OptimizePress 3 Review (2024): The Best WordPress Landing Page Builder?
Considering using OptimizePress on your WordPress site? In this hands-on OptimizePress 3 review, I’ll help you decide whether this tool is right for you.
If this isn’t your first time considering OptimizePress, it’s important to start by noting that OptimizePress 3 is a huge upgrade over the previous versions of OptimizePress.
It’s a completely new product with a great editing experience, as well as add-on tools to help you build funnels, display sales notifications, and more.
Here’s how we’ll break down our review of OptimizePress 3:
- High-level look at what OptimizePress 3 offers.
- Detailed hands-on look at the OptimizeBuilder and some of its standout features.
- Hands-on looks at some other tools, like the bundled theme and dashboard.
- Pricing details.
- Final thoughts.
Let’s dig in so that you can decide if OptimizePress is the right option for your website.
OptimizePress 3 Review: What’s in the Box?
OptimizePress 3 comes with a few different core features that you can pick and choose between.
All OptimizePress 3 users get access to the visual, drag-and-drop page builder and a dedicated theme. Depending on your plan, you might also get access to a funnel builder and a sales notification plugin.
Let’s start our OptimizePress 3 review by going through the offerings in a little more detail.
OptimizeBuilder – The Drag-and-Drop Page Builder

The core offering is OptimizeBuilder. This is the visual, drag-and-drop page builder tool.
Again, if you’ve used previous versions of OptimizePress, the new builder is completely different. I didn’t like the old builder, but the builder in version 3 is an absolute joy to use.
I’ll show you it in more depth in the hands-on section, but some of the highlights here are:
- Speedy inline editing experience – it has one of the fastest editing experiences out there (I’ll show you the specific features that lead me to this conclusion).
- Tons of well-designed importable landing page templates.
- Conversion-focused elements, like countdown timers and opt-in forms.
- Built-in two-step opt-in tool.
Smart Theme v3
Another option you have is the Smart Theme. OptimizeBuilder is a plugin, so you can use it to build page content, but you’d still need to pair it with a theme.
You can use any theme that you want…or you can use the bundled Smart Theme, which is kind of like a flexible base that’s tailor-made to pair with the builder.
Again, you’ll see it in more depth in the hands-on section of our OptimizePress 3 review, but some of the highlights are that:
- The theme looks nice and modern right out of the box.
- You get tons of customization options in the WordPress Customizer to control its looks.
- It includes some nice features like built-in social follow buttons, opt-in forms, and a script management tool.
OptimizeFunnels – Create Full Sales Funnels
While OptimizeBuilder lets you create single designs, OptimizeFunnels helps you put everything together to create full sales funnels.
OptimizeFunnels is still somewhat new, so it doesn’t have its full feature list as of the time that we’re writing our OptimizePress 3 review.
However, the developers have plans to add:
- Built-in checkout support to process payments directly.
- Built-in statistics to analyze how effective your funnels are.
If they can beef up this feature, I could see this being a solid ClickFunnels alternative down the line.
Note – I don’t have a copy of OptimizeFunnels, so you won’t see it in the hands-on section. It’s only available on the highest tier.
OptimizeUrgency
OptimizeUrgency helps you add real-time sales notifications to your site. You can generate these notifications from:
- WooCommerce sales
- Manual information
- New content or external offers
Note – I don’t have a copy of OptimizeUrgency, so you won’t see it in the hands-on section. It’s only available on the highest tier.
Hands-On With OptimizePress 3 Builder
Let’s start the hands-on section of our OptimizePress 3 review with a detailed look at the new OptimizeBuilder interface.
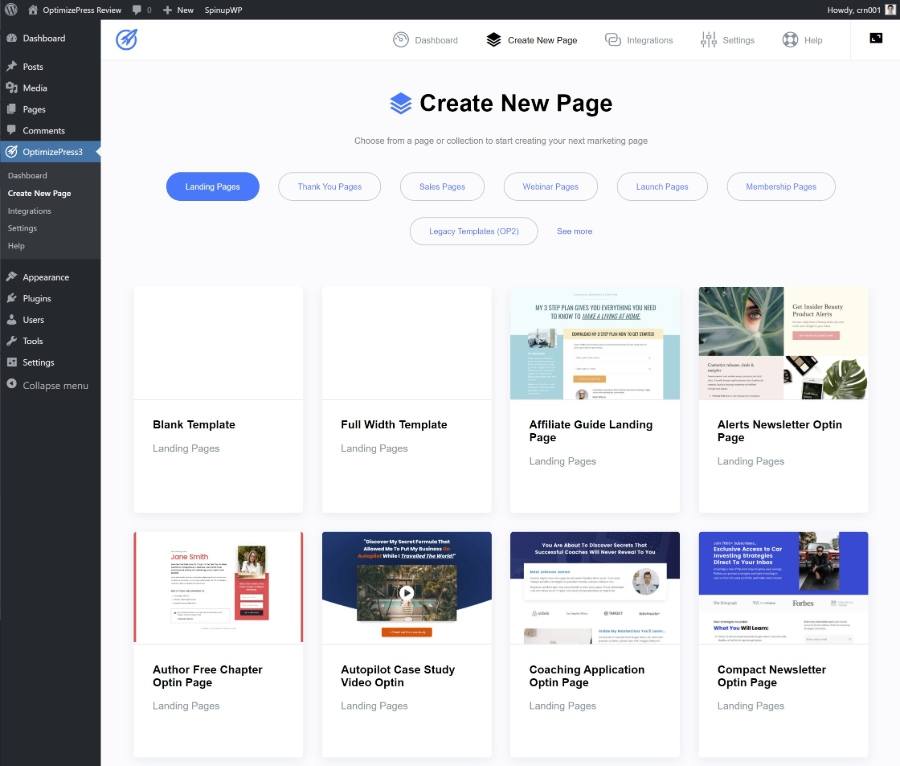
When you go to create a new page with the builder, you can either start by importing one of the many pre-made templates or use a blank template.
One thing to note here is that the templates are really well done – most of them look super professional and like they were built by a professional designer:
For this example, I’ll choose one of my favorite templates rather than starting from scratch.
This will launch the builder.
The builder uses an immersive full-width view. There are no always-on sidebars or anything to get in the way of your design. The only interface element beyond the live visual preview is a toolbar at the top:

Let’s go through and I’ll single out some of the things I like about the new OptimizePress builder.
Almost Everything is Inline
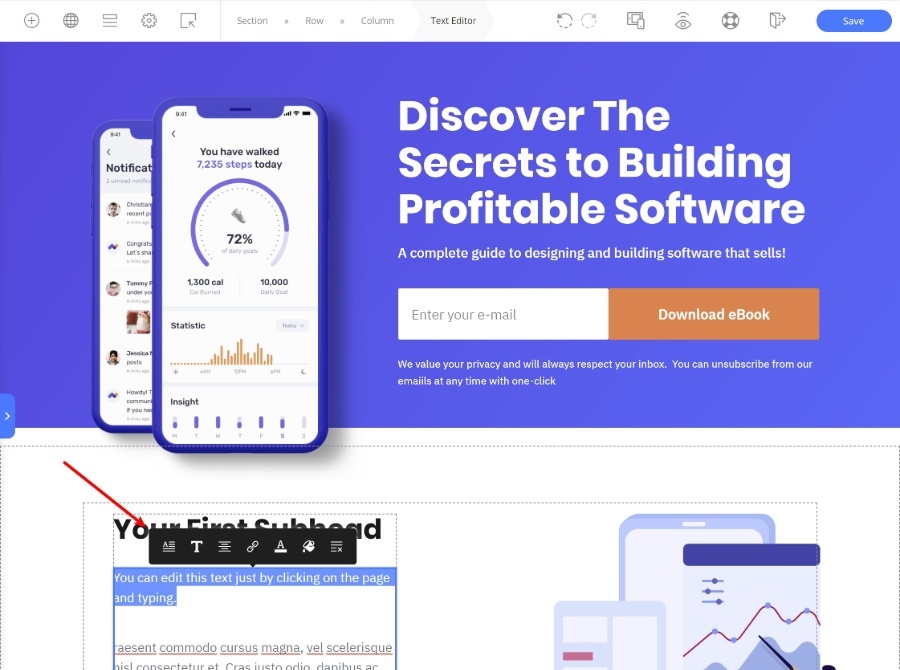
One of my favorite things about the builder is how almost every setting is inline. That is, you can work by just clicking on elements in the design – you don’t need to go back-and-forth between a sidebar.
For example, if you want to edit text on the page, you just click and type:
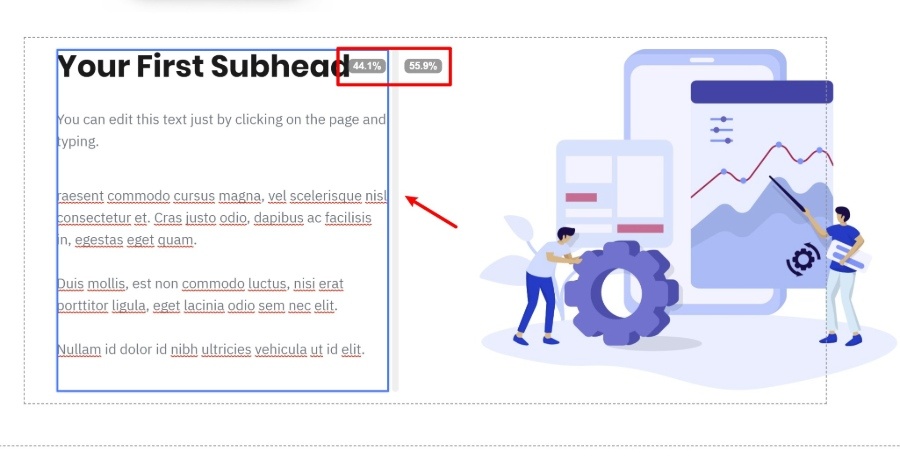
If you want to change the spacing between elements (margins & padding or column width), you can just hover over that section and use drag-and-drop to change the spacing:
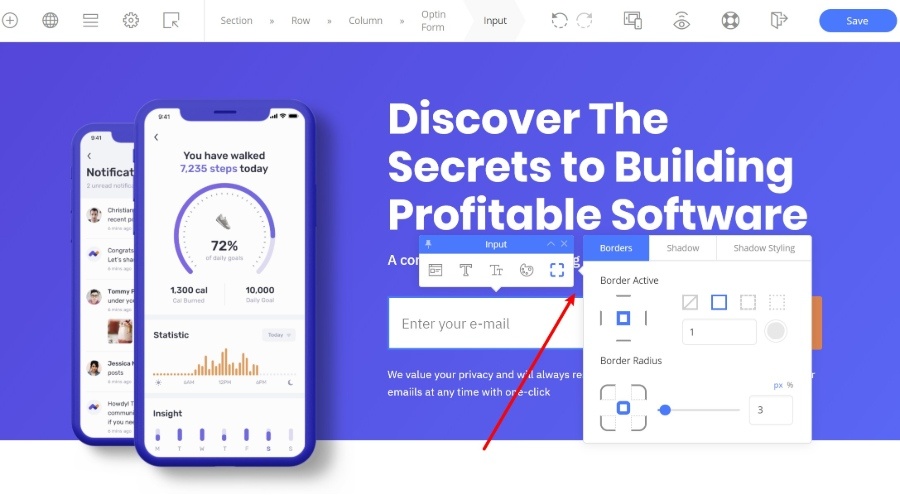
If you want to edit the settings for an element, the settings also appear inline, rather than opening in a sidebar like you’d see with Elementor or a lot of other WordPress page builder plugins:
The one exception is if you open an element’s advanced settings. Depending on the element, that will sometimes open those advanced settings in the sidebar:
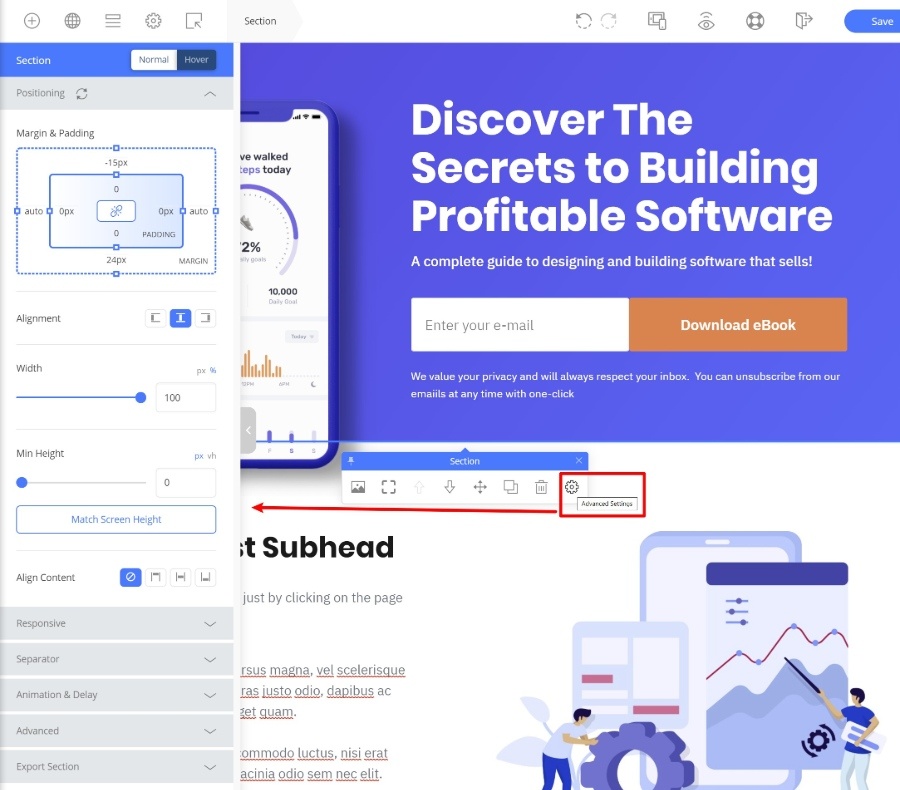
The advantage of using this inline approach is that it lets you build pages a lot faster, which is an often underlooked consideration when picking a WordPress page builder.
For example, instead of needing to open a sidebar, click on a tab, and adjust the spacing there…you just drag-and-drop on the visual preview. That’s how it should be!
A Good Selection of Content Elements
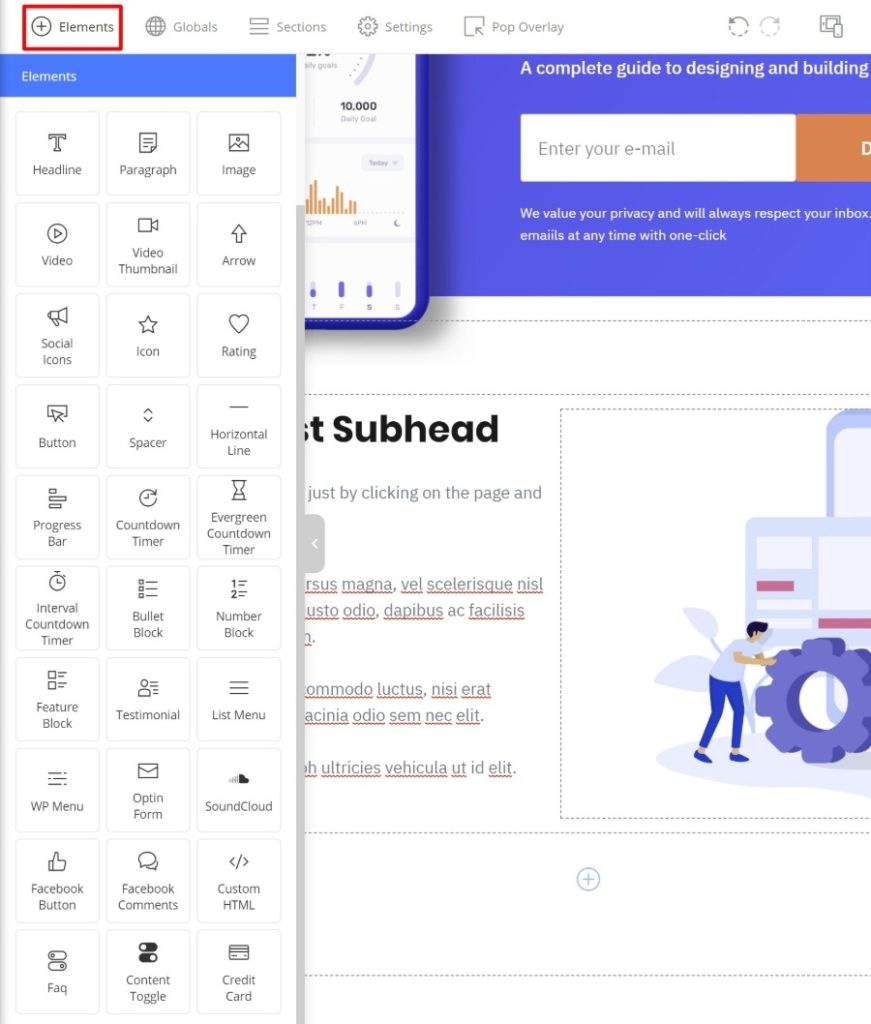
If you want to add new content to your page, you can click the Elements button on the toolbar. That will open up a sidebar with a full list of elements.
To add an element to your design, all you do is drag it onto the page.
OptimizePress has a great selection of elements. In addition to all the common building blocks, some of the elements that are worth featuring are:
- Optin Form – create opt-in forms that connect directly to popular email marketing services, CRMs, or webinar services.
- Evergreen OR Interval Countdown Timers – add countdown timers for urgency.
- Testimonial – easily add social proof.
Automatic Column Creation When Dragging Elements
Here’s another feature that I love, and one that will help you build pages faster.
With a lot of page builders, you first have to set up your section/column layout. Then, you can add elements inside that existing grid.
You might not think about it, but that can actually eat up a lot of time and it gives you a lot less flexibility when building your designs.
OptimizePress does things in a much smarter way. When you drag over a new content element, you can place it anywhere on the page, including in its own column. All you do is drag it to the spot where you want to add it and OptimizePress will highlight the layout for you:
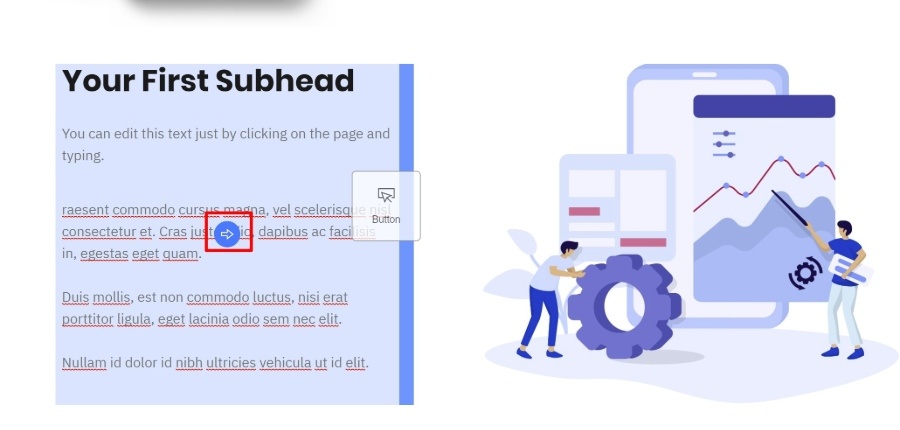
In the example above, OptimizePress will insert the button to the right of the highlighted column:
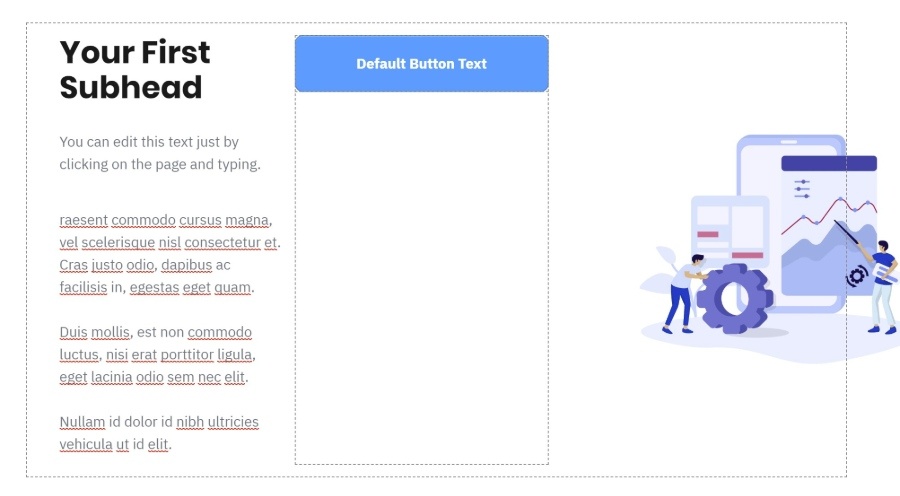
It seems like a small thing, but this is one of my favorite features in Thrive Architect, so it’s awesome to see OptimizePress do it so well.
Design Presets
Another feature that can help you save time is design presets. For many elements, OptimizePress will automatically suggest presets that you can quickly apply to the element:
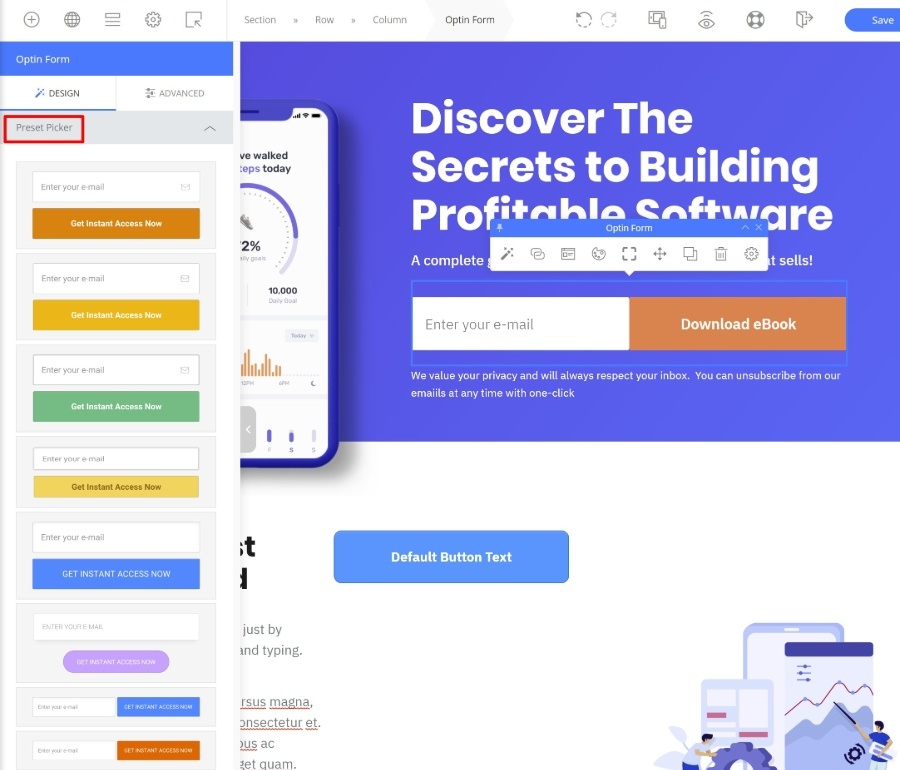
You can then further tweak things as needed using the element’s settings.
This is especially great if you’re not a designer, because you don’t have to worry about configuring every design setting from scratch.
Global Elements
Global Elements are a neat feature that help you when you need to reuse the same design across multiple pages.
For example, a testimonial block that you use on multiple pages.
What happens if, down the line, you want to change the testimonial? Do you have to go to every page where the testimonial appears and manually update the element?
No! When you mark an element as global, you can update it one time and automatically apply those changes to every instance of the global element.
To save an element as global, all you need to do is right-click and choose Mark Element as Global:
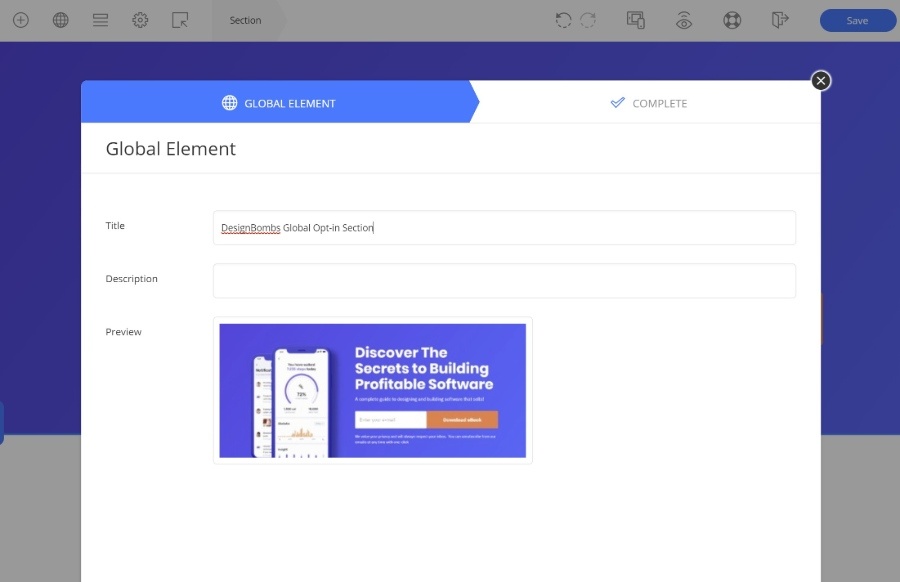
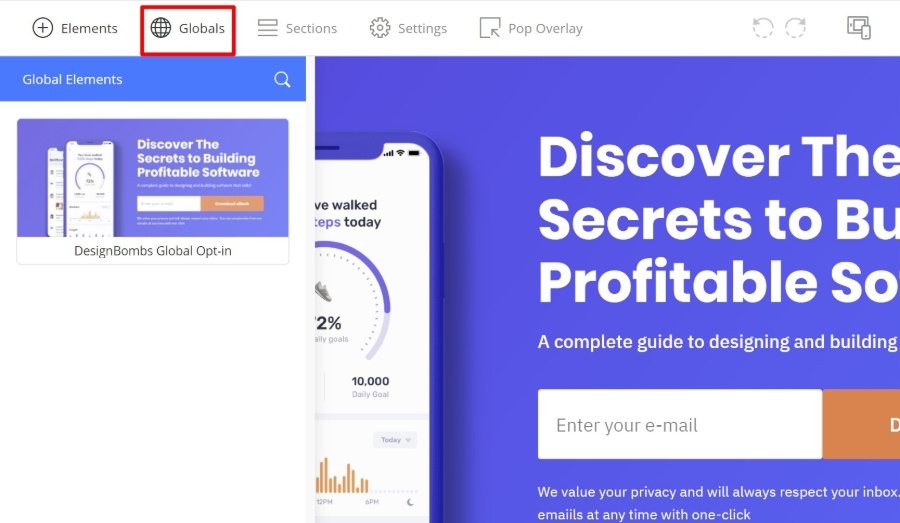
You’ll then be able to insert global elements in other designs from a dedicated Globals option on the toolbar:
Responsive Design Settings and Previews
All the designs that you create with OptimizePress are responsive by default, which means they’ll look great on all devices.
If you want to preview how your design will look on another device, OptimizePress comes with a built-in preview tool:
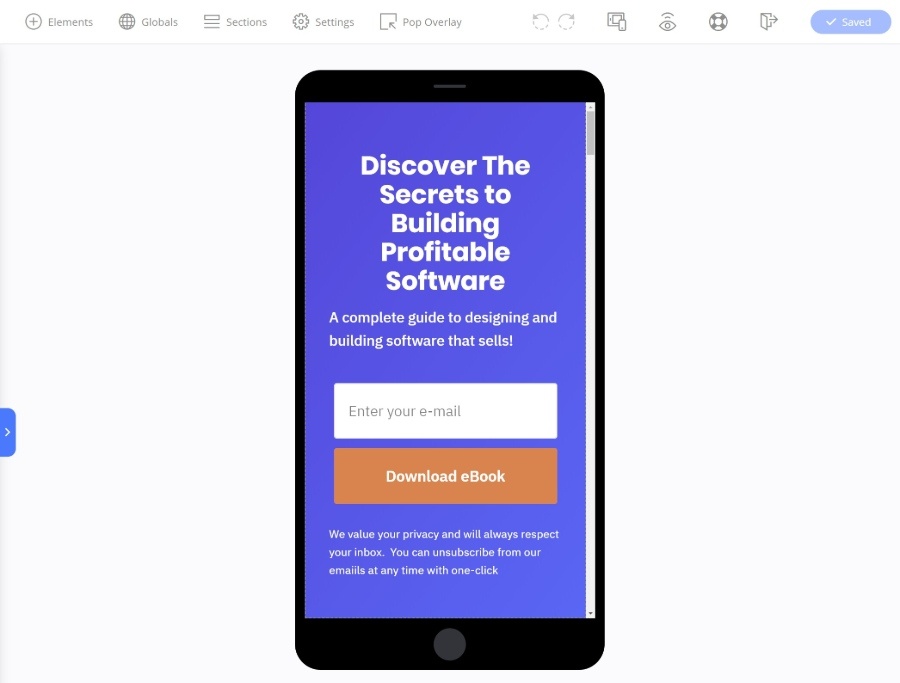
Here’s the neat thing, though:
Any design changes that you make in the responsive preview will only apply to those devices.
For example, if you change the text size to 13 px while in the mobile preview, the font will be 13 px but only for mobile designs. This lets you dig in and further optimize your designs for different devices.
You also have an option to hide certain content elements on different devices if needed.
Create Popup Overlays
Finally, we have one of the most unique features – a built-in tool to help you create a popup overlay (AKA a two-step opt-in). For example, you could have users click a button to open a popup with the opt-in form.
While some other page builders let you create popups, I’ve never seen this feature integrated into the builder interface itself.
All you do is click the button on the toolbar and you’ll be able to set up the popup overlay right there:
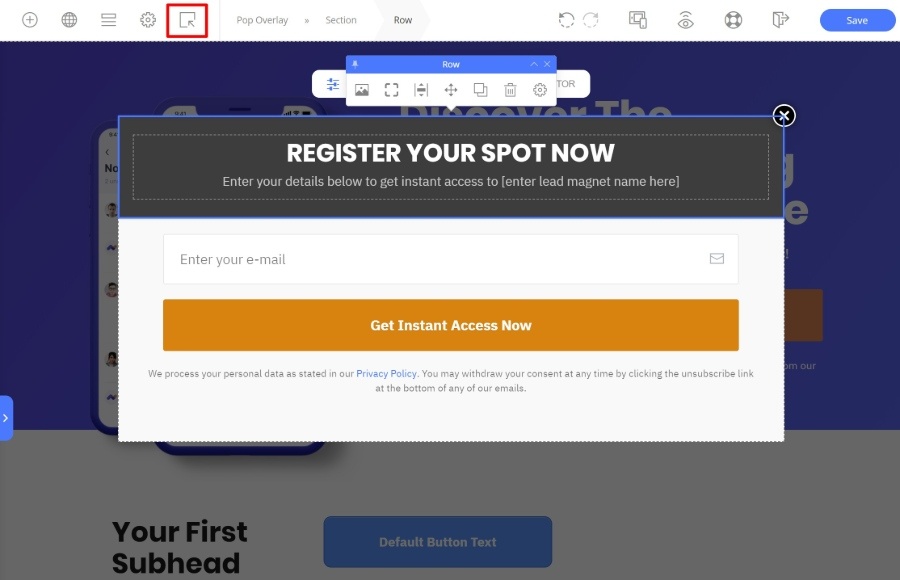
Given that a lot of people will be using OptimizePress for landing pages, having this built-in feature is super convenient.
Final Thoughts on OptimizeBuilder
The new OptimizePress Builder in version 3 is a huge upgrade over previous versions.
As I tried to highlight above, it’s packed with so many features to help you build great-looking designs faster.
I love how almost everything is inline.
Want to edit text? Just type on the page.
Want to change spacing? Just use drag-and-drop until the layout is perfect.
Want to add a new content element? Just drag it onto your design and OptimizePress will create a new column if needed.
You get the idea…
It’s just a really speedy, well-thought-out design experience.
In terms of design/style options, OptimizePress doesn’t have quite as much flexibility as something like Elementor or Divi. But it gives you everything most people will need. And I think this fits with its design philosophy:
OptimizePress is trying to help you build good-looking, high-converting landing pages as quickly as possible. It’s not necessarily trying to be a web designer’s playground like Elementor and Divi.
If you’re marketing/goal-focused, then I think you’re going to love how OptimizePress approaches its builder interface.
Hands-On With OptimizePress Dashboard
Next, let’s move our OptimizePress 3 review away from the builder and into some of the other tools.
To help you manage all of your tools, you get a dedicated OptimizePress dashboard:
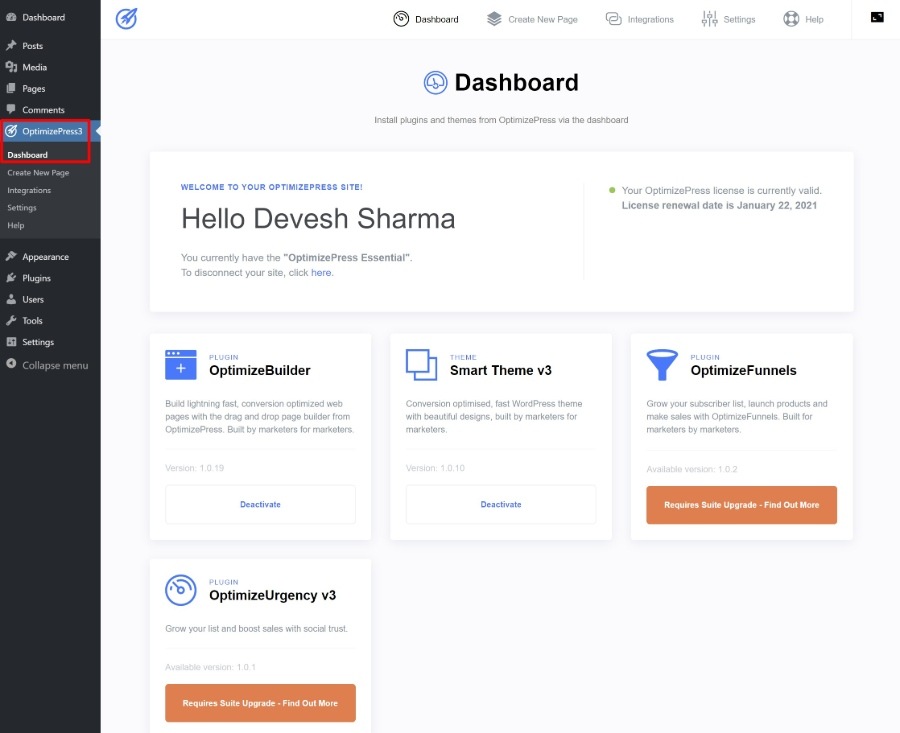
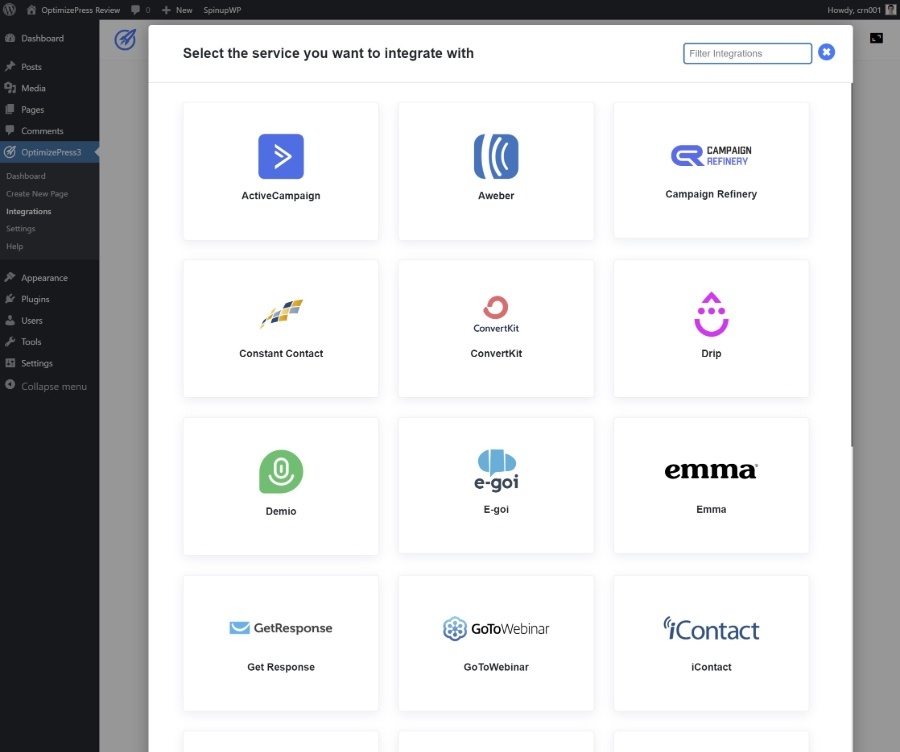
This is also where you can set up integrations with the 20+ services that OptimizePress supports:
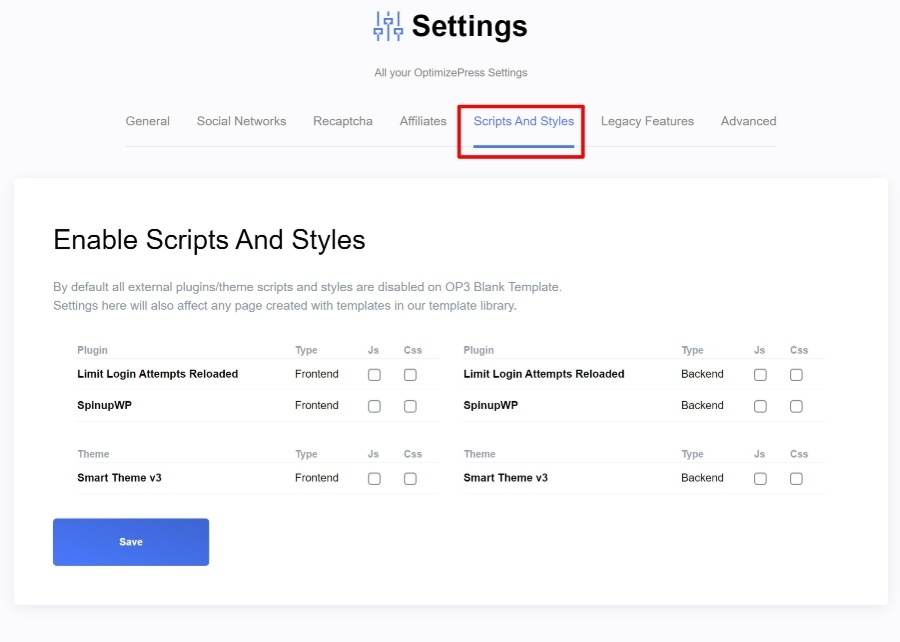
Another neat feature in the dashboard area is the ability to conditionally enable/disable scripts and styles on your OptimizePress designs.
For performance reasons, you might not want scripts and styles from your theme or other plugins to load on your OptimizePress designs when you’re using the blank template.
Using simple checkboxes, you can disable/enable as many elements as needed to keep your OptimizePress designs bloat-free and fast-loading:
Hands-On With OptimizePress SmartTheme
OptimizePress SmartTheme is a totally fine theme…but I don’t think it should be a huge factor in your decision.
It looks nice and has some convenient options, but I would personally prefer to pair the OptimizePress builder with something like Genesis, GeneratePress, or Astra.
To control most of the theme’s settings, you can use the real-time WordPress Customizer:
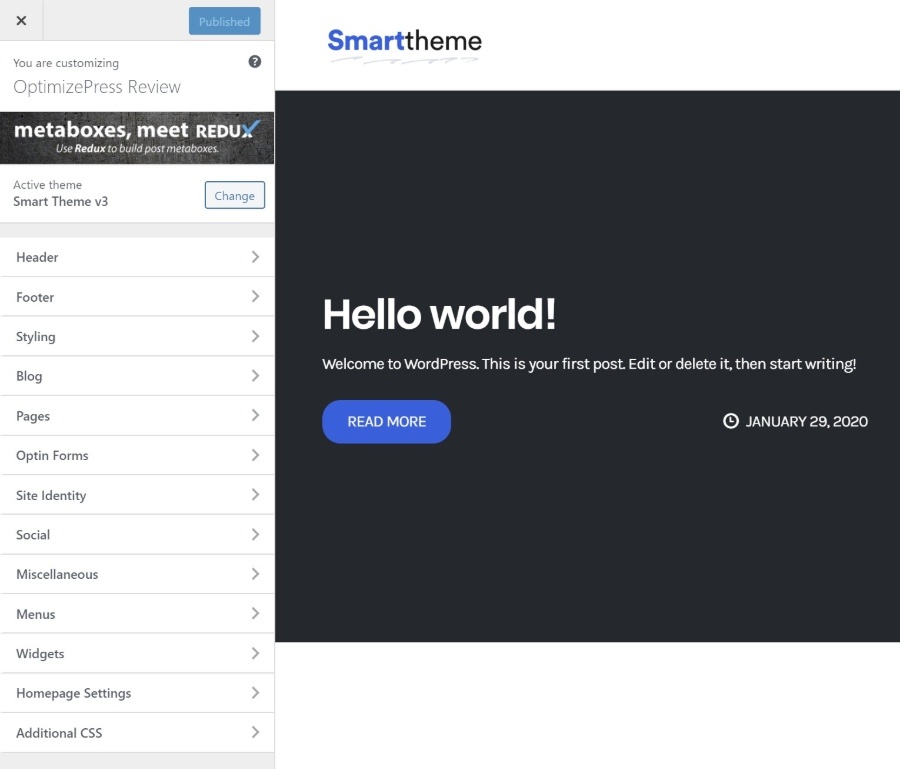
You also get a backend theme options panel, if you prefer that approach:
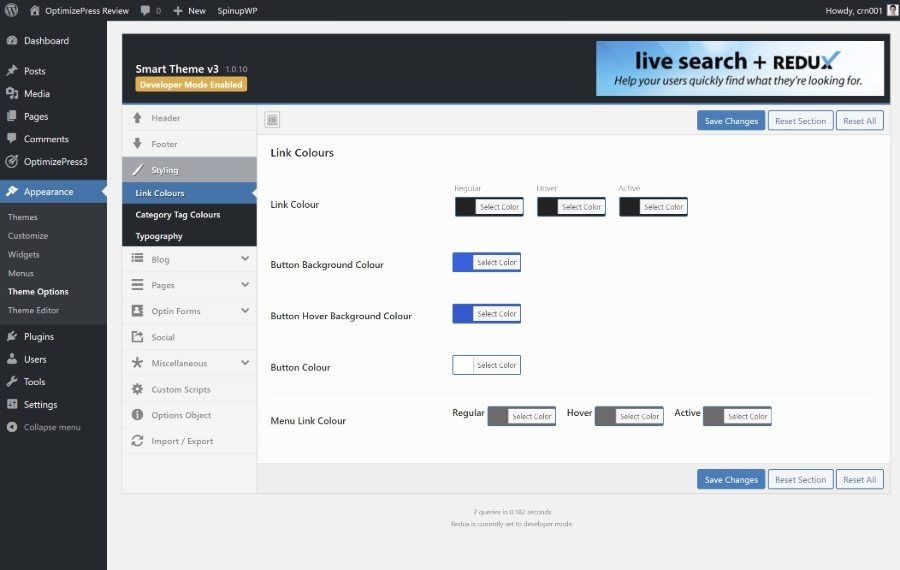
As I mentioned in the intro, some of the highlights are:
- Built-in opt-in forms for various parts of the site.
- Built-in social share buttons.
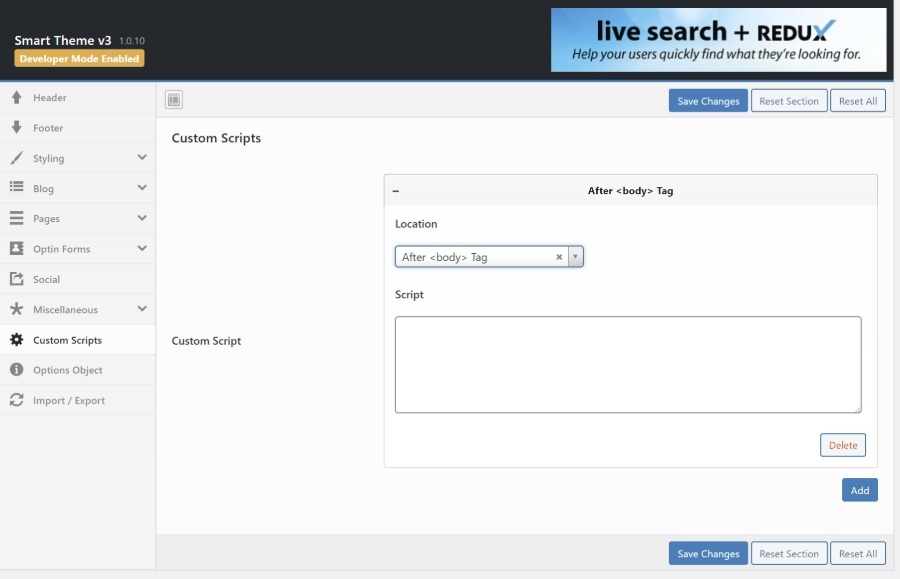
I also like the Custom Scripts tool, which lets you insert scripts at different spots on your theme:
All in all, I think SmartTheme is a totally fine theme – I just think it’s more of a “throw in” than a reason to purchase OptimizePress by itself.
Speaking of purchasing OptimizePress, let’s talk pricing…
OptimizePress 3 Pricing
OptimizePress has three pricing plans. Each plan offers a different set of features and lets you use the tools on different numbers of sites.
You can view full pricing details below:
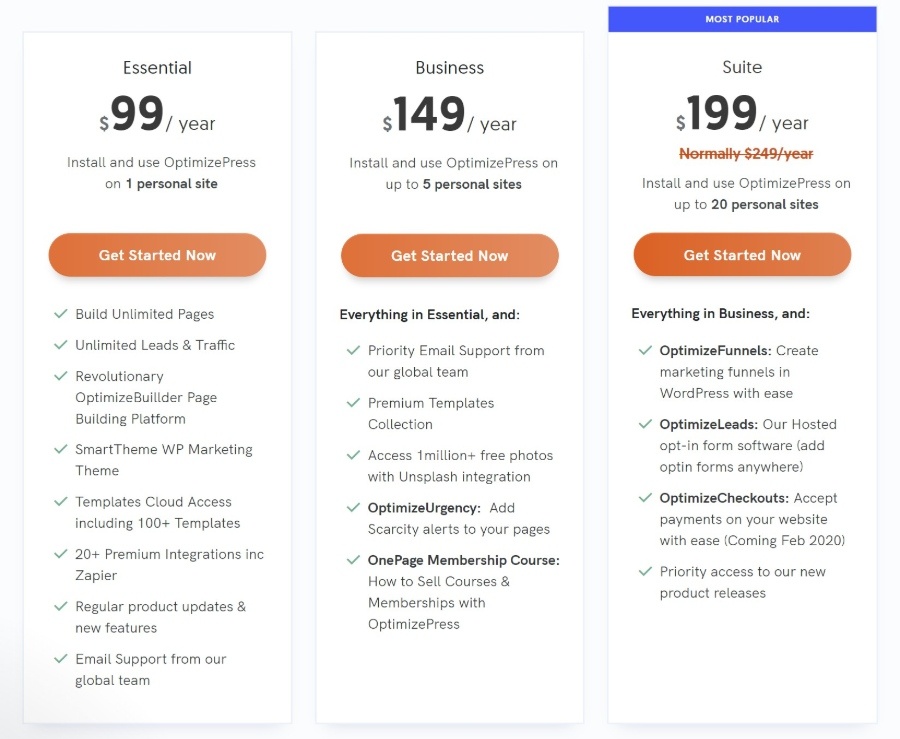
With the cheapest plan at $99, OptimizePress is a little pricier than your average page builder. For example, Elementor is $49, Brizy is $49, Divi is $89…but that includes access to all the Elegant Themes products and use on unlimited sites.
So is it worth it to pay more for OptimizePress?
Well, I think that depends on how you want to use it…
If you’re just a casual user, I’d say you’d be better off with the free version of Elementor or a cheaper tool.
But if you want to build conversion-focused landing pages, I think paying a premium for OptimizePress is worth it because OptimizePress is literally built with that purpose in mind.
For example, no regular page builder is going to offer you that convenient in-editor popup overlay creator or such a great selection of built-in integrations.
OptimizePress 3.0 FAQ
1. What do I need to use OptimizePress 3.0?
OptimizePress is a WordPress plugin, so you’ll obviously need a working WordPress website with the ability to install plugins (either self-hosted WordPress or the WordPress.com Business plan or above).
Beyond that, OptimizePress doesn’t have any specific server requirements that are different than any other WordPress plugin.
Your server will need to be running at least PHP 7, which all quality WordPress hosts support and you should already be using.
2. Will pages that I created in OptimizePress 2.0 work with OptimizePress 3.0?
Sort of! You can run OptimizePress 3.0 alongside OptimizePress 2.0 without any issue, which means that you can still use your older OptimizePress 2.0 designs while also benefiting from OptimizePress 3.0.
You will need to have both plugins installed to do so, but the developer has built them to be compatible.
Additionally, the OptimizePress team is still supporting OptimizePress 2.0 for the time being, so there’s not an immediate need to upgrade, though I would recommend doing so as version 3.0 is a huge improvement.
3. Can I edit pages from OptimizePress 2.0 in OptimizePress 3.0?
No! You will not be able to use the new OptimizePress 3.0 editor to edit pages that you’ve created with OptimizePress 2.0. You will still be able to edit them using the older OptimizePress 2.0 editor, though.
4. Do I need to use the OptimizePress theme?
No! OptimizePress 3.0 will work with any WordPress theme, so feel free to keep your existing theme or choose from any theme that’s out there.
As I detailed above, OptimizePress 3.0 does include its own theme, but you are not forced to use this theme.
5. Do I need to know HTML/CSS to use OptimizePress 3.0?
No! The beauty of OptimizePress 3.0’s visual, drag-and-drop editor is that anyone can build beautiful landing pages. You don’t need any special technical knowledge to get value from OptimizePress 3.0.
6. Can I use OptimizePress 3.0 with OptimizeMember?
No! OptimizeMember will only work with OptimizePress 2.0 – you cannot use it with OptimizePress 3.0.
OptimizeMember was an extension for OptimizePress 2.0 that helped you set up a WordPress membership site.
The same goes for any older OptimizePress 2.0 extension. OptimizePress 3.0 has its own set of extensions that are separate from OptimizePress 2.0.
Final Thoughts on OptimizePress 3 Review
OptimizePress 3 is a huge improvement over previous versions.
The new OptimizeBuilder is a joy to use. With so many inline editing options and convenient features, it offers one of the fastest design experiences of any page builder that I’ve used.
It also offers a great responsive design experience, which is important in 2024 and beyond.
When you combine that with all of its marketing-focused elements and integrations, as well as the funnel builder tool, you get a really enticing WordPress design experience for marketers or anyone else looking to build conversion-focused landing pages or sales pages.
If you want to get started, purchase OptimizePress 3 today. All plans come with a 30-day money-back guarantee, so there’s no risk if you don’t like it.
Do you have any questions about our OptimizePress 3 review that would help you make your decision? Ask away in the comments!


Honestly,
most of the features in op3 look better than in op2 at the first glance. However, they aren’t customizable at all. At the end, you end up using mostly custom html to get features that were once possible in op2. Also op3 can’t calculate taxes anywhere exept europe and doesn’t have a built in optin to paypal.
If you use op3 as a business and not just write an article about it without really having use it, it’s really frustrating. Can’t recommend. Don’t make the same mistake as I did.