
How to Use Facebook Debugger and Open Graph to Fix Posting Issues
Facebook touts a monthly user base of 2.27 billion consumers, according to data posted in late 2018. If you’ve taken advantage of the popularity of this platform, then you understand what sort of effect it can have on the profitability of your WordPress website.
That said, what happens when Facebook fails to display your post as it was intended?
In the following article, we’re going to take a look at a few things:
- Why this happens to your content on Facebook.
- How to use the Facebook Debugger tool.
- How to integrate Open Graph markup into your workflow with an SEO plugin.
Why Doesn’t Facebook Share Your Posts Correctly?
You meticulously craft a web page or blog post, knowing the design and content are sure to impress visitors and soon-to-be customers.
That said, it doesn’t matter whether you reach Facebook consumers through organic posts or paid ads. You expect your content to appear as polished as it is on your WordPress site. This is why it’s so frustrating when Facebook shares your posts:
- With the wrong image.
- With no image.
- With an incorrect title or description.
- With no title and/or no description.
So, why bother with Facebook marketing if it can’t share your content correctly?
There are a number of reasons why this happens:
Reason #1: WordPress Caching
Website speed plays a critical role in the success of a website. If pages load fast enough, visitors can focus on the content instead of on how painfully slow the experience is.
A website is nothing more than a combination of files and code that come together to make the beautiful interface and functionality within it. But those files and code require a lot of processing power from your server whenever someone visits the website, which is what slows it down. This only gets worse as you add more content to the site.
To get around this issue, your server can cache a web page. Basically, it makes a static HTML copy of it (that’s significantly lighter in weight) and sends that to new visitors’ browsers. C
aching is supposed to clear when a web page has changed, but that’s not always the case. There are times when a small change — like to a featured image or meta title — will get “stuck”. And this is why Facebook is sometimes unable to recognize the correct elements.
So, it’s in your best interest to keep loading speeds fast with a WordPress caching plugin.
Reason #2: Facebook Caching
Facebook has its own caching system, too, and for good reason:
“Link metadata tends to change infrequently, so the Facebook crawler conserves resources by updating your link metadata automatically every 30 days. Therefore, it can take as much as 30 days for your link details to update after a change.”
So, let’s say you uploaded a post to Facebook. However, you realized you wanted to tweak the featured image. You delete the post, update and save the new image in WordPress, and then try to re-upload the post. However, the old featured image keeps showing up. This is typically when Facebook caching is to blame.
Reason #3: Image Sizing
Facebook has minimum sizing requirements for sharing content on its platform. As such, if the featured image you’ve attached to a post or page falls short of those guidelines, Facebook will look around the rest of the page to find a suitable replacement. This is how, even if you take care of everything else on this list, the wrong image still appears.
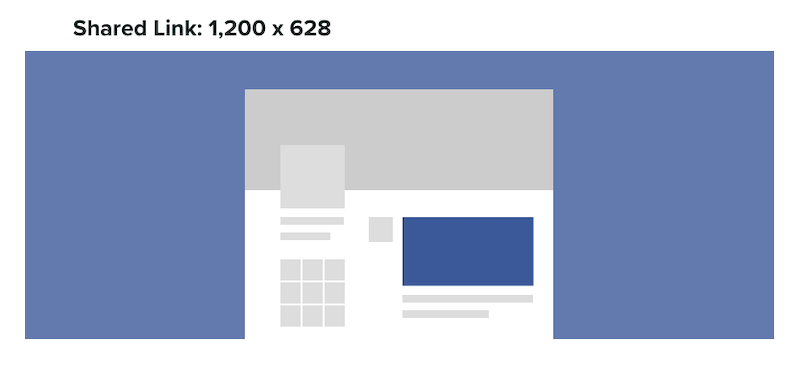
Sprout Social publishes up-to-date criteria for Facebook image sizing guidelines, so refer to this before you publish featured images to your WordPress site.
Reason #4: Missing Featured Image
WordPress has a dedicated widget for featured images in every Post and Page. However, because it sits in the bottom-right corner of the UI, it’s easy to forget it’s there sometimes.
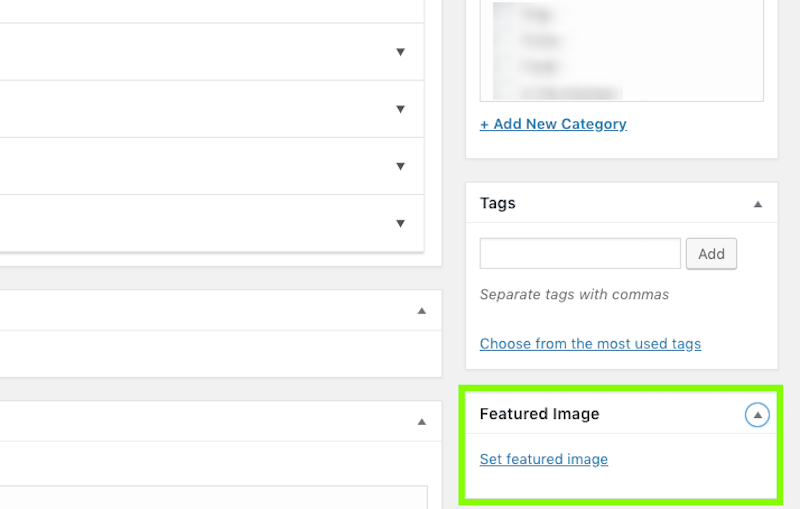
When that happens, Facebook will treat it the same way it treats an undersized image. It will look at the rest of the page and see if it can dig up a suitable replacement. Typically, it will take the first properly sized image that appears on the page.
Reason #5: Missing Open Graph Markup
If you have an SEO plugin installed on your WordPress site, you’re already familiar with metadata like this:
Why do we need this?
It conveys to search engines what the page is about and also helps convince consumers to click on the link when they encounter it in search. This metadata never shows up on your website. Instead, it’s what search engines use to describe an individual web page in search results.
When present, Facebook pulls from what’s known as Open Graph markup. It’s similar in function to SEO metadata; however, the main goal is to create social media-specific metadata. When Open Graph data is unavailable, however, Facebook draws from SEO metadata to craft the preview title and description for your post (if it exists).
Now that we understand the why, let’s look at how to fix it.
How to Use Facebook Debugger to Fix Posting Issues
You want Facebook to be a vehicle through which you boost conversions; not lose them. Which means you need to get a handle on caching and Open Graph markup issues.
This is the Facebook Debugger:

So long as you have a Facebook account, you can use this free tool to troubleshoot and repair Facebook metadata.Here is how the tool works:
Step 1: Run the Facebook Debugger
Enter your URL:

Then, click “Debug”.
Pay close attention to the following elements the Debugger retrieved:
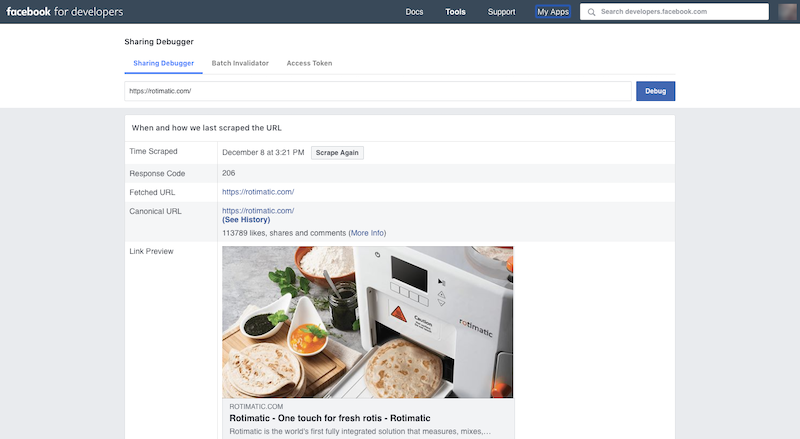
Time Scraped: If Facebook previously “scraped” (cached) this particular web page, you’ll see a different timestamp here. Otherwise, it should be current.
Response Code: A response code of 200 or 206 is good. Anything else signals there’s something wrong when Facebook attempted to scrape the page.
Link Preview: This shows you exactly how your post will appear in Facebook as of right now. If you’re unhappy with it, then it’s time to troubleshoot the underlying issue.
Just one quick note to make about the Facebook Debugger:
You should use this to diagnose potential sharing issues before you upload a post to Facebook. The Debugger cannot repair a post that is already live. All it can do is tell you what will happen when a post is published to Facebook and guide you to resolve any discrepancies before that ever happens.
Step 2: Review the Open Graph Markup
Scroll down the Debugger page and you’ll see the Open Graph markup Facebook was able to retrieve from the page:
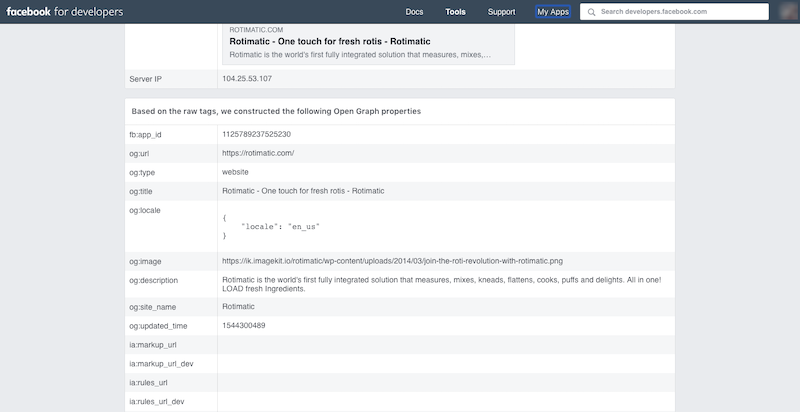
If nothing were in these fields, it means that Open Graph markup is missing.
The Facebook Webmasters guide provides information on how to add Open Graph markup to your website’s metadata structure.
Here is an example of how Open Graph markup looks from the DesignBombs website:
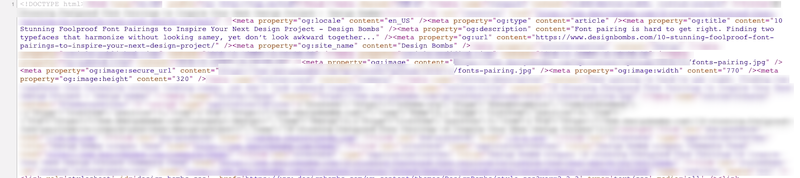
You can manually update your page’s metadata with Open Graph meta tags… or you can use a plugin to do it. Since you’re already using an SEO plugin to optimize your content, you might as well let a plugin help you go the rest of the way.
If the Open Graph Markup looks good — as it does in the example above — proceed to the next step.
Step 3: Clear the WordPress Cache
Log into your WordPress website.
Regardless of which caching plugin you use, there are typically two places in WordPress where you can clear the cache:
The first is in the top admin bar. It should say “Delete Cache” or “Clear Cache”. You can also navigate to your caching plugin and do the same there.
Wait for the confirmation message and then return to the Facebook Debugger.
Step 4: Scrape Again
This time, click the “Scrape Again” button beside the Time Scraped field.
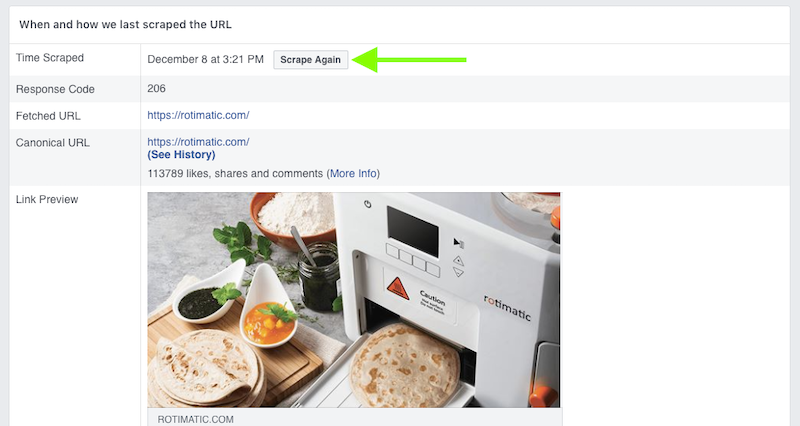
This will effectively clear the Facebook cache and allow it to retrieve the corrected version that exists on your website.
In some cases, you’ll receive a warning or error message. This may happen if the image detected by Facebook is too small or too large, if a featured image is missing, or if Open Graph markup is missing. If that’s the case, return to your page in WordPress, fix the critical errors and then “Scrape Again” in the Debugger.
You might also want to use the “Scrape Again” feature if you preview your post in the Debugger and decide the description is too long or you want to use another image. Now is the time to make those changes, clear the WordPress cache, and use the Debugger to “Scrape Again”.
Step 5: Review and Share Your Post
Review the snippet preview along with the Open Graph meta tags below it. If everything looks good, you have the all-clear to share this post on Facebook without worries.
How to Use a WordPress Plugin with Open Graph Markup
If you find the Facebook Debugger to be tedious and don’t want to have to go through the process every time you want to share content to Facebook, that’s fine. You can let your WordPress plugin do the work!
Yoast is, by far, the most popular SEO plugin for WordPress. What some of its users might not know is that it comes with an Open Graph markup tool, so let’s quickly explore how to set this up.
Step 1: Activate Yoast Social
To activate it, go to the SEO plugin on the WordPress sidebar and select “Social”.
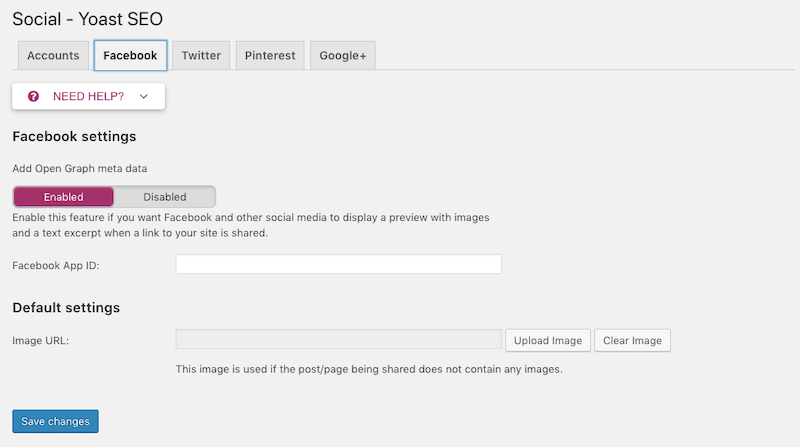
Click on the Facebook tab and switch the toggle to “Enabled”.
Enter your Facebook App ID if you want to track activity in Facebook Insights related to your Open Graph marked-up posts. It’s not necessary that you do this though.
You can also add an Image URL here. This is just in case you or one of your content producers forgets to add a featured image (or any images at all) to a page.
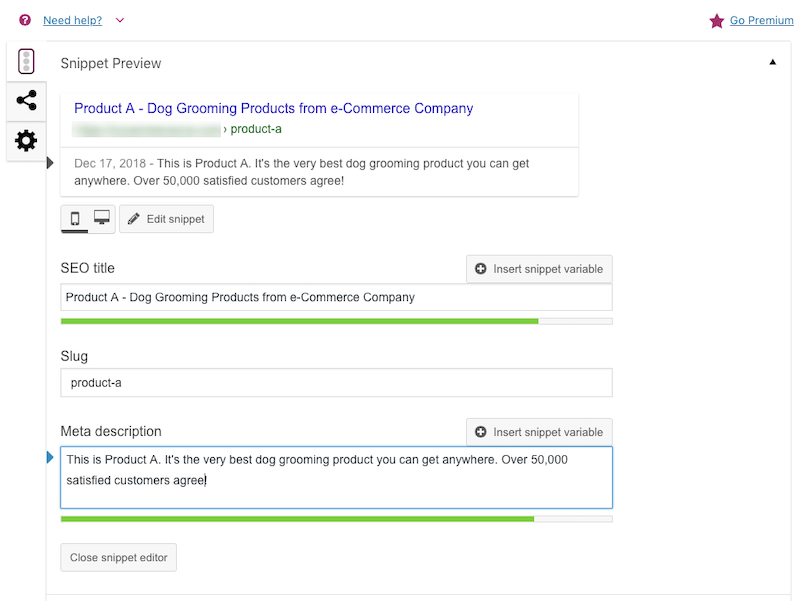
Step 2: Add Open Graph Meta Tags to Posts and Pages
On each post and page, you have a Yoast box that enables you to add page-specific SEO metadata. If you look over at the three tabs on the left of this module, you’ll see a social-sharing icon. Click it to access the Yoast Social tab:
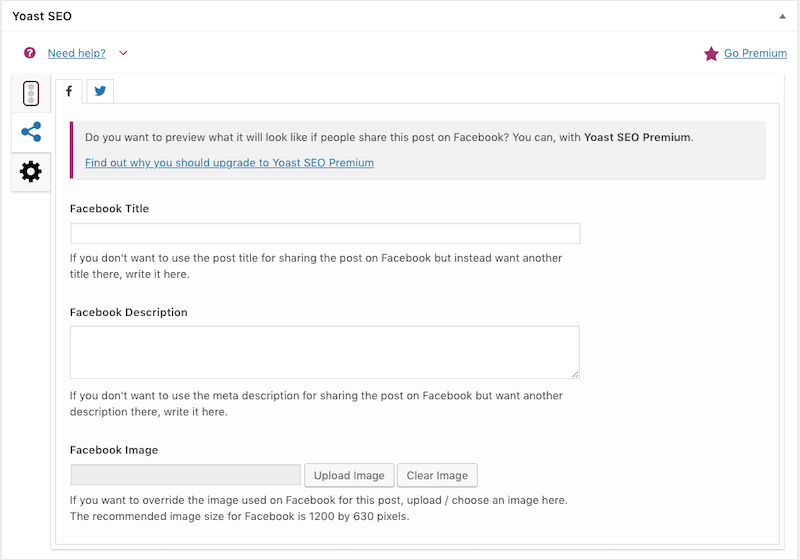
Now, Facebook can use the SEO title, slug, and description you wrote up. However, if you don’t trust that Facebook can retrieve the data properly, or the Facebook Debugger has told you otherwise, go ahead and input your Open Graph markup here.
The same goes for your Featured image. You may have already added it to the WordPress post or page. However, if you really want to drive the point home with Facebook, attach the image to the Yoast Social tab.
Step 3: Post Your Content
If all is configured above, you shouldn’t have to use the Facebook Debugger tool anymore. However, if you do run into issues after posting your content to Facebook, just know that it’s there to help you sort out any issues that arise.
Wrap-Up
Want to exponentially grow traffic to the WordPress website you’ve worked tirelessly to build? And boost conversion rates in the process? Social media marketing on a platform like Facebook could be key to your success… just be careful of what you post.
If you don’t take the time to use Open Graph markup correctly, you may unintentionally tarnish your business’s reputation with poorly-composed posts. Thankfully, the Facebook Debugger and a must-have WordPress plugin like Yoast have you covered.
Leave a Reply