How to Cut Out an Image in Photoshop
In this article, we’ll discuss why and how to use Photoshop to cut out images and some of the advantages of doing so. By the end, you will better understand how to cut out an image in Photoshop and how it can benefit your photos.
Cutting out an image in Photoshop allows you to isolate a specific part of an image and make it stand out from the rest. This is useful for making collages, adding text or graphics to images, or even creating entirely new images from existing ones.
How to Cut Out an Image in Photoshop
You can cut out an image in Photoshop using several different tools. However, you’ll always want to pair them with Layer Masks.
What Are Layer Masks?
Layer masks in Photoshop are a powerful non-destructive editing tool used to selectively modify a layer’s transparency. They are used to hide parts of a layer, making those areas transparent while leaving the other parts of the layer visible.
Layer masks are used for a variety of photo editing tasks, but today we’ll be focusing on their ability to cut out an image from its background.
What Is Non-Destructive Editing?
Non-Destructive Editing in Photoshop is a way of editing photos without permanently altering the original image.
This is done using layer masks, smart objects, and adjustment layers, which allow the user to make changes to the image without affecting the original.
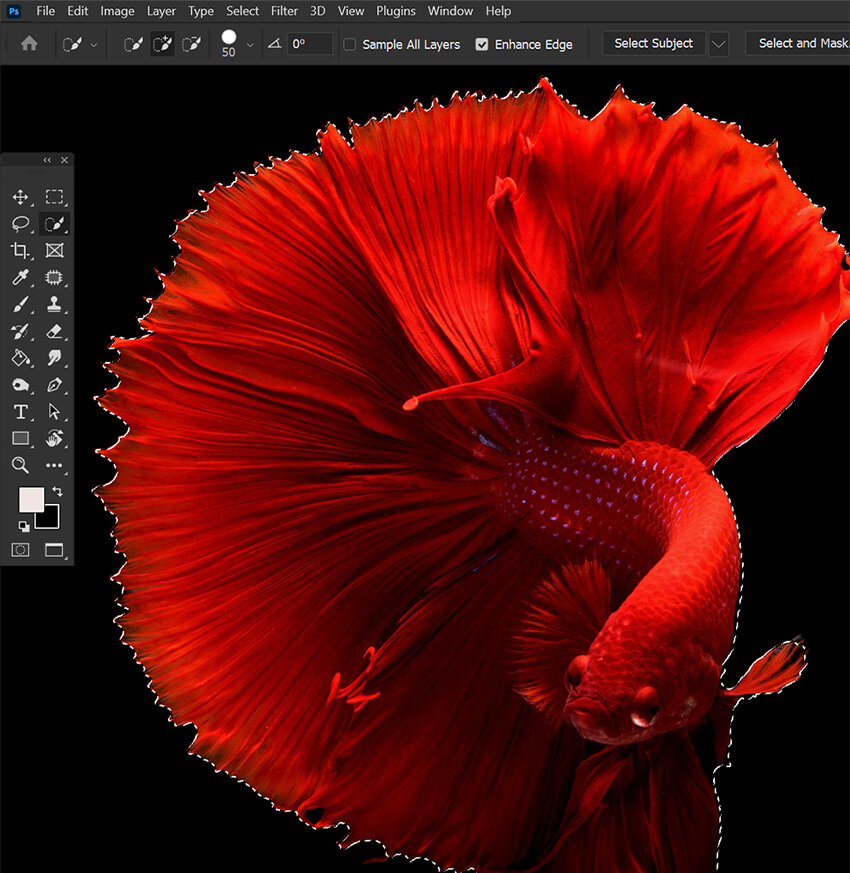
How to Cut Out an Image in Photoshop Using Select Subject
The Select Subject Tool in Photoshop is an AI-powered selection tool that can quickly select an object or person in an image with just one click.
However, the Select Subject Tool is not perfect and can sometimes make mistakes. It can struggle to detect fine details or select subjects with complex shapes.
Step 1: Select an Auto Select Tool
Select any of the Auto Select tools, like the Object Selection tool. Next, choose ‘Select Subject’ in the upper Options toolbar.
Alternatively, you can use the Object Select tool itself by finding an object and clicking. If the subject is human, Select Subject works better, whereas Object Select works better for items and shapes.

Step 2: Click Select Subject
Click on ‘Select Subject’ to create an automatic selection around the subject in the Photo.
Step 3: Add a Layer Mask
Add a Layer Mask using the button at the bottom of the Layers panel.
If needed, refine the selection with a black or white Brush tool. However, if you need more help refining your Mask, see “How to Use Select and Mask” below.

How to Cut Out an Image in Photoshop Quickly Using the Lasso Tools
The Lasso tool is best used when making selections freehand around irregular shapes. It provides more control than the other selection tools that have predetermined shapes or auto-select.
However, it offers a low level of accuracy.
Step 1: Select the Lasso Tool
Select the Lasso tool (L) from the Tools panel.
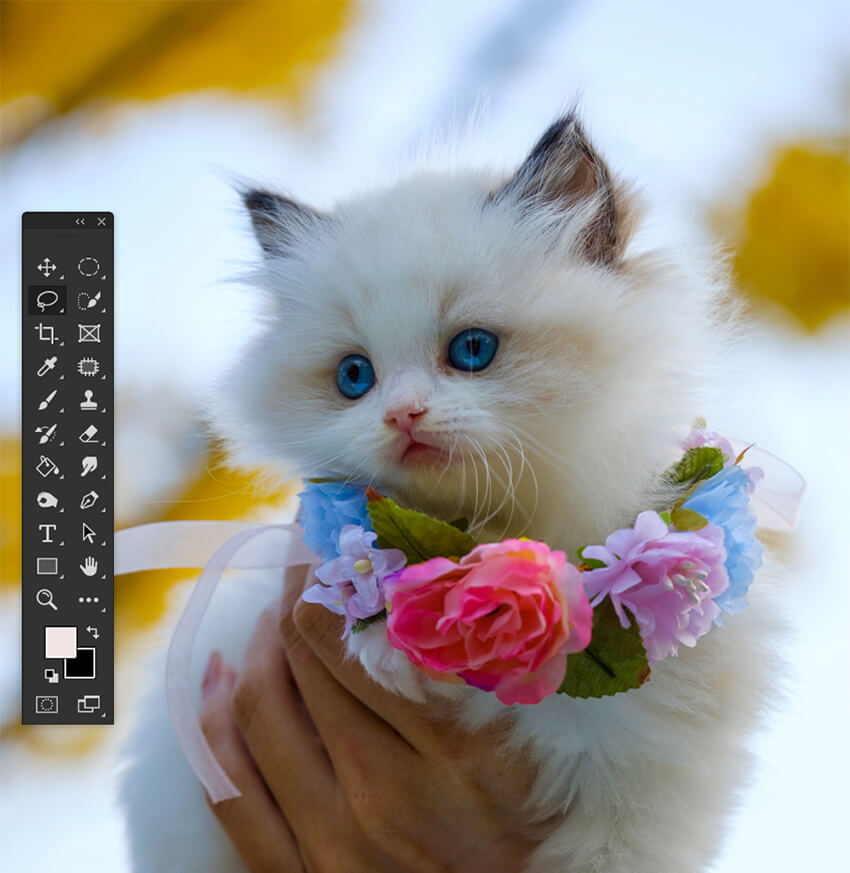
Step 2: Create a Freehand Selection
Click, hold and drag the Lasso tool around the area you want to cut out. If you let go of the mouse button at any time, the selection will auto-complete.

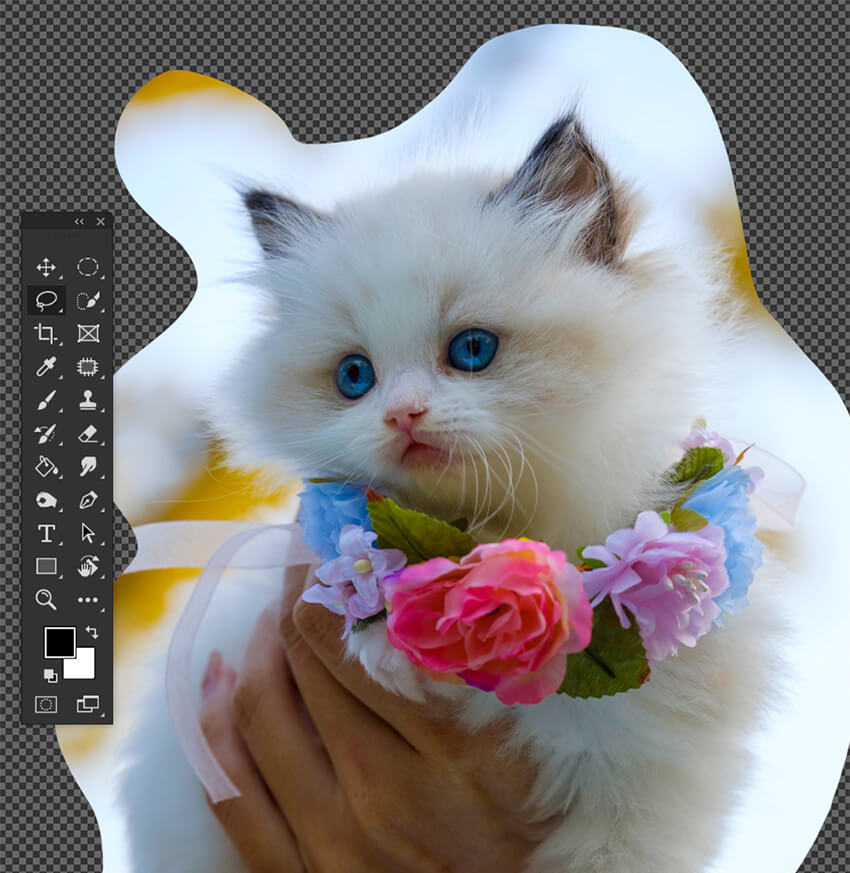
Step 3: Create a Layer Mask
Create a new Layer Mask using the bottom button in the Layers panel. And remove the selection using Ctrl+D.
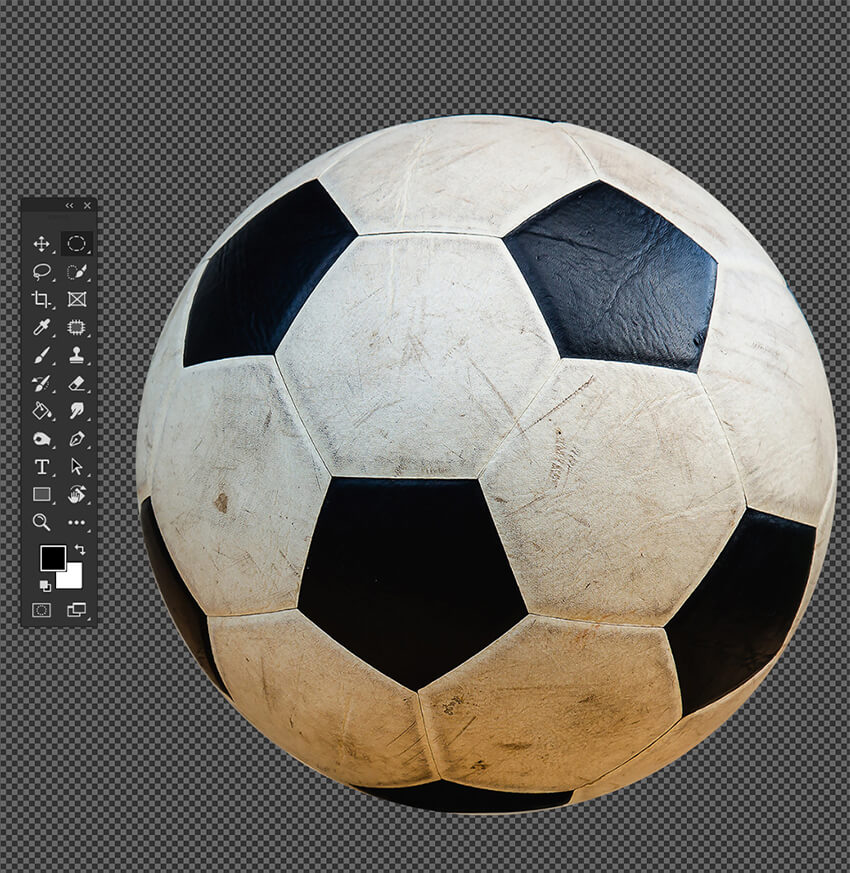
How to Cut an Image Out in Photoshop Using the Rectangular & Elliptical Marquee Tool
The Rectangular and Elliptical Marquee Tools are best used when you select a specific shape, such as an ellipse or oval. It is particularly useful for making selections of objects that are circular, as it allows you to quickly and precisely create a selection that will fit the shape of a round object.
However, as it only creates circles, it is limited in what it can and can’t select.
Step 1: Select the Elliptical Marquee Tool
Select the Elliptical Marquee Tool (M).
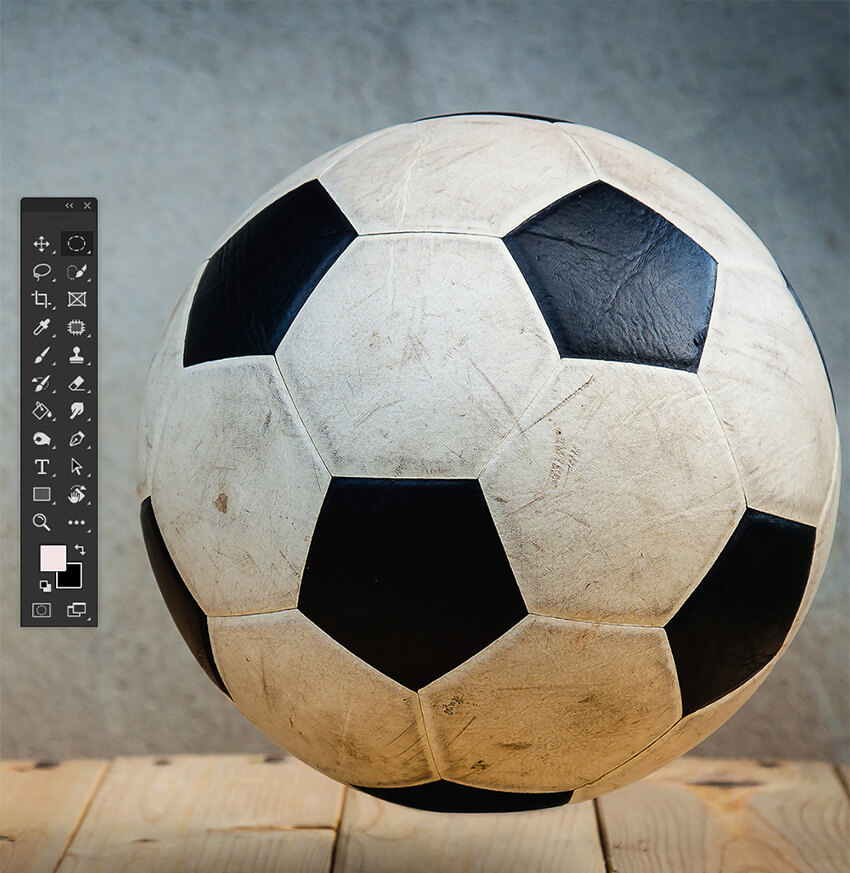
Step 2: Create a Circular Selection
Drag the tool across the layer to create an ellipse around the area you want to cut out. Hold down Shift to keep the ratio of the circle consistent.

Step 3: Add a Layer Mask
With the image player active, click the Add Layer Mask button found at the bottom of the layers panel.
Step 4: The Rectangle Tool
The rectangle tool works the same as the Elliptical tool. Only instead of circles, it creates squares and rectangles.
It shares similar pros and cons with the Elliptical tool, Ratio Control, and settings like Feather.
How to Cut Out a Photo in Photoshop Using the Quick Selection Tool
With the Quick Selection Tool, you can quickly select objects in an image with just a few clicks. It is also great for making selections with irregular shapes and edges like grass or rocks.
However, it does not work well with intricate details, making precise selections challenging.
Step 1: Select the Quick Selection Tool
Select the Quick Selection Tool from the toolbar (keyboard shortcut: W).
Step 2: Click & Drag
Click and drag over the area of the image you want to cut out.
Step 3: Refine Selection
Use the minus (-) and plus (+) icons at the top of the workspace to fine-tune the selection until the entire area you want to cut out is selected.
Step 4: Add a Layer Mask
Click the Add Layer Mask icon at the bottom of the Layers panel.

How to Cut Out a Photo in Photoshop Using the Magic Wand Tool
The Magic Wand Tool is a versatile selection tool in Photoshop that can quickly select areas in an image based on color or tonal range. It is handy for isolating objects in a complex background or selecting large areas of solid color or tone.
Step 1: Select the Magic Wand Tool
Select the Magic Wand tool (W) from the Tool Bar.
Step 2: Click on an Area of the Image
Click on the area of the image that you wish to cut out. This will select all pixels with similar colors and tones as the area you clicked on.
If you need to make a more precise selection, you can increase the tolerance level by holding the Shift key while clicking on the image.
Step 3: Refine the Selection
Make any additional adjustments to the selection using the other selection tools.
You can use the Lasso Tool (L) to add or subtract pixels from the selection by holding down Shift to add to a selection and Alt to remove from a selection.
Step 4: Add a Layer Mask
Once you have the selection exactly where you need it, create a Layer Mask using the Add Layer Mask button at the bottom of the Layers panel.
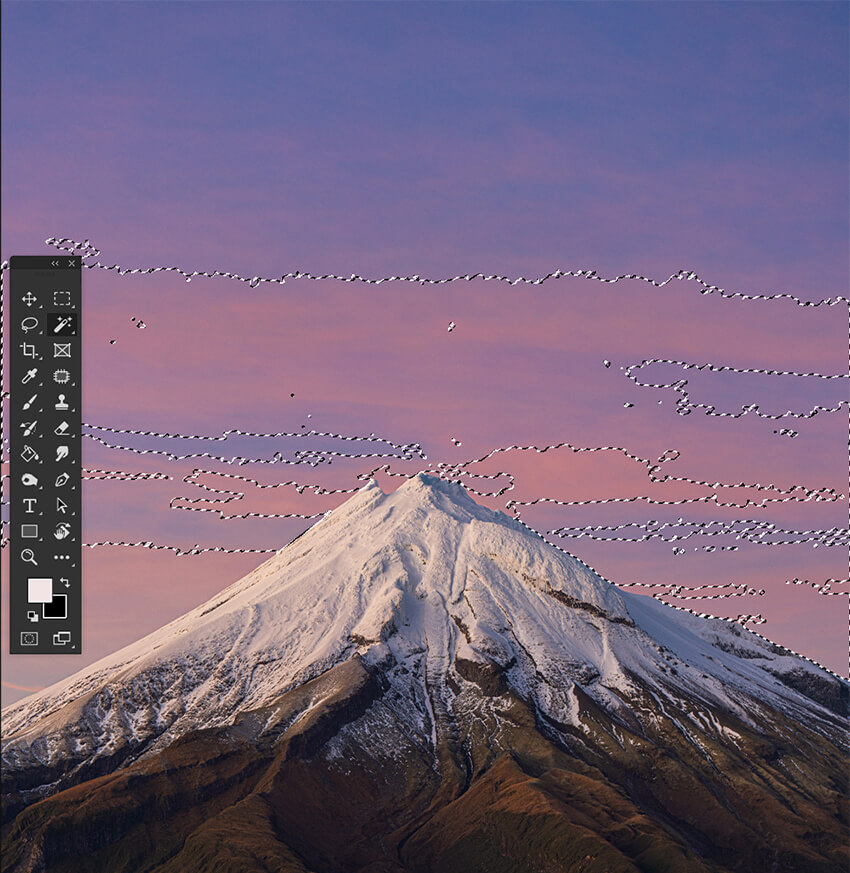
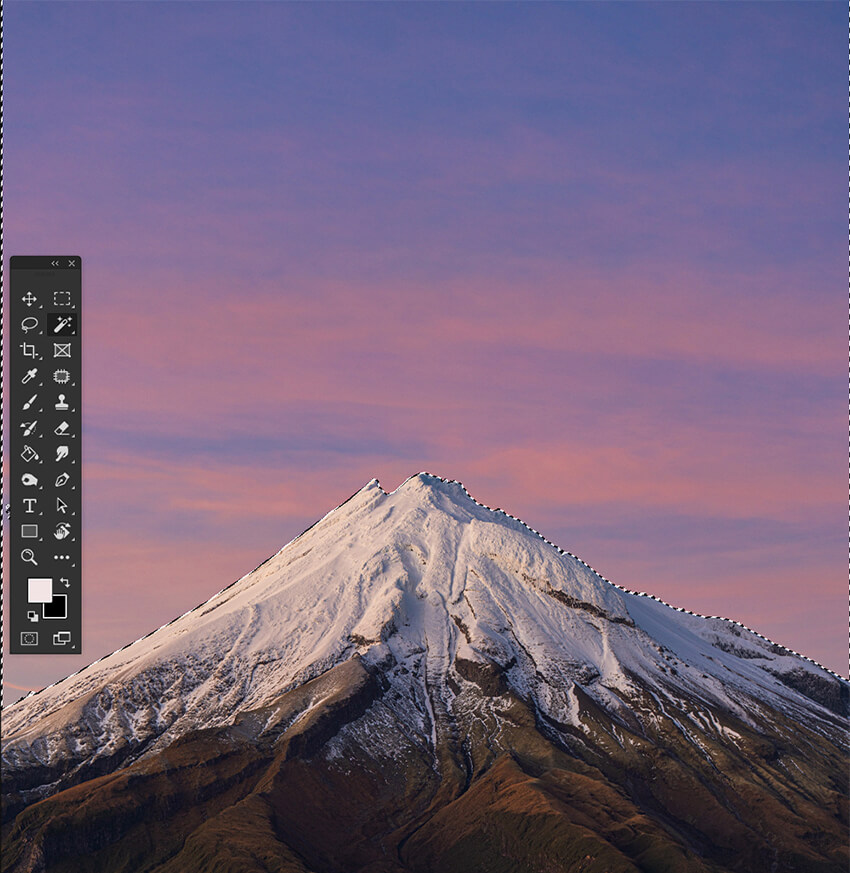
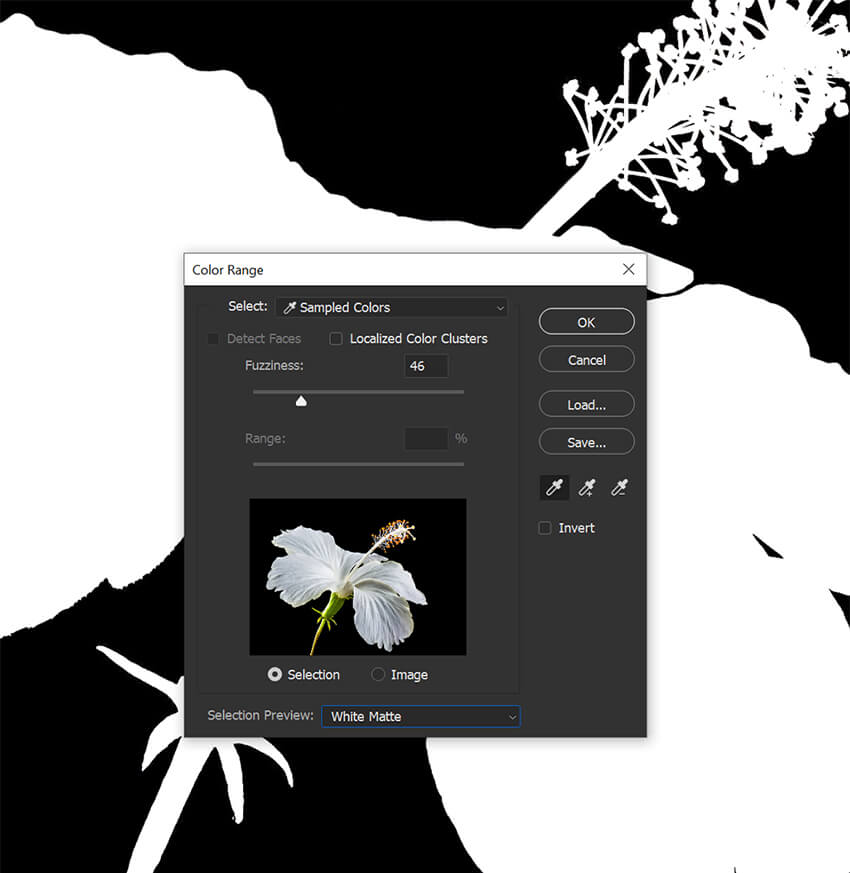
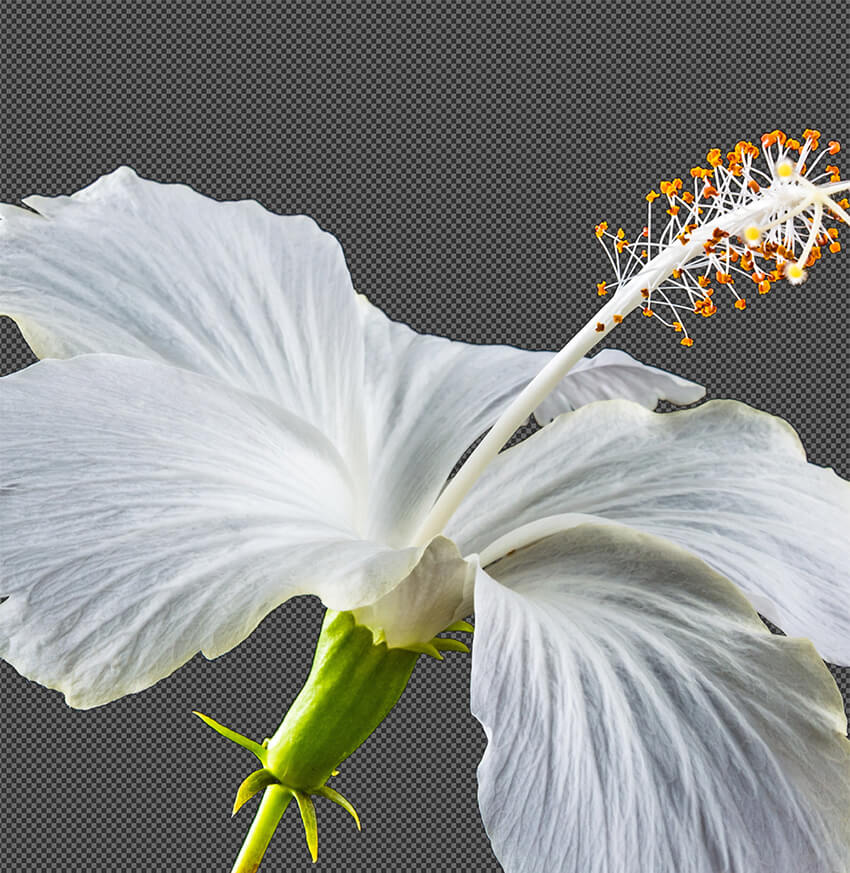
How to Cut Out an Image in Photoshop Using Color Range
Color Range is a powerful selection tool in Photoshop that allows you to quickly select areas of an image based on color. It is handy for selecting areas with subtle color gradients or for making quick selections of areas with significant color differences.
However, Color Range does not do well with monochrome images or subjects that share many of the same colors as their backgrounds.
Step 1: Go into Color Range
Make sure your layer is selected, and go to Select > Color Range. This will open a Color Range window.
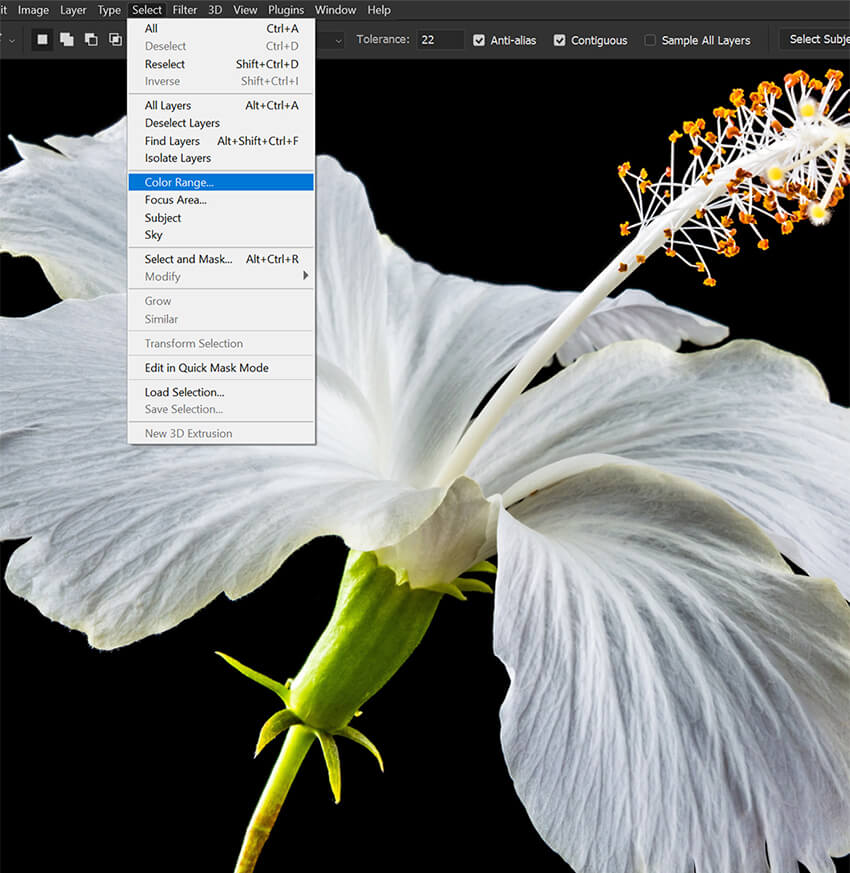
Step 2: Select the Background Color
Select the eyedropper in the Color Range window and click on the area you want to cut out.
Adjust the Fuzziness slider until you get the desired selection. A higher Fuzziness setting will result in more of the image being selected.
Once happy with the selection, click OK.
Step 3: Add a Layer Mask
Click the mask icon in the Layers panel to make a layer mask.
You will likely need to refine the Mask further using a Brush set to black or white. Mask out any areas Color Range didn’t select or mask back areas it selected that you want to keep.
Incorporating a Retro Look to the Cutout Images
As the Polygonal Lasso Tool works similarly to the other selection tools, let’s look at how we can use it to create a retro cutout effect.
Step 1: Create a Selection with the Polygonal Lasso Tool
Use the Polygonal Lasso Tool to create a selection around the subject.
Don’t get too close to the edges of the subject. We want it to create harsh edges and corners. Similar to a magazine collage.

Step 2: Add a Layer Mask
Add a Layer Mask to the image.

Step 3: Duplicate the Layer, and Delete the Layer Mask
Duplicate the masked layer, and delete the Mask. Make sure the duplicated layer is below the original.
It will look unedited at this point.

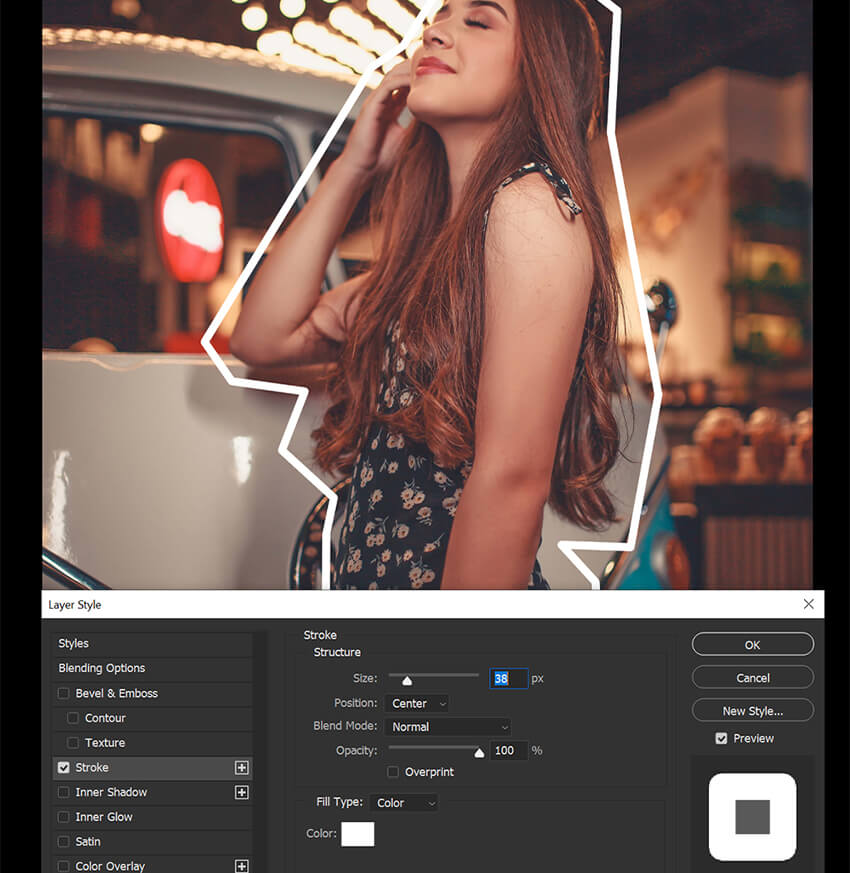
Step 4: Add a Stroke Layer Effect
Add a thick white stroke around the original extracted subject using the Layer Effects menu at the bottom of the Layers panel.
You can crop out the bottom of the stroke effect if you’d like.
Step 5: Add a Color Layer
Below the cutout subject, add a Solid Color fill layer using the Fill layer menu at the bottom of the Layers panel.
You can set it to any color you want, then set the Layer Mode to Color.

Step 6: Add Some Texture
Finally, add some texture to the background using an image of paper or another rough surface. Place this texture below the cutout subject but above the Color Fill layer.
Set the layer to Multiply, and bring the Opacity down to 70%. This will give it an older retro look.

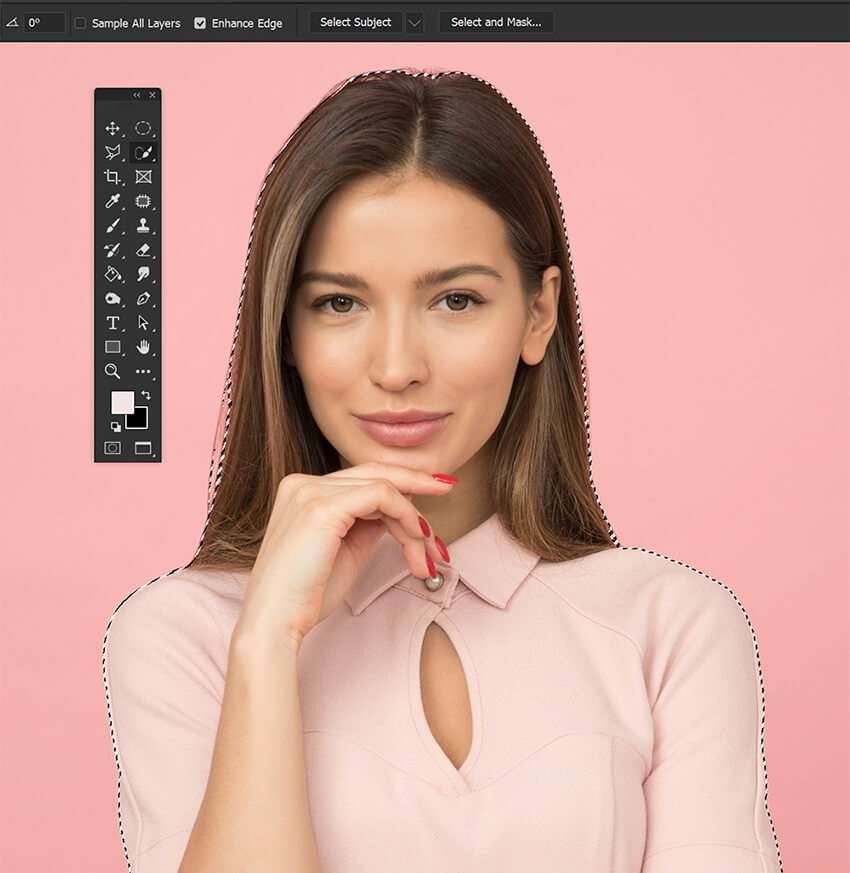
How to Use Select & Mask in Photoshop
Refine Edge in Photoshop is a powerful tool that gives you more control over the edges of your selection. It allows you to refine the selection by adjusting its contrast, color, and sharpness or using Photoshop’s Refine Edge Brush.
You can pair any selection tool with Select and Mask, making it the last step after creating an initial selection and adding a layer mask.
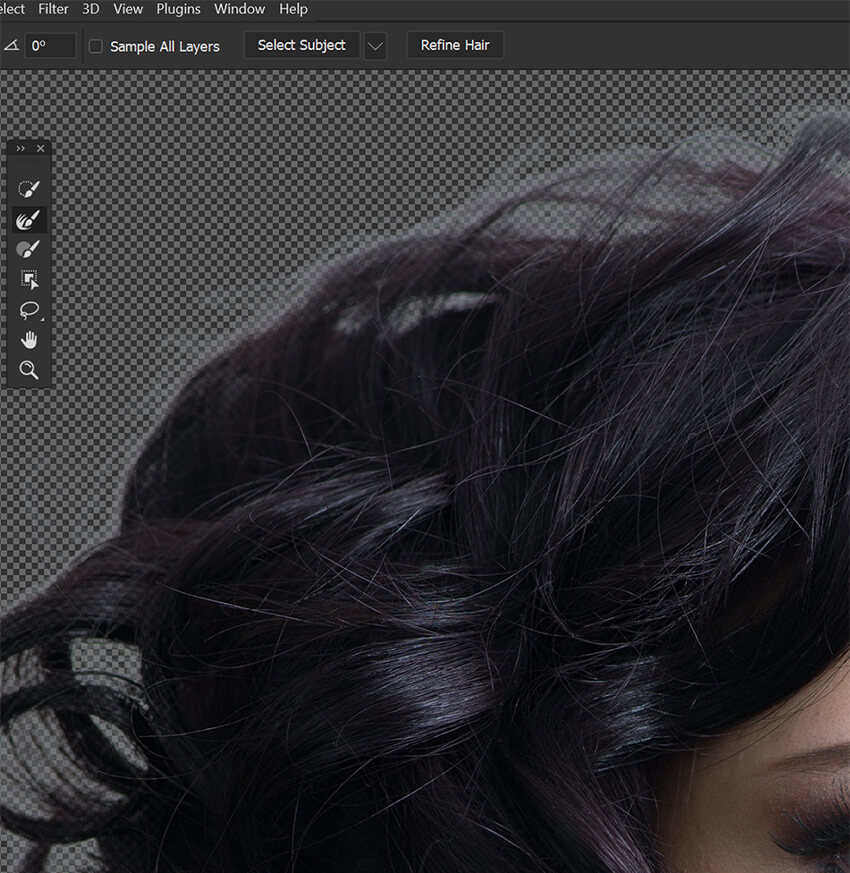
Step 1: Make an Initial Selection
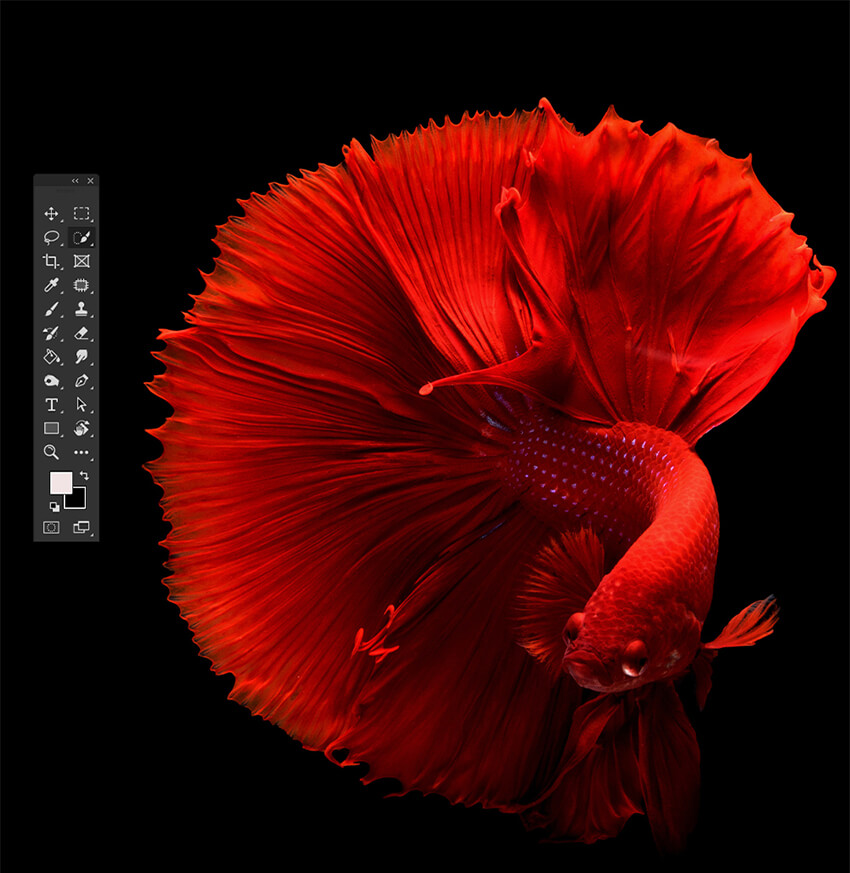
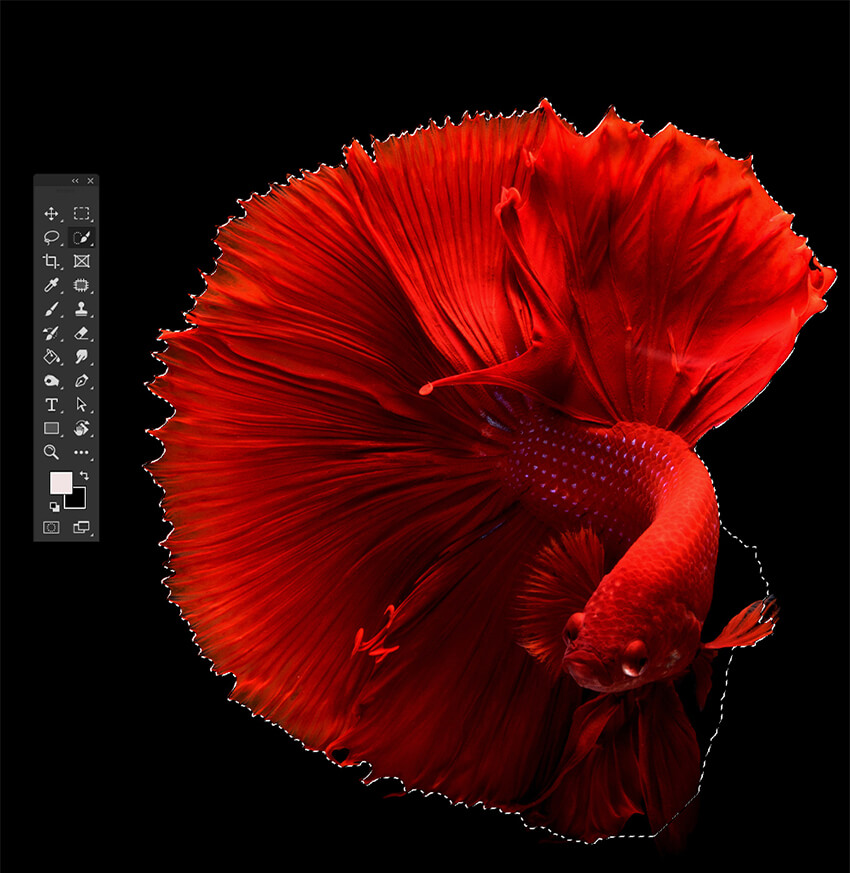
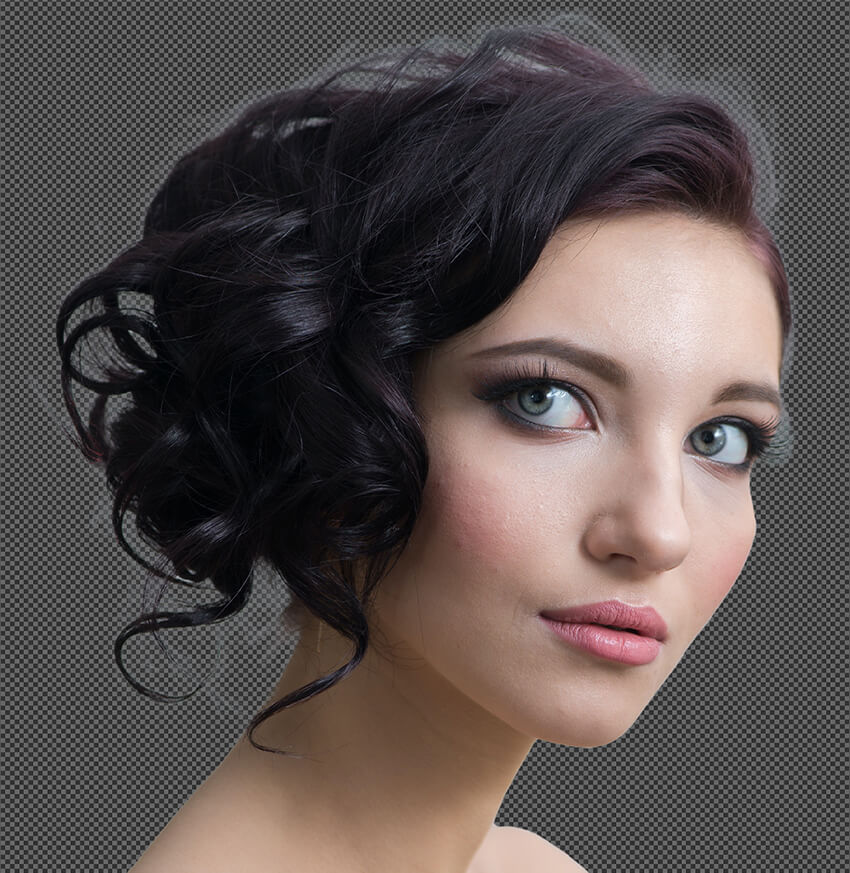
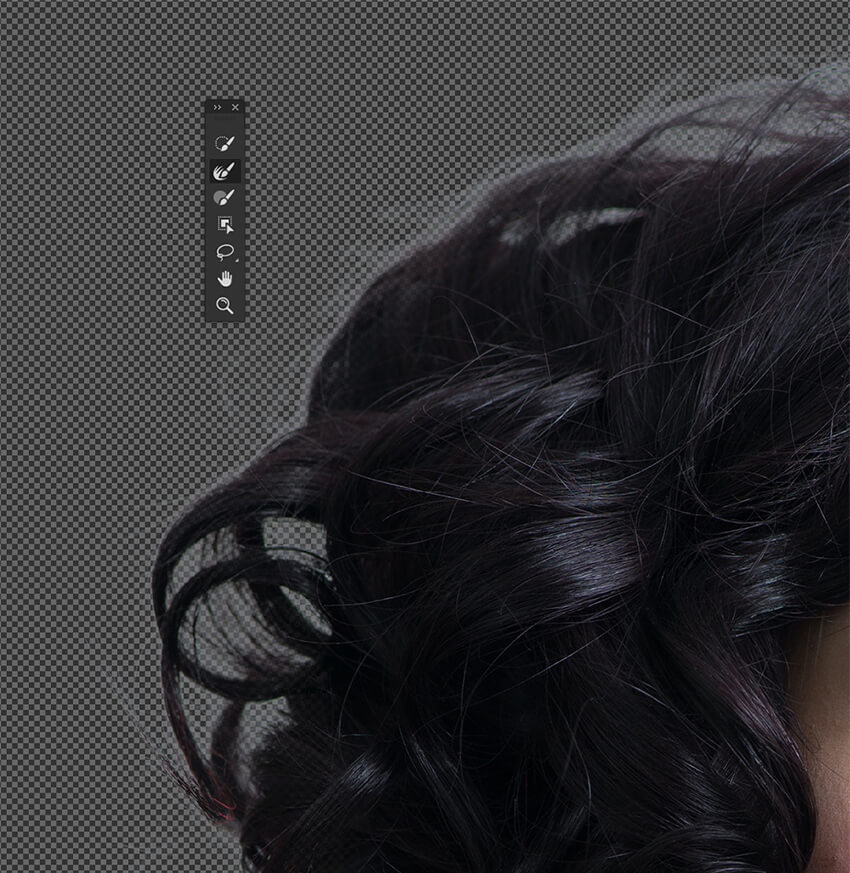
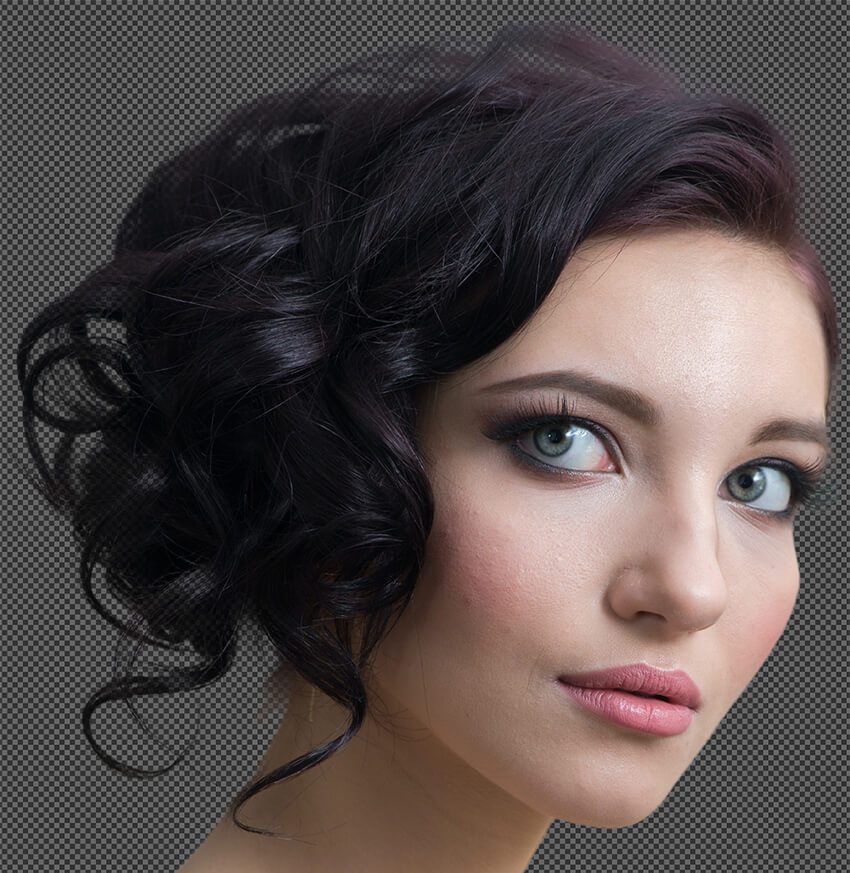
Select the area you want to refine using one of the selection tools. Here I used Select Subject.
I’ll be using a subject with a lot of hair to show how Select and Mask can even remove the background from small details like hair strands.
Step 2: Enter Select and Mask
Go to Select > Select and Mask.

Step 3: Adjust View
In the Select and Mask workspace, you will see a preview of your selection and a dropdown to adjust the view.
You’ll want to choose the view that helps you see the selection best.
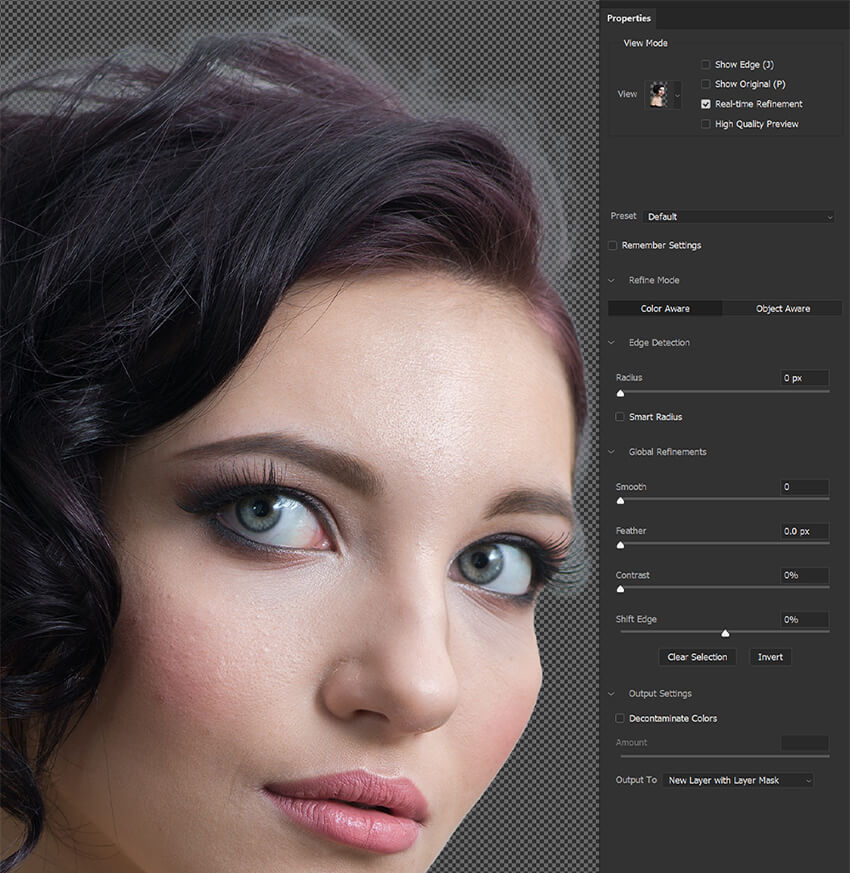
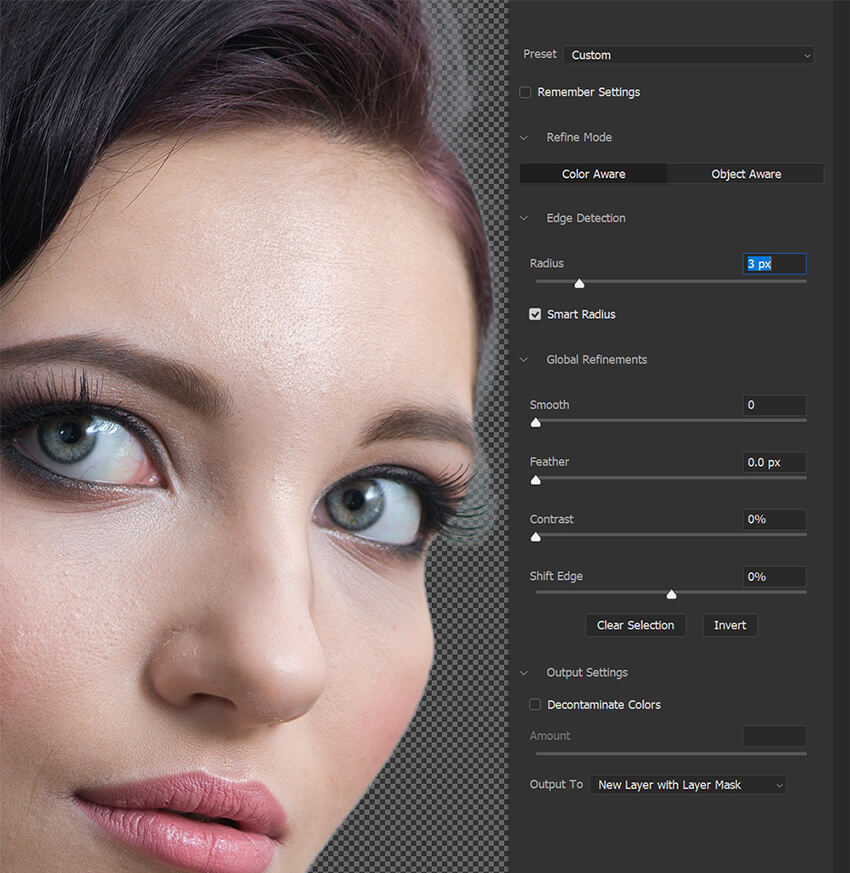
Step 4: Turn on Smart Radius
Make sure Smart Radius is checked and set the amount to 3-4 pixels. You can experiment with different settings, but I find 3px to work for most things.
Step 5: Use the Refine Edge Brush
Switch to the Refine Edge Brush. Drag the Brush across the edges of the subject.
The Refine Edge Brush is like an auto-select tool. It automatically hides what it assumes is the background while keeping small details like hair, threads, or fur.
If it selects or hides too much, hold down Alt/Option and brush over the area to bring it back.
Step 6: Use the Refine Hair Button
You can also use the Refine Hair button Found in the upper Options bar to refine hair strands quickly.
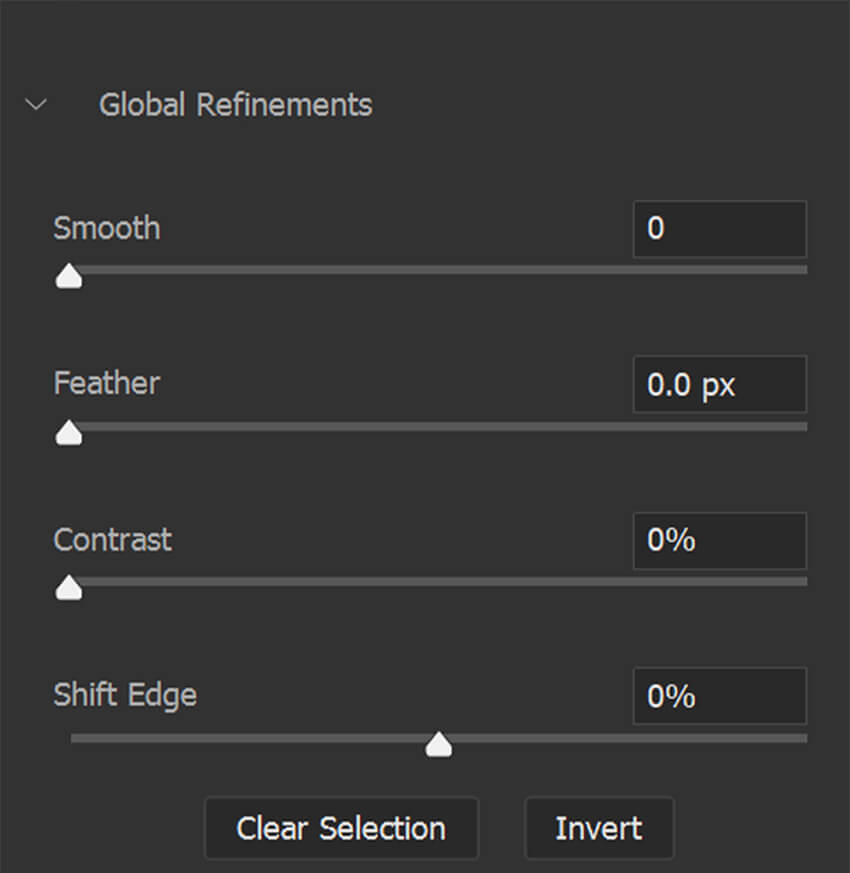
Step 7: Global Adjustments
If you are extracting a smooth or sharp object that lacks complex details, you can use the Global Adjustments to refine the Mask further.
This can include smoothing the edge and bringing the edge inwards using Shift Edge.
These settings do not work well on subjects with hair, fur, or other complex details. However, for example, if you’re extracting a bald subject or a subject with a hat on, you can use the Global Refinements effectively and quickly.
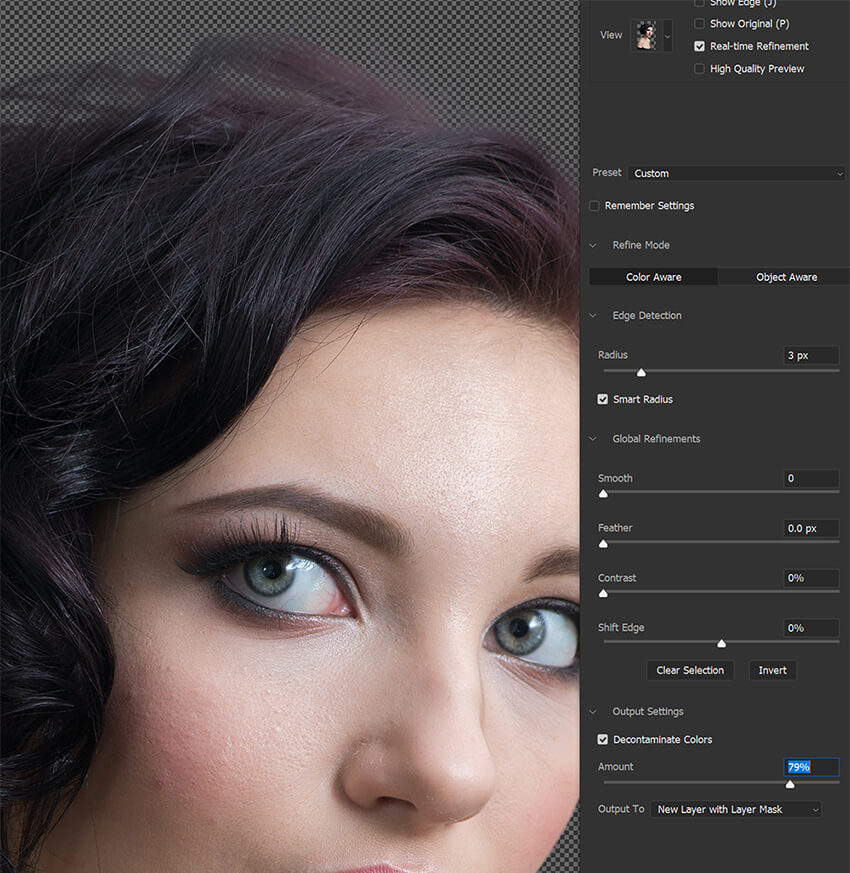
Step 8: Decontaminate Colors
Finally, if necessary, you can use the Decontaminate Colors option to remove any unwanted color fringing.
However, be aware that this is a destructive setting that will permanently affect an image. Photoshop will make a copy of your original image automatically to be safe.
Step 9: Keep Refining the Mask or Selection
Remember, you can re-enter Select and Mask as often as you need to adjust a mask further.
Leave a Reply