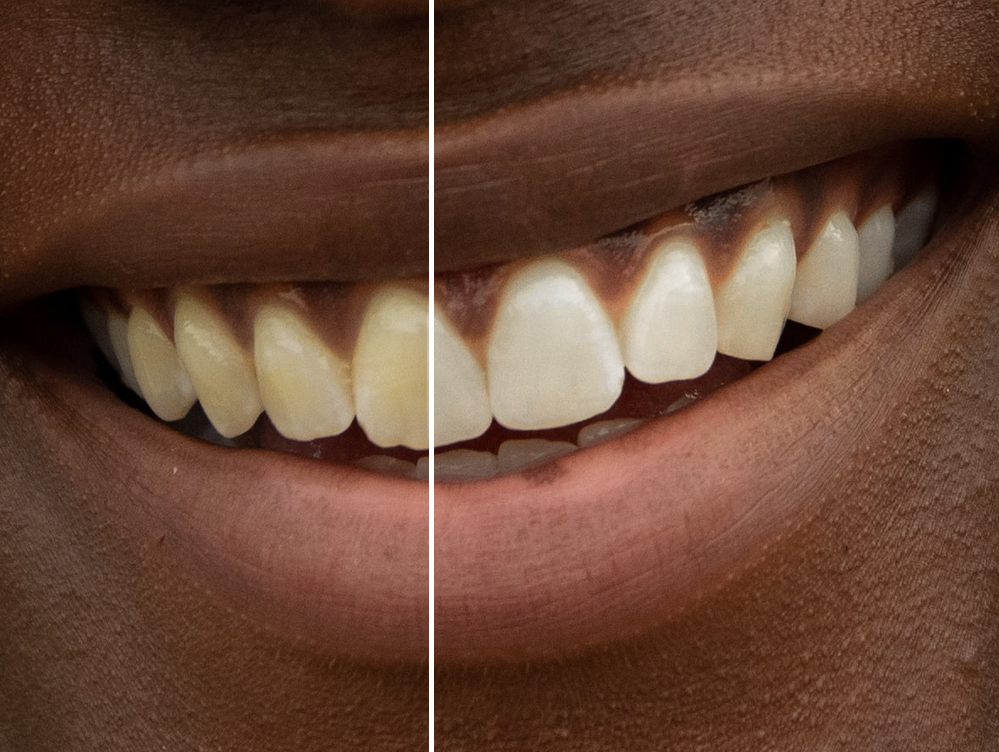
How to Whiten Teeth in Photoshop
In this tutorial, we’ll cover how to whiten teeth in Photoshop. Whether it’s a natural yellow tooth color or caused by overly yellow lighting, teeth can appear yellow for a number of different reasons. So learning how to whiten teeth in Photoshop is a must for photographers, photo retouchers, or even casual social media users. Luckily it’s as easy as using a few adjustment layers and layer masks to remove the yellow tint from teeth.
We will also cover how to remove extra dark spots from teeth using similar tools, but with different settings. Let’s get started!
How to Whiten Teeth in Photoshop
Step 1: Create a Hue/Saturation Adjustment Layer
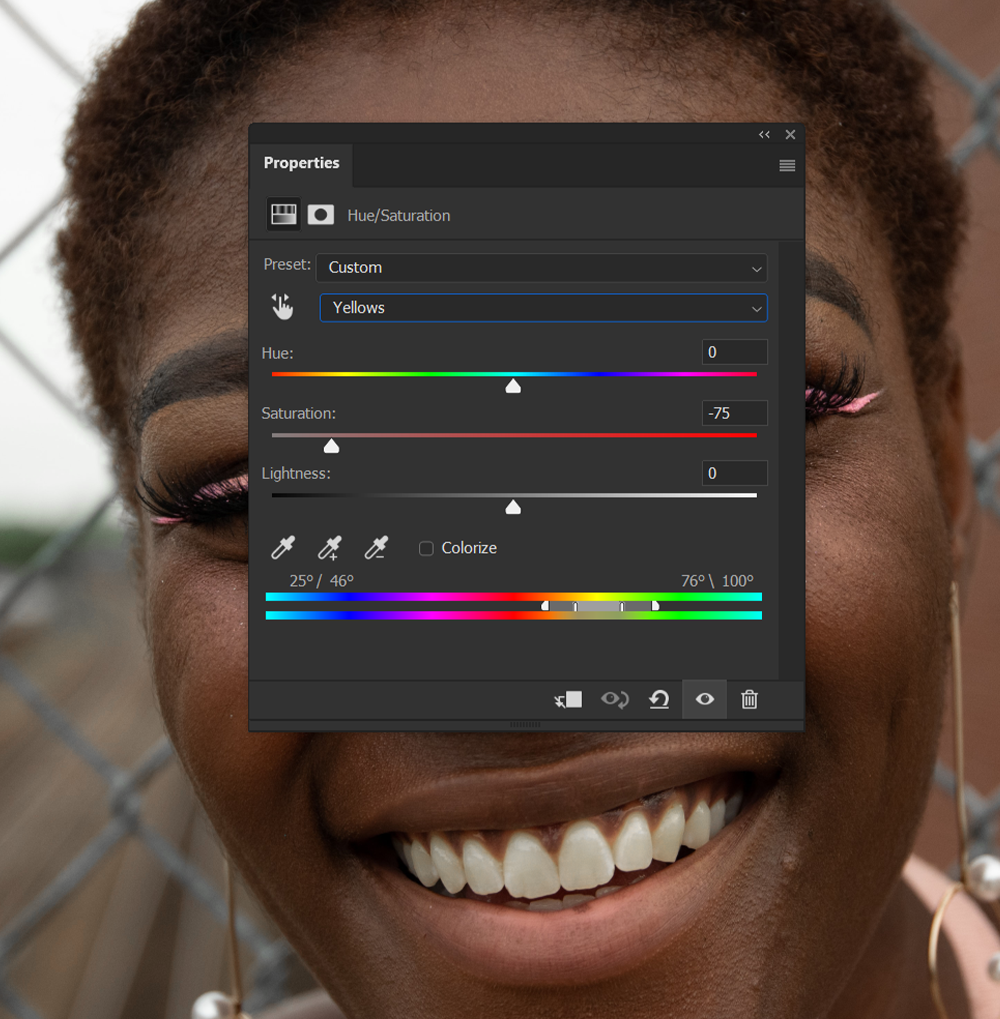
First, create a Hue/Saturation adjustment layer above the original image. You can do this by looking in the Layers panel, clicking the “New Fill or Adjustment Layer” icon, and choosing the Hue/Saturation adjustment layer.
With the Hue/Saturation layer selected, open the Properties panel. Change the Edit option from Master to Yellows.
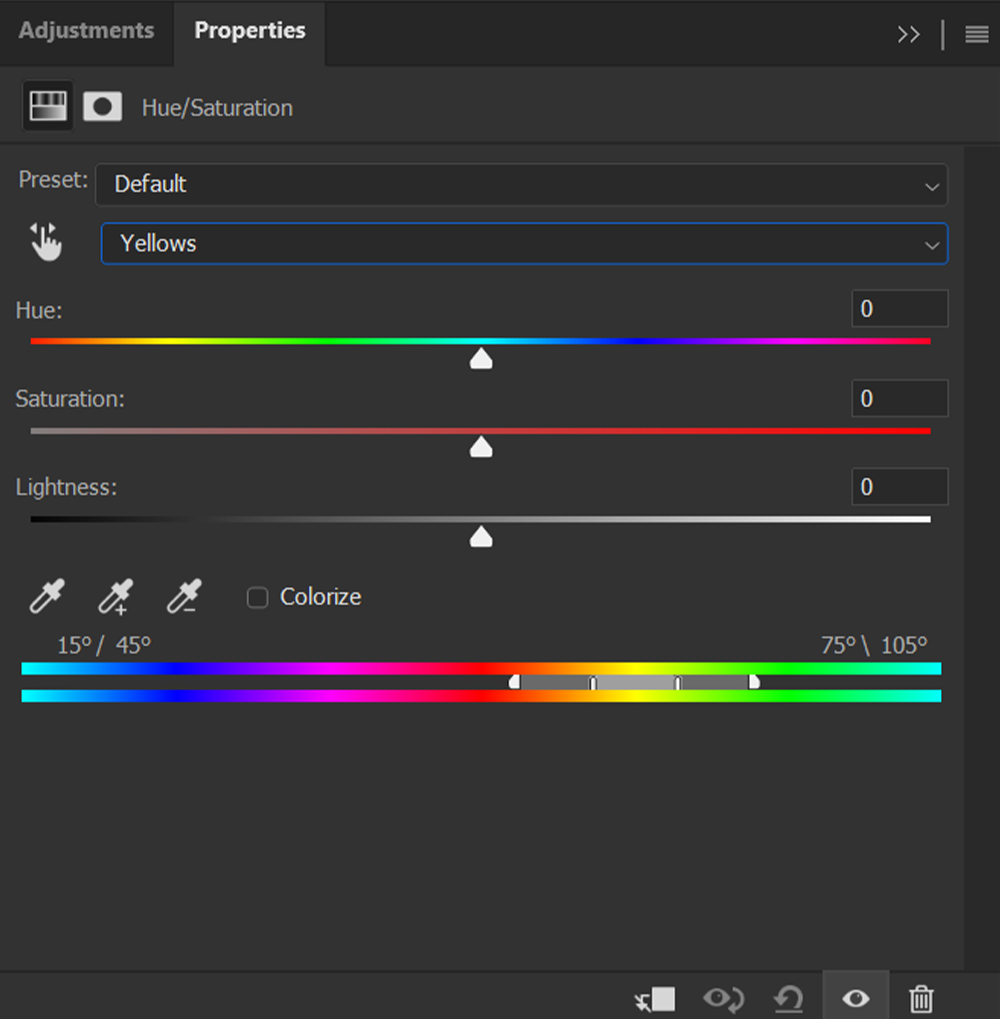
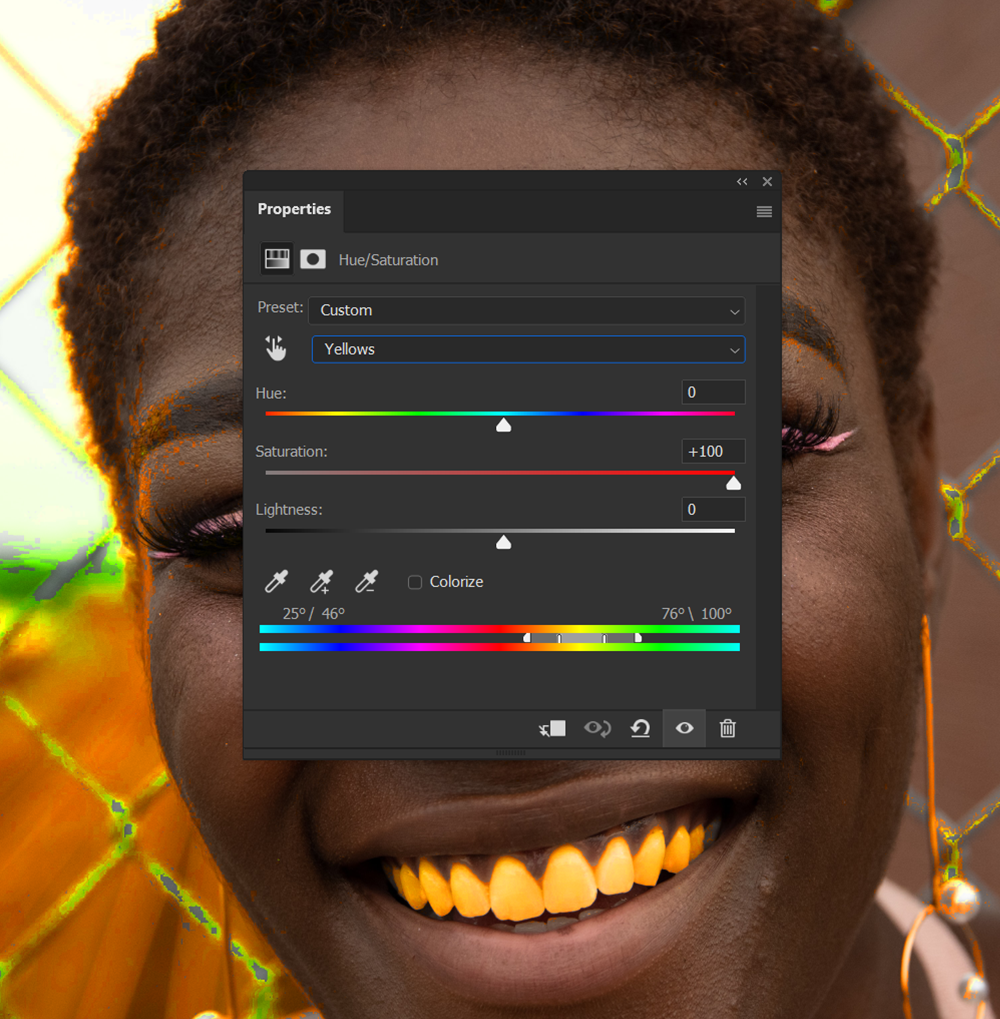
We are going to move the Saturation Slider to +100. Setting the saturation to +100 will show us all the yellow areas in an image by over saturating those areas.
Now, we want to dial into the exact shade of yellow in the teeth. We can do that using the rainbow slider found below the Lightness setting. Slide the slider and its left and right toggles until all the teeth are highlighted, not the gums or lips. It’s okay if other parts of the image are highlighted.
Step 2: Remove the Yellows From the Image
Next, we can remove the yellow from the image by bringing the saturation to -85. The amount will depend on how yellow your subject’s teeth are and how white you want them to be.
When looking at how to make teeth white in Photoshop, try to avoid removing 100% of the yellow from the teeth, or they will look overly retouched.
Step 3: Select the Teeth
We’ve removed the yellow from the teeth, but we’ve also removed the yellow tones from other parts of the image. We can bring them back using layer masks.
Choose the Lasso tool and create a rough selection around the teeth. Since we selected a specific shade of yellow using the Hue/Saturation slider, we don’t have to make an exact selection.

Step 4: Add a Layer Mask
Let’s delete the default Layer Mask from our Hue/Saturation adjustment layer and then add a new Layer Mask.
You can add a new Layer Mask using the Add layer Mask button found on the bottom of the Layers panel. The new layer mask will take the shape of the selection.
Alternatively, you can use a default Brush set to black to mask anywhere you don’t want the adjustment layer to affect the image.

Step 5: Adjust the Settings of the Adjustment Layer
Once masked, you might have to go back into the Hue/Saturation layer and adjust the Yellow settings further.
If there are areas in the teeth that are more yellow than others, you can duplicate the Hue/Saturation adjustment layer and spot-treat the yellow spots. Delete the Layer Mask of the duplicate, add a new Layer Mask, invert the mask using Ctrl-I, and then mask in the Hue/Saturation layer over the extra yellow areas.
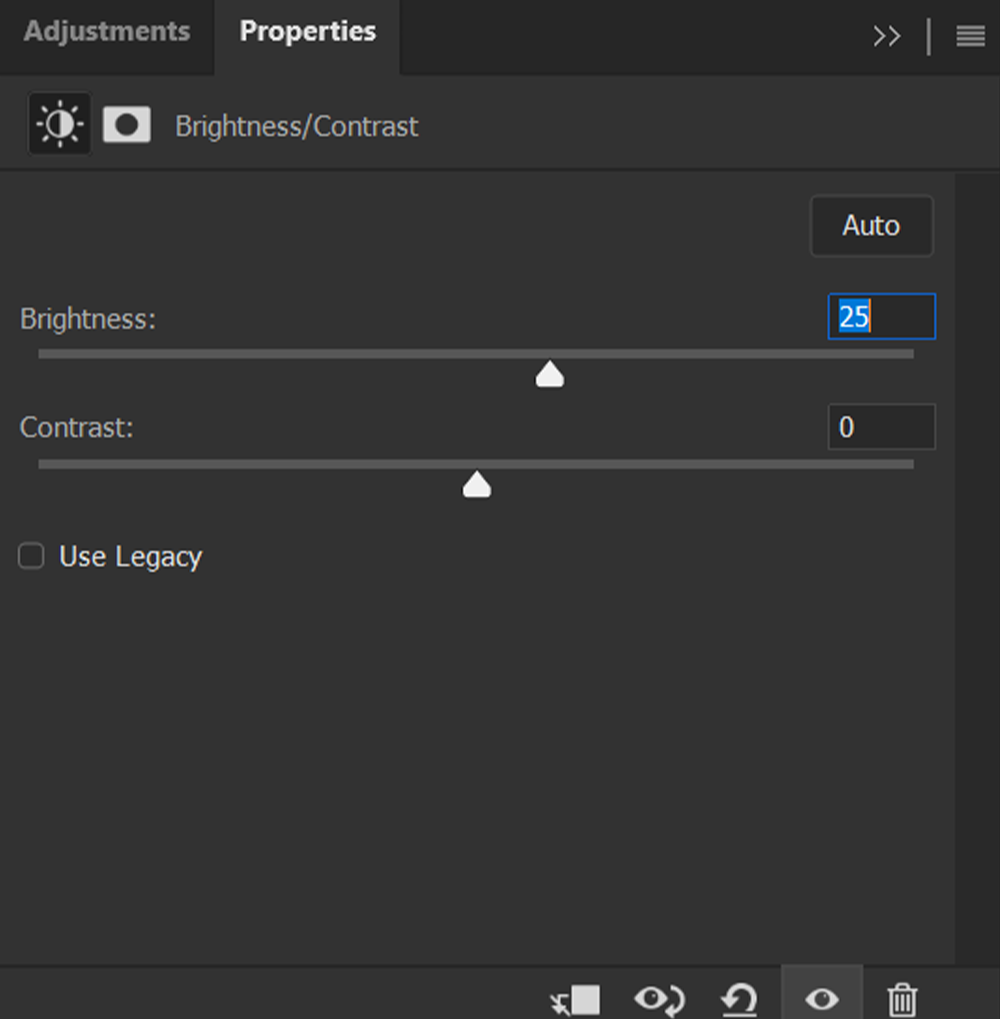
Step 6: Brighten the Teeth with a Brightness/Contrast Layer
If the teeth are looking too dark or gray, you can add a Brightness/Contrast adjustment layer over the Hue/Saturation adjustment layer. Set the Brightness to 15 and the Contrast to 5.
These settings will change from image to image, and some photos may not need brightening.

Step 7: Copy and Paste the First Mask
Once you are happy with the brightness of the teeth, copy and paste the layer mask from the Hue/Saturation adjustment layer onto the Brightness/Contrast adjustment layer.
Do this by selecting the Hue/Saturation layer mask, holding Alt, and then dragging and dropping the layer mask onto the Brightness/Contrast layer.
Use a default round Brush to do any final refining to the Brightness/Contrast layer mask, making sure the gums and lips are not overly brightened.

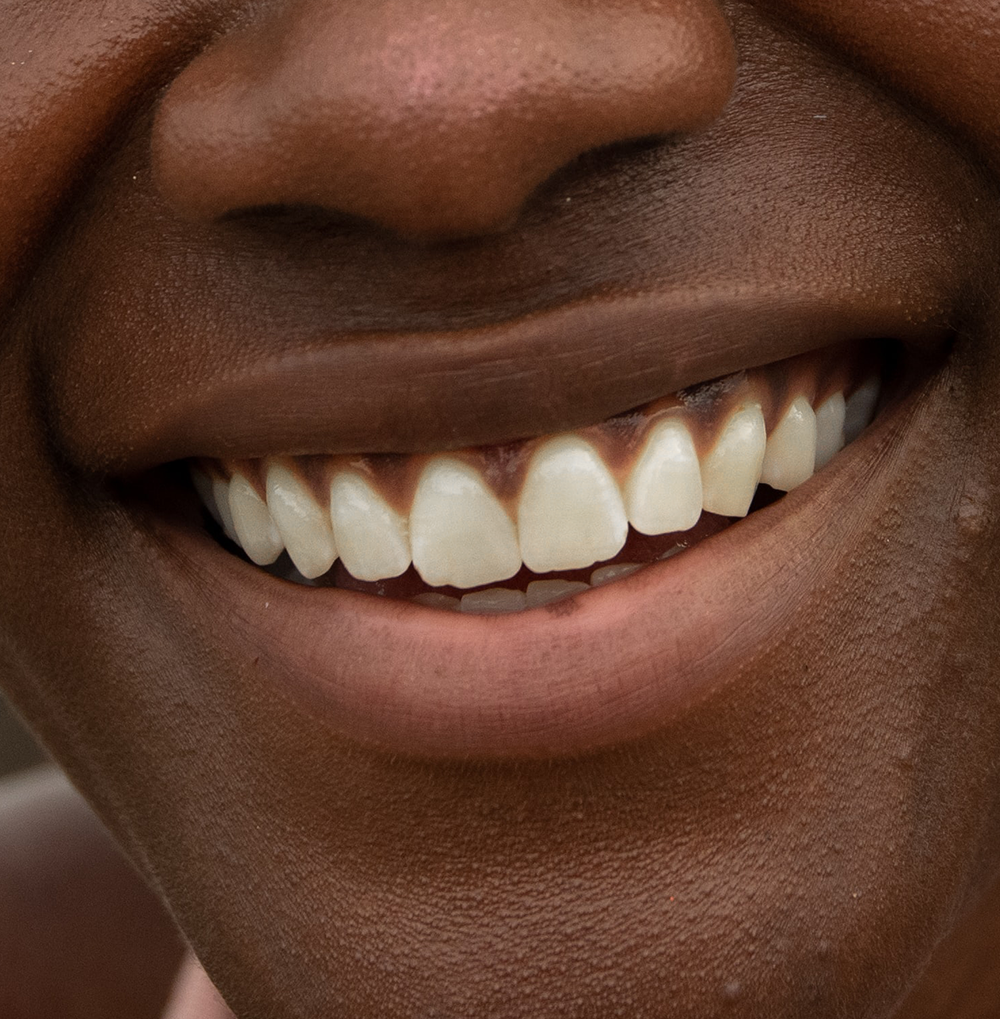
How to Remove Dark Spots From Teeth
Step 1: Create a Brightness/Contrast Adjustment Layer
If there are extra dark spots or ridges on the teeth they can be removed using a Brightness/Contrast adjustment player and a layer mask.
Create the Brightness/Contrast adjustment layer setting it to Brightness of 25. Then Invert its layer mask using Ctrl-I.
Step 2: Adjust Your Brush Settings
Now, let’s select a default soft round Brush. We want to make sure the Hardness is set to 0%.
Next, let’s set the Flow to 10% or less. Setting a Brush to a low Flow will lower the amount of paint being laid down all at once. This lets you build up color, or in this case mask in brightness, slowly laying down small amounts with each pass.
Set the Brush’s Foreground Color to White.
Step 3: Brighten the Dark Spots on the Teeth
Use the brush to slowly mask in brightness onto any areas of teeth that are overly dark. That includes teeth stains, ridges, and other imperfections.
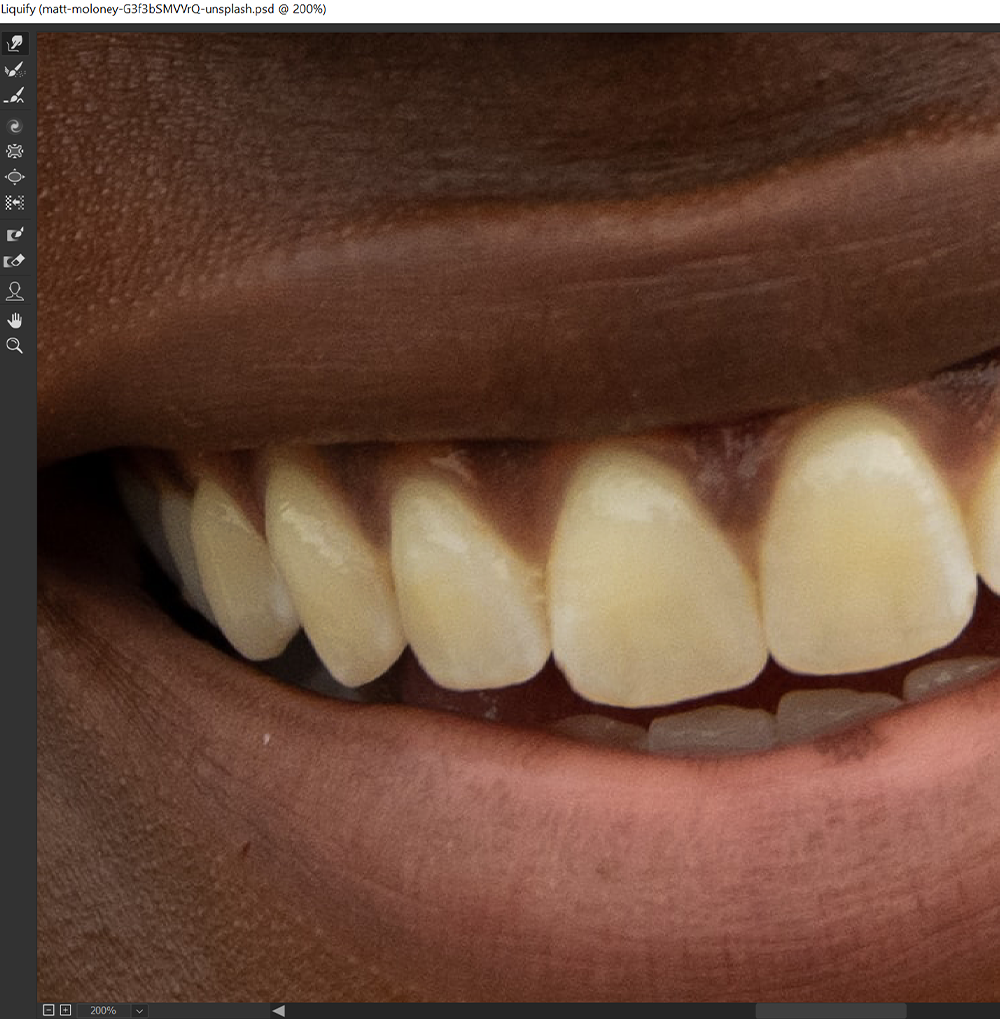
Step 4: Remove Ridges from the Teeth
If the dark spots on the teeth were caused by ridges or other dents, you can fix the edges of the teeth using the Liquify tool.
Go to Filter > Liquify and choose the Forward Warp tool. Now Zoom in very close to the teeth, and push and pull the edges of the teeth to straighten them out.
Try and create a clean edge without overly warping or stretching the pixels of the teeth. Focus on any obvious bumps or ridges, leaving the natural shape of the teeth largely intact. If you overly warp the teeth, you might have to re-adjust your earlier layer masks to compensate.
Conclusion
There you have it! That’s how to make teeth whiter in Photoshop using just a couple of adjustment layers and layer masks. Remember that leaving some natural yellow can be a good thing. Removing too much color from teeth can make a photo look overly retouched.
Keep it subtle, and you’ll bring out the best in a person’s smile without it looking fake.
Leave a Reply