How to Remove Objects in Photoshop
Knowing how to remove an object in Photoshop is essential for all Photoshop users. Whether you’re editing photos, designing, or creating photo composites, there will always be some unwanted detail that’s in the way. Luckily, Photoshop has several tools that can quickly and seamlessly remove an object!
Today, we will be looking at how to remove an object in Photoshop using five different techniques. Each tool excels at removing different types of objects in all different kinds of scenarios, all on their own.
The tools can also combine them, so you never have to worry about a distracting or unwanted object ruining your photos ever again.
- How to Remove Objects in Photoshop Using the Patch Tool
- How to Remove Objects in Photoshop Using the Content-Aware Move Tool
- How to Remove Objects in Photoshop Using the Clone Stamp Tool
- How to Remove Objects in Photoshop Using the Spot Healing Brush
- How to Remove Objects in Photoshop Using the Brush Tool
How to Remove Objects in Photoshop Using the Patch Tool
First, let’s start with the Patch Tool. The Patch tool is used to remove unwanted image elements. The Content-Aware option in the Patch tool takes nearby pixels and patches them over the unwanted area, creating a seamless blending effect with the surrounding area.
Step 1: Adjust Settings
Select the Patch Tool, found by Right-clicking the Spot Healing Brush and opening the tools carousel. You can also cycle through the different Patch tools using the shortcut J. With the Patch tool selected, look at the upper Options bar.
- Patch: First, we want to set Patch to Content-Aware.
- Structure: For Structure, we can enter a value between 1 and 7 to set how closely the patch will reflect any existing image patterns. This setting can change from image to image. Though, I find a Structure of 4 does a good job most of the time.
- Color: For Color, you can enter a value between 0 and 10. This will specify how much Photoshop will apply algorithmic color-blending to the patch. If you enter 0, any color blending is disabled. I like to keep it at 0, but this can change from image to image.
- Sample All Layers: If you want to make changes directly to your photo, keep this Unchecked. However, if you’re going to work less destructively, check this box and create a new layer. Everything you patch will be placed on the new layer.

Step 2: Select Unwanted Object
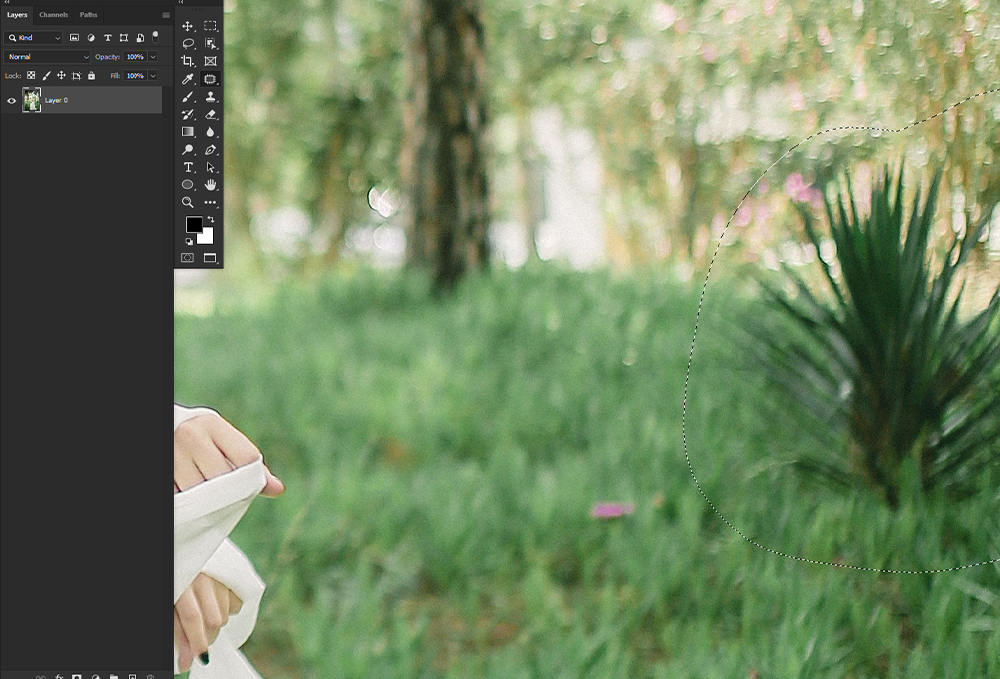
With our settings in place, we can create a selection around the unwanted options.
The selection doesn’t have to be precise. In fact, you want to grab some of the outer surrounding areas around the unwanted object.
Step 3: Drag Selection to a New Area
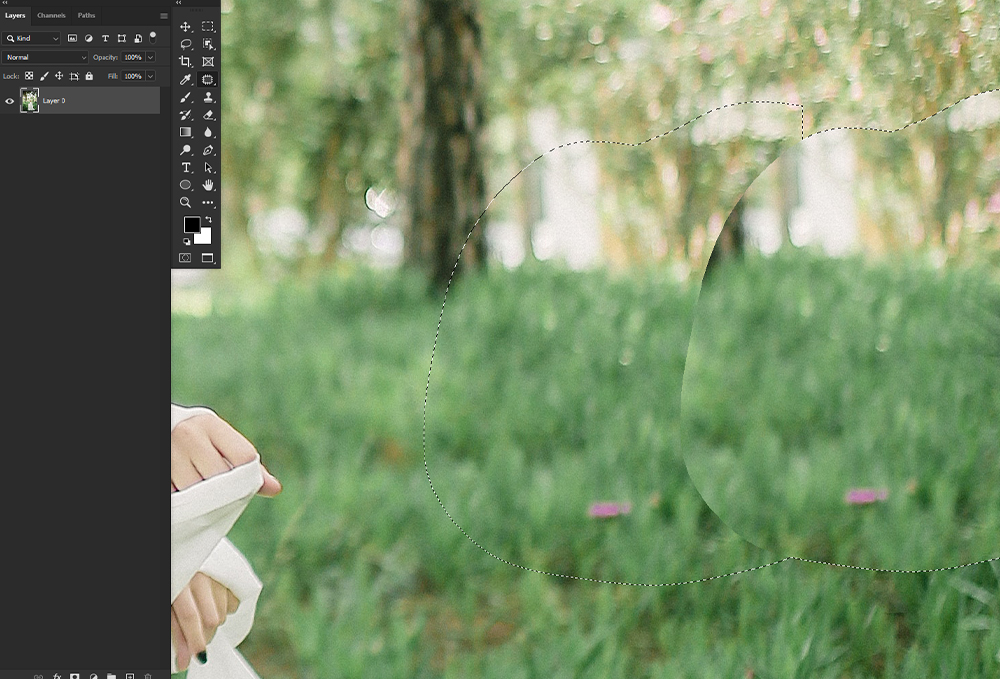
Now, drag the selection over an area similar to the area your object is on. Keep lines and textures in mind. Below, I ensured the horizon line between the grass and trees lined up.
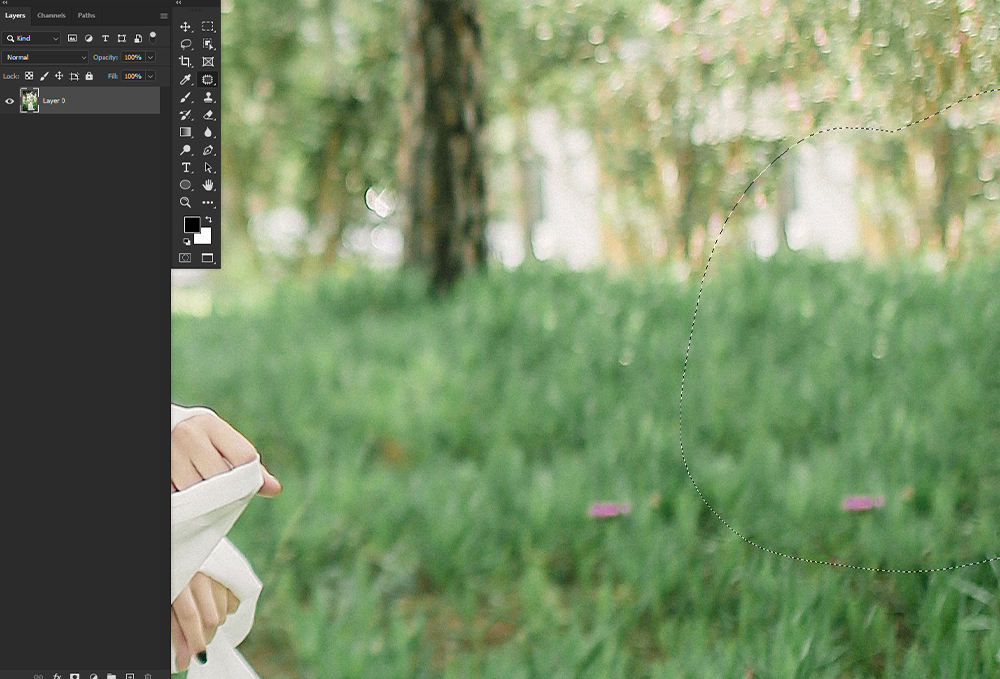
Sampling from an area that was clear, removing the dark bush from the right-hand side of the subject.
Remember, if you’re getting a lot of weird artifacts or blurriness, try making several different test patches with different settings. Once you are happy with the results, move on to the main unwanted object.
You can also remove blurry pixels or repeating patterns by patch tooling them out, making smaller patches onto the main patch.


How to Remove Objects in Photoshop Using the Content-Aware Move Tool
Next, let’s cover the Content-Aware Move tool, which is similar to the Patch tool but used slightly differently.
If there is an object you want to remove from one spot but place on another, you’ll want to use the Content-Aware Move. Keep in mind that the Move tool is ideal when the background remains similar.
Step 1: Select the Object You Want to Move
Select the object you want to move. Make sure you select part of the background of the subject as well. You do not want an overly exact selection.
You can use the Move tool to draw the selection or any other selection tools, switching back to the Move tool once the selection is made.

Step 2: Drag to New Area
Drag the selection to the area you want to place the object.
If the Transform On Drop option is enabled, you can scale the part of the image you’ve just moved.

Step 3: Clean Up Previous Area
After dropping the object into its new location, the old area may have leftover pixels, blurry pixels, or other general odd-looking artifacts.
Clean this up using the Content Aware-Patch tool, following the same steps you would use when removing an ordinary object—treating them as unwanted objects themselves.

How to Remove Objects in Photoshop Using the Clone Stamp Tool
The Clone Stamp tool places one part of an image over another part of the same image. The Clone Stamp tool is ideal for duplicating objects or removing unwanted objects, both small and large.
Step 1: Set Your Brush Tip and Settings
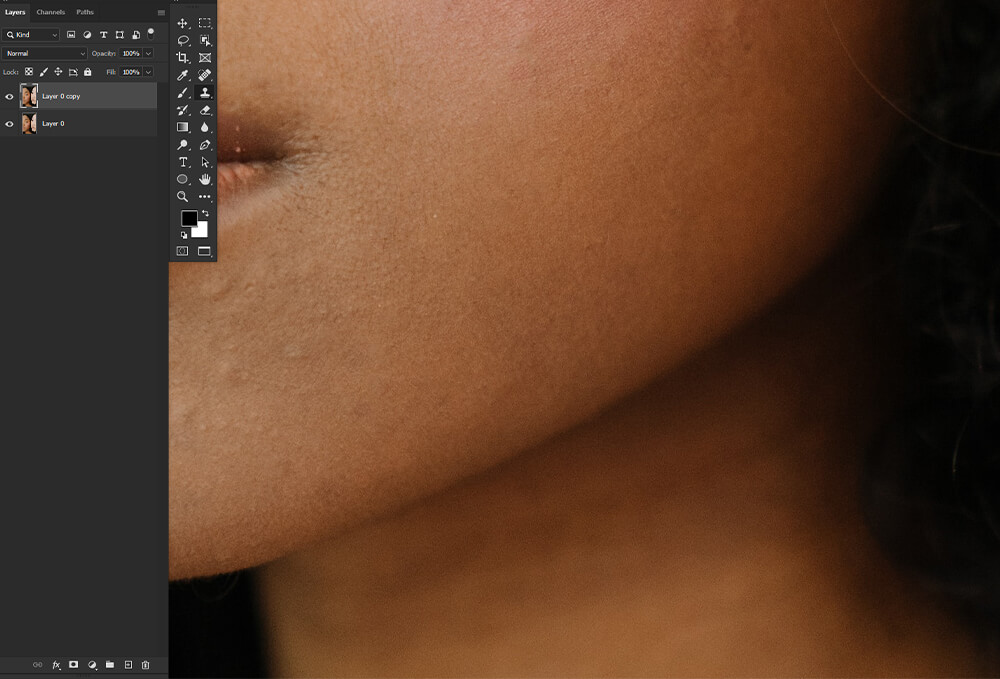
Select the Clone Stamp tool in the Tools toolbar or by pressing S.
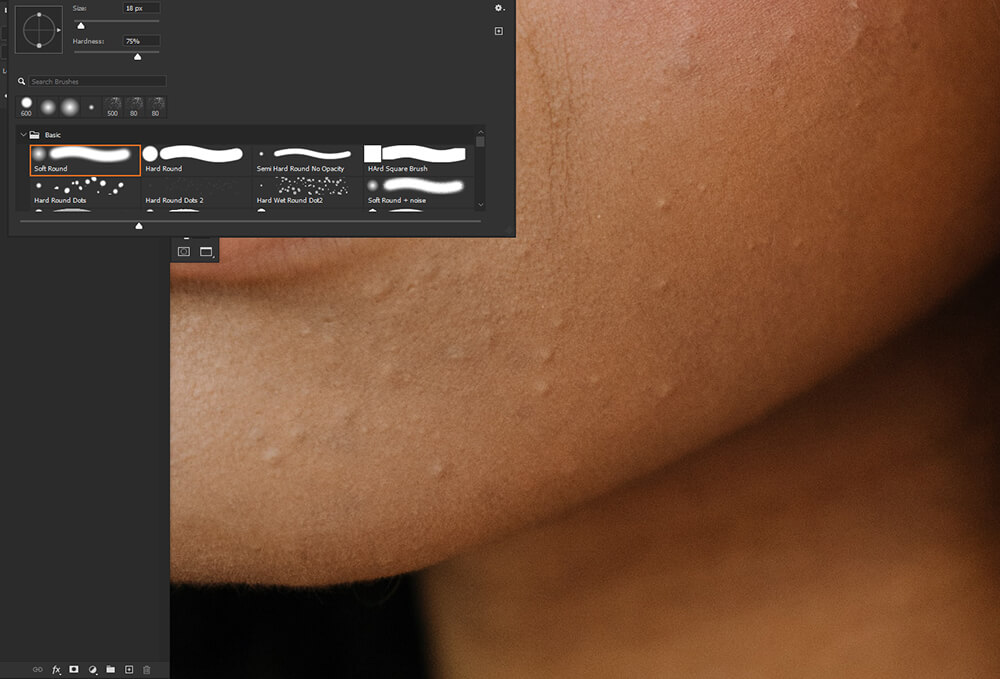
Choose a brush tip, Size, Opacity, and Flow in the options bar. This will depend on what you are stamping.
I like to choose a slightly larger brush than the detail I am removing and keep the Hardness at around 75%.
If the object is large, I set it to a slightly smaller size and decrease the Hardness for better blending.
Step 2: Sample an Area and Paint
Next, we set the sampling point by positioning the Stamp tool’s pointer over the area we want to be sampled and then holding Alt/Option and clicking.
Drag over the detail that you want to remove. It’s best to make smaller, shorter strokes instead of longer ones.
You also want to be careful about duplicating details or creating unintentional patterns. If that happens, go over the repetitive detail again using a different sampled area.
How to Remove Objects in Photoshop Using the Spot Healing Brush
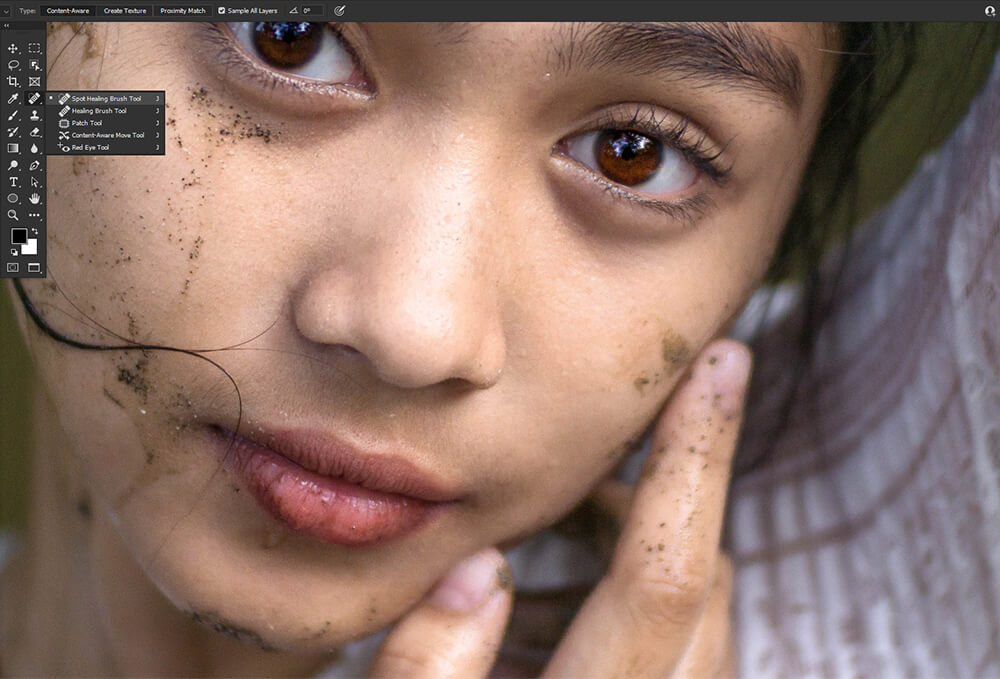
The Spot Healing Brush tool can quickly remove blemishes and other more minor imperfections in your photos.
The Spot Healing Brush paints with sampled pixels from an image and matches both the texture and lighting of the sampled pixels to the pixels being healed.
Step 1: Adjust Settings
First, select the Spot Healing Brush tool, the shortcut being J.
- Type: We want to make sure the Type is set to Content-Aware.
- Brush Size: We want to choose a brush size. Selecting a slightly larger brush than the area you want to heal is ideal. I also like to keep the Hardness at around 75%.
- Mode: More times than not, you’ll want Mode set to Normal. However, you can choose Replace, which will preserve noise, film grain, and any texture at the brush edges.
- Sample All Layers: Check Sample All Layers if you want to sample pixels from all visible layers. You can Uncheck Sample All Layers to sample only from the current layer.

Step 2: Drag Over the Unwanted Object
Now, click the area you want to fix. You can click and drag to select and remove imperfections from larger areas. Try not to choose too large of an area. Making multiple smaller selections is ideal.
The Spot Healing Brush automatically samples from around the selected area.
Step 3: The Healing Brush as an Alternative
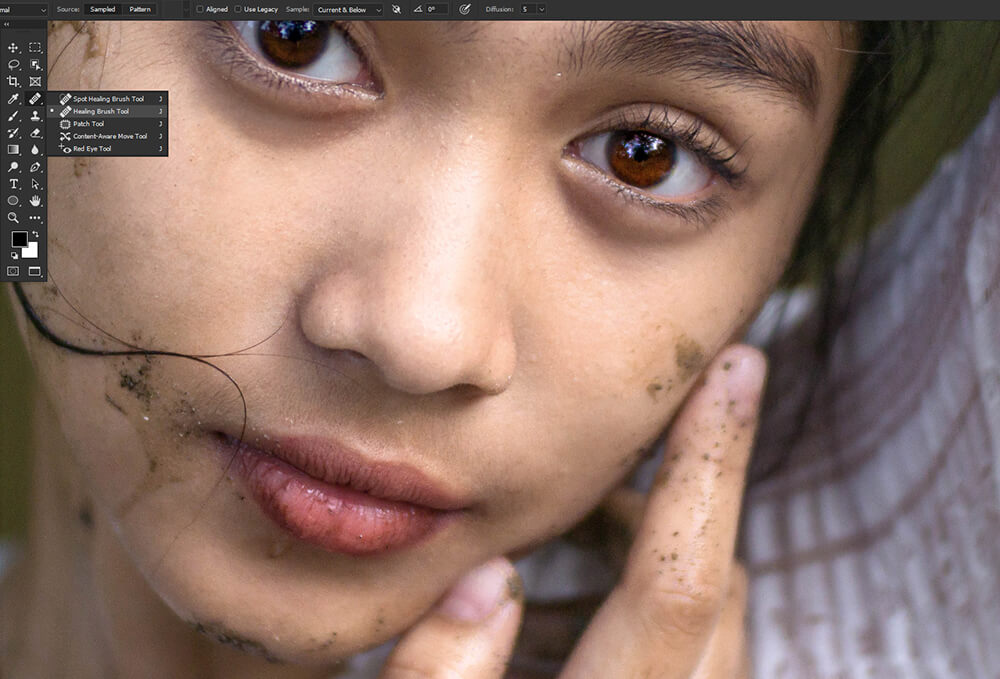
Try the Healing Brush tool if you want more control over which areas are sampled.
The Healing Brush tool works like the Spot Healing Brush, but you choose which areas to select by holding Alt/Options and clicking, similar to the Clone Stamp tool.
How to Remove Objects in Photoshop Using the Brush Tool
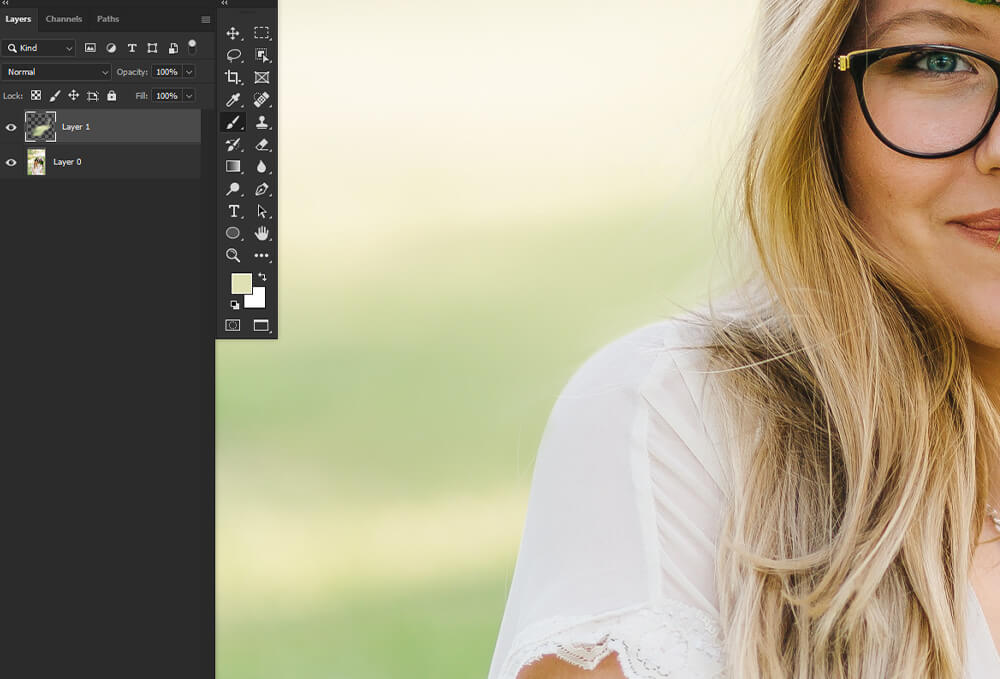
Finally, let’s cover how to remove unwanted detail using just a default round Brush. This technique is ideal for objects on simple undefined backgrounds with little to no detail. A subject with a shallow depth of field is a great example.
Step 1: Set Your Brush Settings
First, set up your Brush.
- Brush Tip: For the brush tip, you want the default round Brush set to 0% Hardness most of the time. Ultimately, however, it will depend on the area you are painting. If the area you’re painting has harsher edges, increase the Hardness to match.
- Brush Size: The size will change as you paint. Change the size of your Brush quickly using the [ and ] keys. I like to start with a size slightly larger than the area I am painting.
- Flow & Opacity: Flow and Opacity are great tools for building up color slowly, which you’ll want to do in this technique. I suggest setting the Flow to as low as 10% and as high as 75%. The Flow rate will change as you go.

Step 2: Choosing Colors
Next, sample a color from the area you’re painting, overusing the Color Picker tool.
Every time you paint on an area with a new color, you’ll want to color pick from that area, so you will often switch colors. To quickly switch from the Brush tool to the Color Picker and back again, press and hold Alt. Choose a new color, and, when you let go of Alt, your Brush tool will be active again.
Step 3: Paint Over the Object You’d Like to Remove
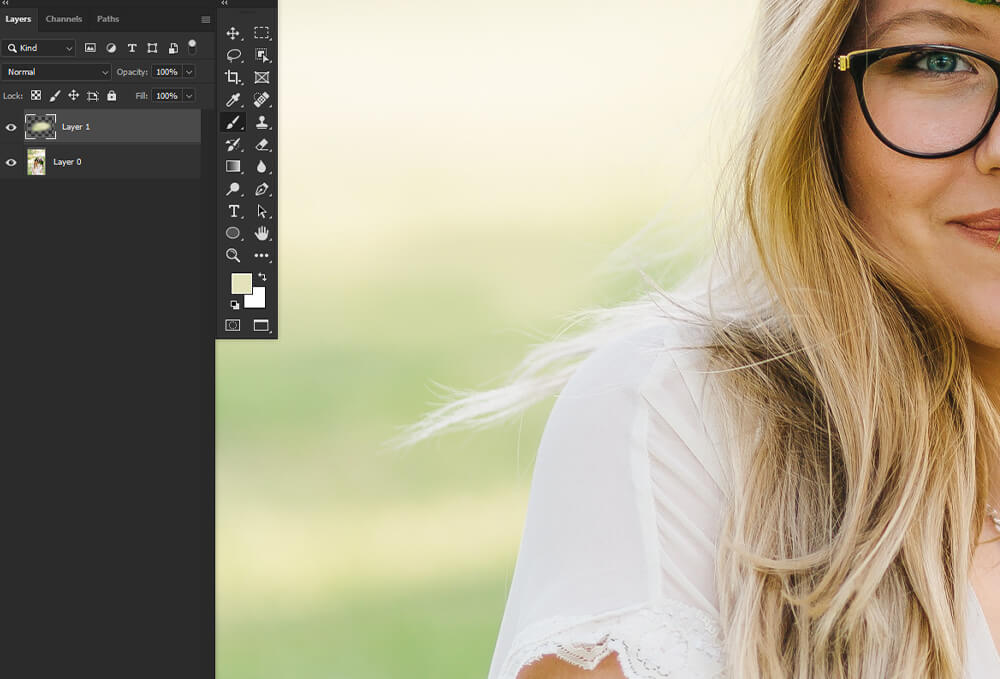
Now that your Brush is set up and you know how to select colors quickly, simply paint out the unwanted object or detail.
This works best on out-of-focus backgrounds because you don’t have to focus on painting any specific shape. You just need to get the blend of colors correct.
Conclusion
That is how to remove an object in Photoshop! Remember each tool has its strengths and weaknesses. Once you get a feel for when you should use each tool, removing objects becomes both quick and easy. You can also combine the different object removal tools and techniques, giving you infinite options and a chance to decide your own preferences.
Seamlessly removing objects is a must for photographers and digital artists alike—just be careful of repeating patterns, blurry pixels, and glitches like artifacts.


Leave a Reply