
How to Create a Network Using WordPress
No person is an island, and neither is a WordPress website. In some cases, you’ll have a bunch of sites that look different on the surface, but under the hood will share the same core files, themes, plugins, and more. For times like this, you’ll want to create a network within WordPress – otherwise known as a ‘Multisite’.
If you visit WordPress.com, you’ll see the Multisite functionality in action. However, your implementation doesn’t need to be on a global-level scale. Instead, you can run all of your sites from the same network. This can save you lots of time and resources, while still giving you the power and flexibility you want.
For this post, we’re going to show you how to create a network using WordPress, in only a few steps. Before this, we’re going to discuss what a WordPress network is in greater detail.
What a WordPress Network Is (Both as a Concept and Technical Implementation)
The concept of a WordPress network is a simple one to understand. Consider a single installation, complete with a selection of themes, plugins, and other settings you often turn to when spinning up a new WordPress site.
In lots of cases, you’ll use this template over again. This could be either as a defined ‘Blueprint’ (if you use a tool such as Local by Flywheel) or a ‘mold’ that you’ll clone or copy files from. If you run a number of sites from one hosting account, each of these sites will load the same elements, while bumping up your resource usage.
Instead, you could create a network of WordPress sites. Note that these sites don’t have to share similar content or focus, and the concept is different to managing separate sites together from a dashboard. Instead, they dip into a pool of common themes and plugins and share those instead. This way, each site will be unique, but won’t take up additional server resources.
However, there are some technical considerations you’ll want to understand before you begin to create a network of your own.
WordPress Multisite
Multisite is the WordPress way to create a network. However, this isn’t a system of separate WordPress websites using a shared cache of resources. Instead, each site on the network is a ‘virtualized’ one. Going deeper, each site doesn’t just share themes and plugins – they share core files too.
This means each sites won’t have its own directory as would a collection of single sites. However, you will find separate database tables and media uploads files for each site in your network.
Also, the other users of the network will have the potential to create sites, unless you specify otherwise. For you, it could be a straightforward way to create a new site. Even so, the ability to create a network isn’t going to be a viable option in some cases. Let’s find out more about this next.
Why You’d Want to Create a Network With WordPress
Before we get into why you’d want to create a network, it’s a good idea to discuss why you wouldn’t. Despite the apparent benefits, a network isn’t a good idea for sites that have interconnection.
For example, a single blog for a primary website might not suit a network, although it would suit using a subdomain. In contrast, that blog translated into other languages and hosted on the same network has potential.
What’s more, if your users have the need to install unique plugins or themes to a site (rather than select from the available pool), a network won’t be a good idea. This is a similar situation with sites on different hosts. A network in this case is going to be unworkable.
However, there are lots of superb reasons and use cases for using WordPress Multisite:
- You can install, update, and remove themes and plugins from one dashboard. This will make your entire network more secure, to boot.
- A network is a stellar way to give individual teams in your company some autonomy, while protecting the integrity of the network. For example, consider online news networks, global enterprises with worldwide branding considerations, and a reseller host with a number of users.
- You already know about the save in resources, but there’s also a time-saving element too. This is because the administrator can run all of the sites from the one dashboard. It can give you an ‘at-a-glance’ overview of the network, and simplify your decisions.
Of course, there are drawbacks to every system, but if your needs align with what a network will offer, you and your users can thrive. Over the rest of this post, we’ll show you how to create a network of your own.
What You’ll Want to Consider Before You Create a Network
Before you dive into creating your network, there are a few things to consider. First are the technical considerations. You’ll work with WordPress’ core files to set things up, so there are some aspects you’ll want to pay attention to:
- First, make sure you carry out a full backup of your single site. There are lots of options available, and almost all work with cloud providers too.
- If you want to change a live site to a Multisite, you’ll need knowledge of Secure File Transfer Protocol (SFTP) and a suitable client such as Cyberduck or FileZilla.
It’s worth noting that we don’t recommend you try to change a live site over to Multisite. Instead, you’ll want to export your site to a local or staging environment, work to make the changes you need, then push it live again.
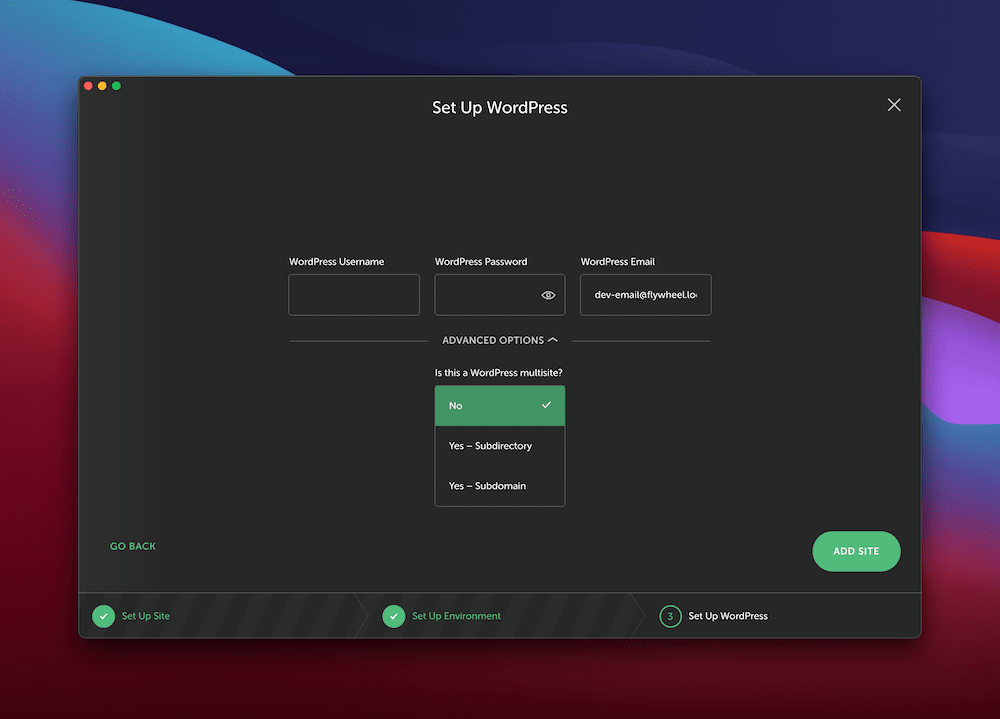
If you want to create a new site and run it as a network hub from the off, you might have success using a tool such as Local by Flywheel or DevKinsta. Both of these have a one-click option to set up a network:
This brings up another aspect to consider before you begin the process: the structure of your site’s URLs.
How to Decide Whether to Use a Subdirectory or Subdomain for Sites in Your Network
On the surface, this doesn’t seem to be a big question to ask. However, the WordPress.org support pages has an entire section on the technical differences between subdirectories and subdomains for your network.
We can sum this up in a few lines, as in most cases, you’ll know if you want to use subdomains. In summary:
- Subdomains need wildcard configurations to let users create new sites on the network.
- Subdirectories only need you to enable pretty permalinks – and most sites will do this as standard.
If this is your first time using Multisite or creating a network, we’d recommend using subdirectories. When you have more experience or specific needs, go ahead and configure your installation to accept subdomains.
How to Create a Network Using WordPress (In 4 Steps)
There are four steps to carry out in order to create a network. If you ever install a manual version of WordPress, some of these will be familiar:
- Enable the network for a single WordPress website.
- Create the network within WordPress.
- Alter some core files to accept the network.
- Begin to manage the sites on your network.
Again, you’ll want to have a full backup at the ready , in case you need to reinstall. Also, you may need some SFTP knowledge if you work on a live site.
1. Enable WordPress Multisite for Your Single Installation
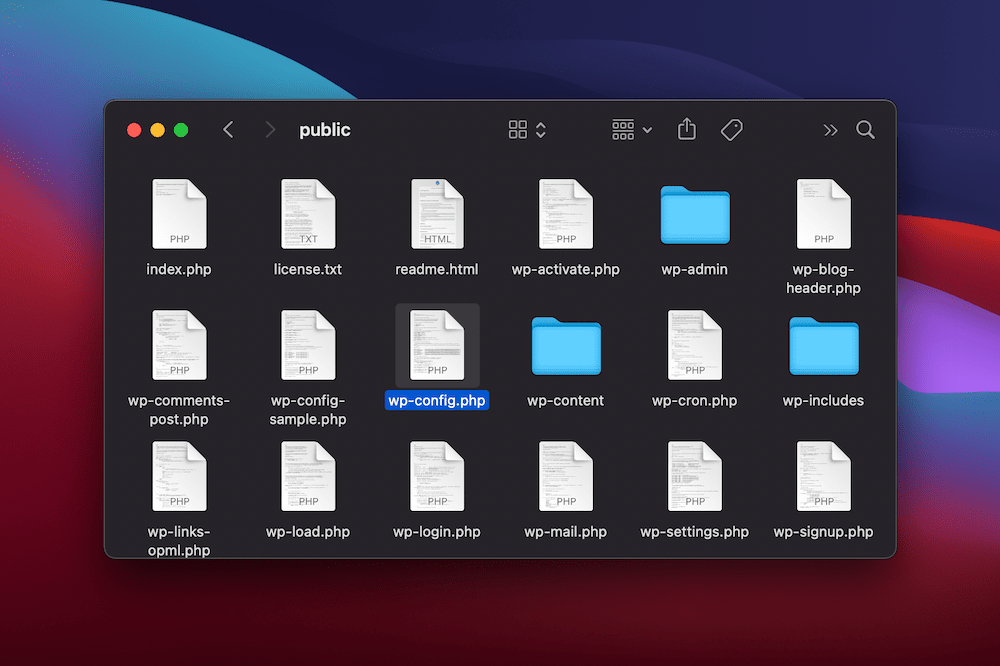
The first task is to tell WordPress that you want to create a network. To do this, you’ll want to access your site through SFTP (if it’s live) or your computer’s file manager (if it’s local). The file you want is wp-config.php, and it should be in the root directory for your site:
You can open this in whatever text editor you choose, even if that is Notepad or TextEdit.
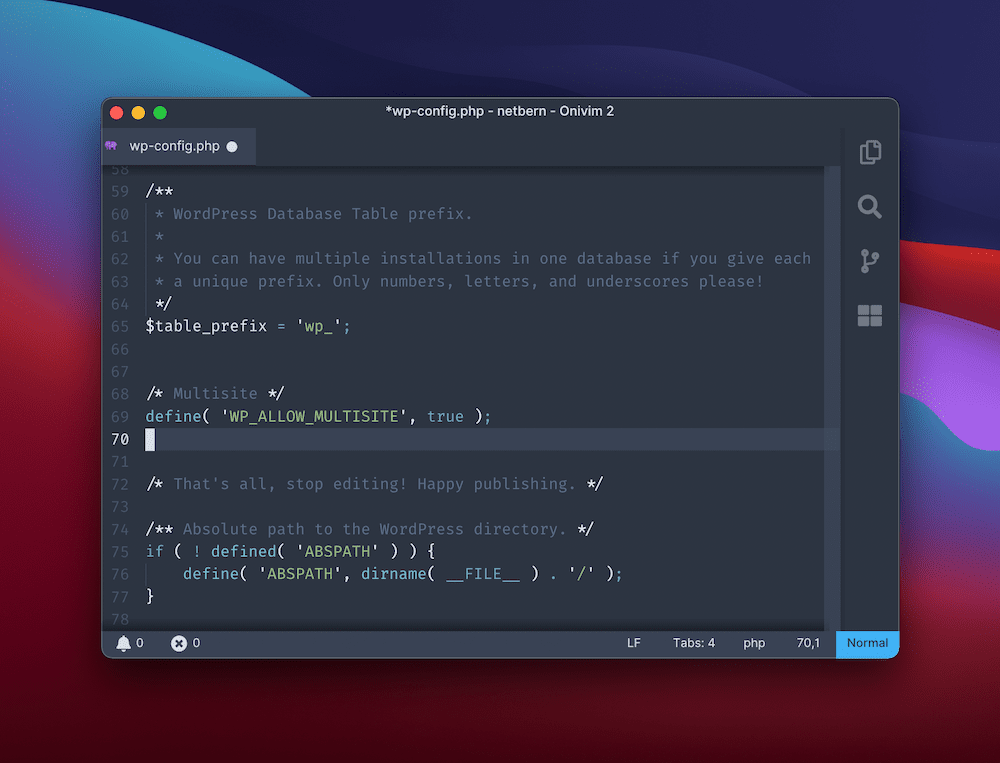
Once the file is open, head to the bottom, and write the following snippet above the /* That's all, stop editing! Happy publishing. */ line or any define or require functions:
/* Multisite */
define( 'WP_ALLOW_MULTISITE', true );
You can save your changes here and refresh your browser. While this prepares WordPress for a network, it doesn’t enable it. In the next section, we’ll do so.
2. Create a Network Within the WordPress Dashboard
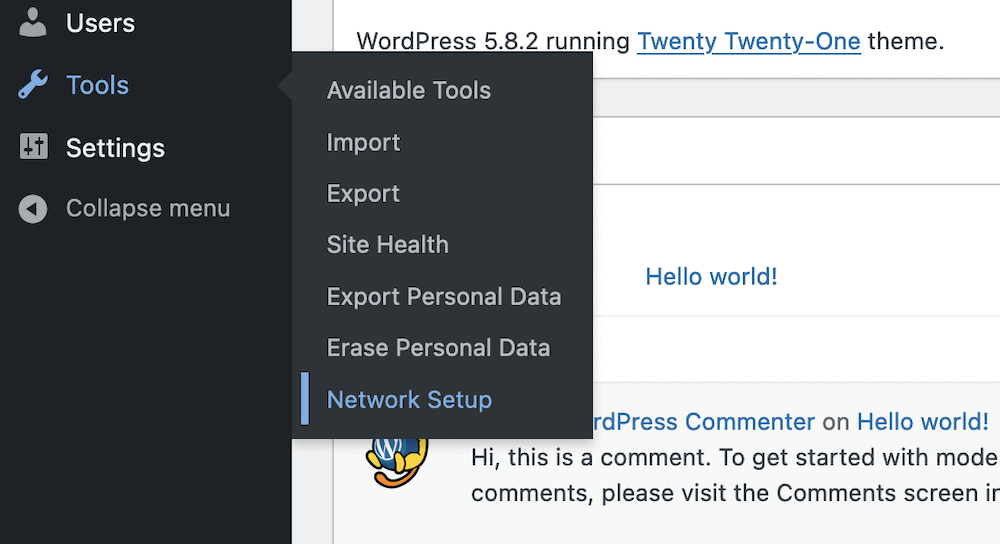
If you head to your WordPress dashboard, you’ll notice that there is now a new option under the Tools > Network Setup link:
Clicking this will bring you to the Create a Network of Sites screen. This will give you the chance to choose whether you use subdirectories or subdomains, name the network, and set an admin email address:
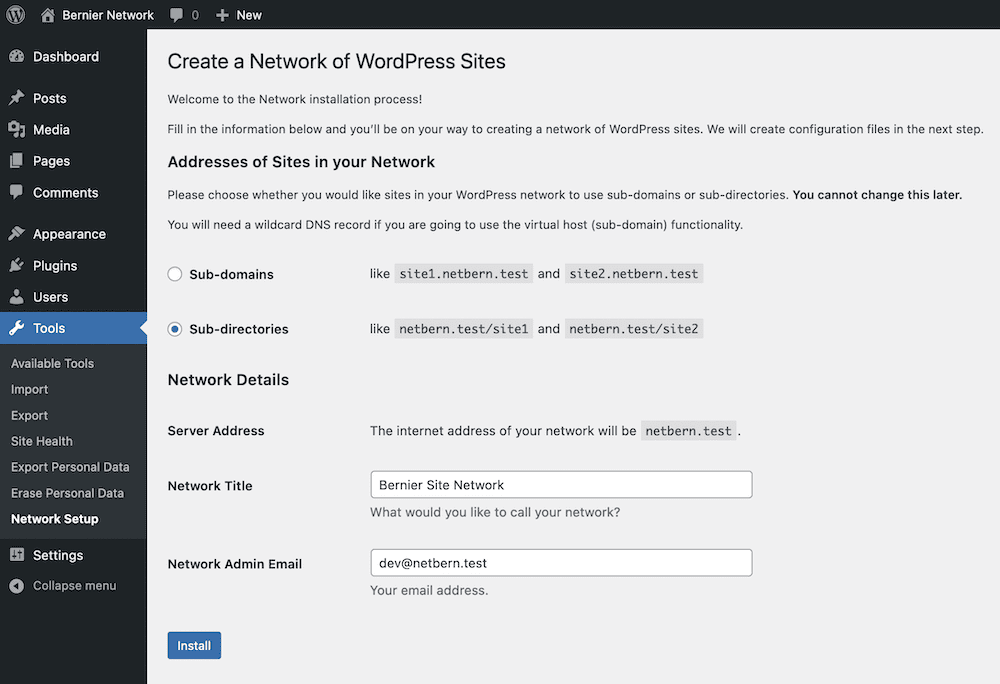
These options are straightforward. However, you may see some extra ones if you choose to update a live site to a networked one.
When you want to continue, click Install, and this will bring up another configuration screen.
3. Enable Your Network in the wp-config.php, .htaccess, and Nginx Files
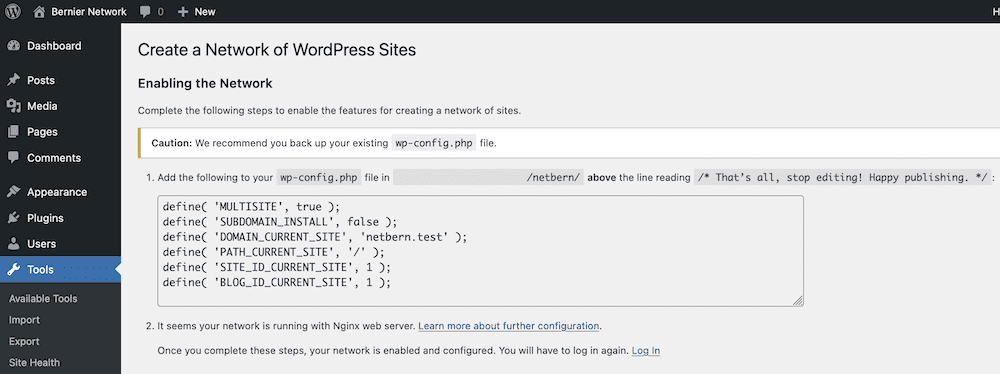
Once you configure WordPress to work as a network, you also need to enable it in a few other files. The exact combination depends on whether you run an Apache or Nginx server. Regardless, both server types will need alteration to the wp-config.php file again.
As such, open it up and add the following lines:
define( 'MULTISITE', true );
define( 'SUBDOMAIN_INSTALL', false );
define( 'DOMAIN_CURRENT_SITE', '<YOUR~DOMAIN~HERE' );
define( 'PATH_CURRENT_SITE', '/' );
define( 'SITE_ID_CURRENT_SITE', 1 );
define( 'BLOG_ID_CURRENT_SITE', 1 );
Again, you can save your changes. If you worry about getting this information right, WordPress provides a copy and paste version within the dashboard:
From here, you can look to configure your server. You’ll find that it’s less straightforward to configure Nginx servers for networks, and the WordPress.org support pages has a detailed article on Nginx and what you’ll need to do. In short:
Find the location of the Nginx files. This is often at the server root under the etc folder. However, if you use the Terminal on your local site or log into your web server through one, you can use the which nginx command to find the right right path.
- Add a block of code depending on your network structure to the the
global/wordpress.conffile. - For Apache servers, the process is smooth and simple: You add or replace code to your
.htaccessfile, and this will be on the same screen as yourwp-config.phpinformation.
Once you make the changes to either your Nginix configuration or your .htaccess file, you’ll need to log in again. At this point, your network is almost ready.
4. Administrate Your Network of Sites from Within WordPress
From here, the Administrator user role you would have is now a Super Admin. This gives you a new option within the WordPress dashboard My Sites:
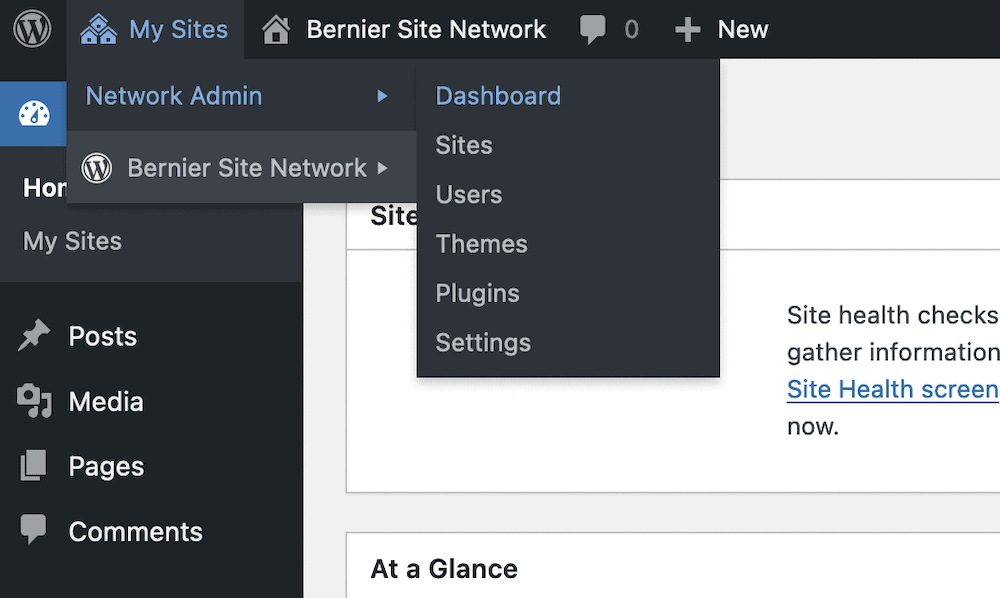
You’ll see the list of sites within the network here, along with a Network Sites option. The dashboard is simple to understand: You add to the network using the Sites > Add New option:
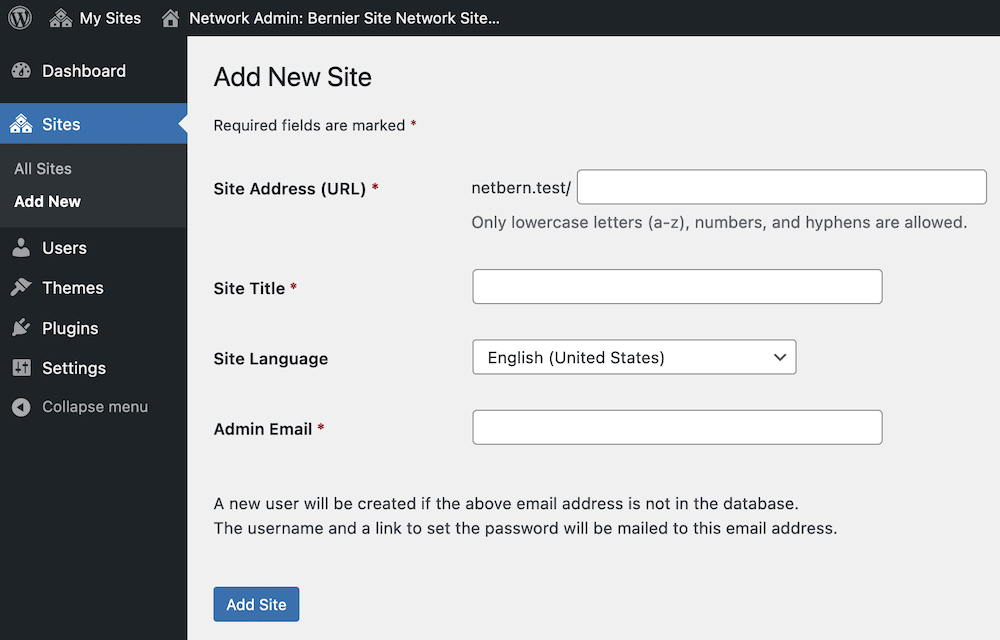
You’ll add a site address, title, and an administrator email, and when you click the Add Site button, this will carry out the rest of the process.
It’s also worth noting that if you check out Themes and Plugins pages, each one has the Network Enable or Network Disable option:
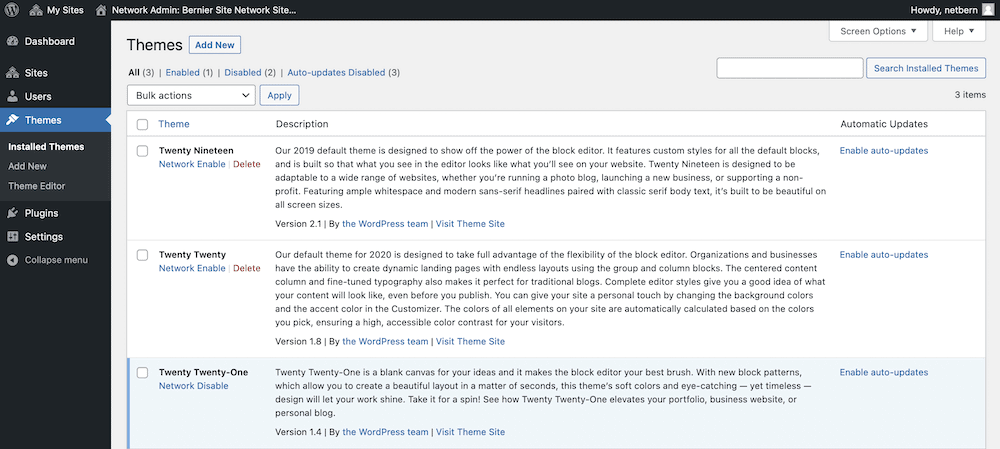
Of course, this will affect the options available within sites on the network:
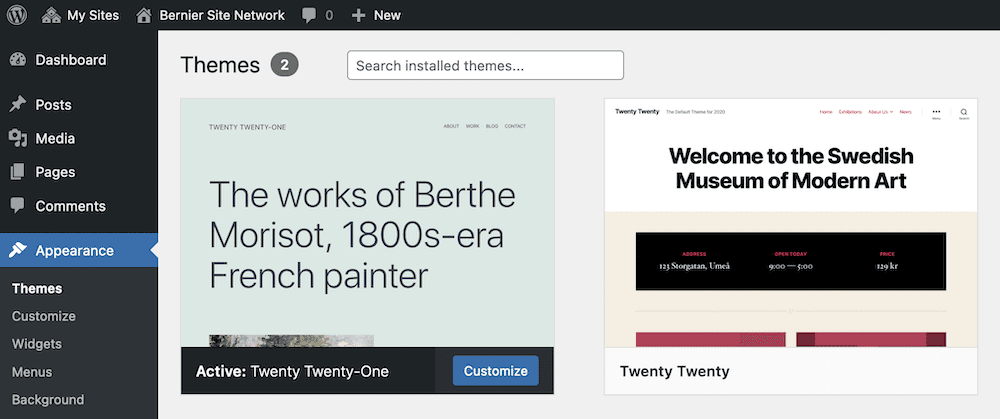
It’s also the same with plugins, and shows how you can manage the entire network from the dashboard, and keep everything more secure.
In Summary
Some WordPress sites you run might have common theme and plugin installs. Because you will often host them in the same place, you could decide to run a Multisite network. This is a fantastic way to manage all of your sites from a single dashboard, and it’s simple to set up too.
In this post, we’ve looked at how to create a network using WordPress. Once you decide on the structure and hierarchy, you can get down to business. You will likely need to alter a file or two, but other than that, a network is straightforward to set up.
Do you need to create a network with WordPress, and do you have any questions about the process? Let us know in the comments section below!
Leave a Reply