
DevKinsta Review: A Free Local Development Platform for WordPress Themes and Plugins
If you’re a WordPress developer or a freelancer or an agency working with client WordPress sites, you could benefit from setting up a local development environment.
Running a WordPress site locally means you can test out changes without the risk of overwriting data on the live site or accidentally allowing public access to a site that’s in development.
In this DevKinsta review, I’ll break down how DevKinsta makes it quick and easy to set up a local development platform on your Mac and PC, the features it offers, and some alternatives to consider.
What is DevKinsta?
DevKinsta is a free local WordPress development platform for Windows, macOS, and Ubuntu, developed by the team behind Kinsta hosting.
DevKinsta speeds up and simplifies the process of installing and developing local WordPress sites.
You can use the platform to develop WordPress themes or plugins or test any kind of WordPress site development or update before you make it live. If you’re a Kinsta customer, you can then publish your site directly to Kinsta and make it live.
DevKinsta Features
DevKinsta includes many features that make it a preferable alternative to installing a web server and setting up your local WordPress environment manually.
One-click WordPress site creation
Remember what a pain it was to install WordPress manually before web hosts started offering one-click installation? (Am I showing my age?!)
DevKinsta replicates this feature locally, enabling you to launch as many WordPress sites as you need (including multisite installations).
Support for PHP 7.2 – 8.0
DevKinsta supports the latest versions of PHP and lets you switch between PHP versions for testing.
Local email management
The platform includes a local SMTP server so you can test sending emails from your site and debug contact forms.
Database management tool
DevKinsta comes with a built-in database management tool, Adminer. You can use this tool to inspect WordPress database tables and edit them directly.
Integration with MyKinsta
Anyone can use DevKinsta for local development, but if you have hosting with Kinsta, it is even more useful.
You can directly download your live site from MyKinsta, use DevKinsta as a staging environment, and push your local site back to the live version on Kinsta when you’re finished testing.
Optimized local development stack
DevKinsta uses Docker to create a fast and secure local WordPress environment that’s automatically optimized for performance.
Multi-platform and multi-language
Windows, MacOS, and Ubuntu users can all install DevKinsta, and it supports 10 languages.
Local HTTPS support
DevKinsta works with HTTPS locally so you can build and test your site securely.
WordPress error logging
The platform includes built-in WP-DEBUG logs so you can log errors and debug your site easily.
Automatic updates
DevKinsta updates itself automatically so you’ll always be working with the latest features.
Downloading and Installing DevKinsta
So let’s take a look at the process of installing DevKinsta. Is it really is as easy as they claim?
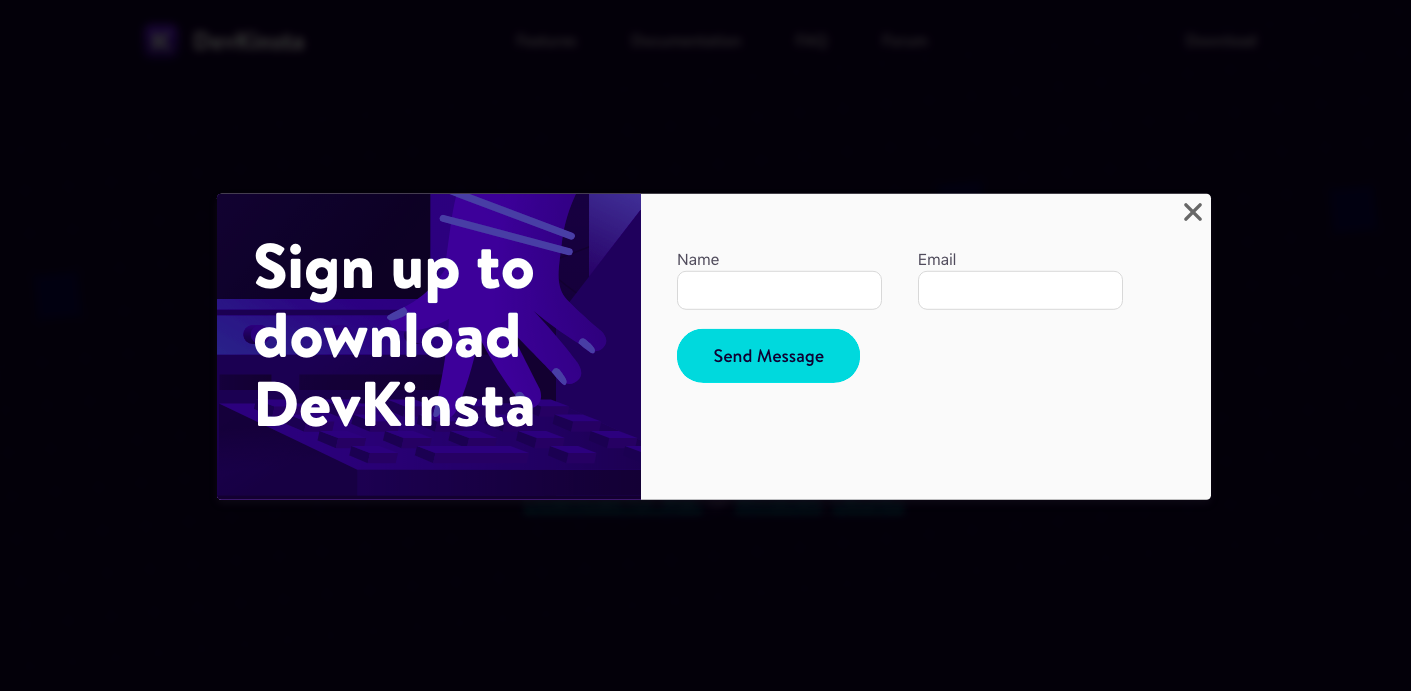
To download DevKinsta, just go to devkinsta.com and click the download link in the main navigation. You’ll need to enter your name and email to continue.
After filling out the form, the download should start automatically. The file is a .dmg if you’re on a mac or an .exe if you’re on a pc. I’m on a Mac and the .dmg file is about 96MB.
Once the file has downloaded, run it to install DevKinsta. If you’re on a Mac, you’ll also need to drag the app into your applications folder.

After you’ve installed DevKinsta, you can run it for the first time. This will take a few minutes as the application downloads and installs Docker. You may also have to grant a few permissions and enter your password.
If you get an error message (like I did) while the software is trying to download Docker, check that your machine meets the minimum platform requirements. If so, you can manually install Docker and then go back to try installing DevKinsta again.
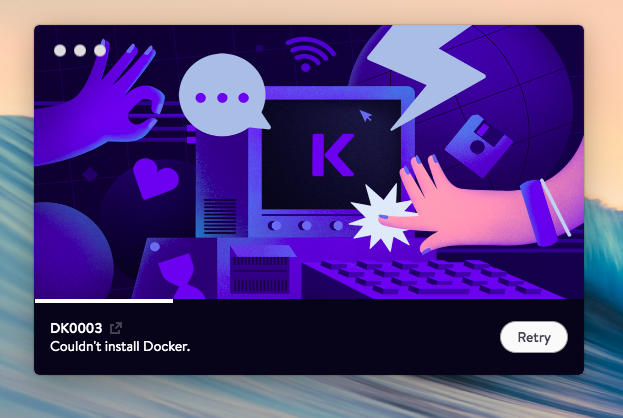
Once Docker is installed, DevKinsta will start it (you can skip the tutorial) and update its images. This takes a while, so have patience! You might want to go and make a coffee while DevKinsta is doing its thing but you’ll only have to do this once.
After Docker has finished setting up, you should be taken the DevKinsta dashboard where you can create a new site.
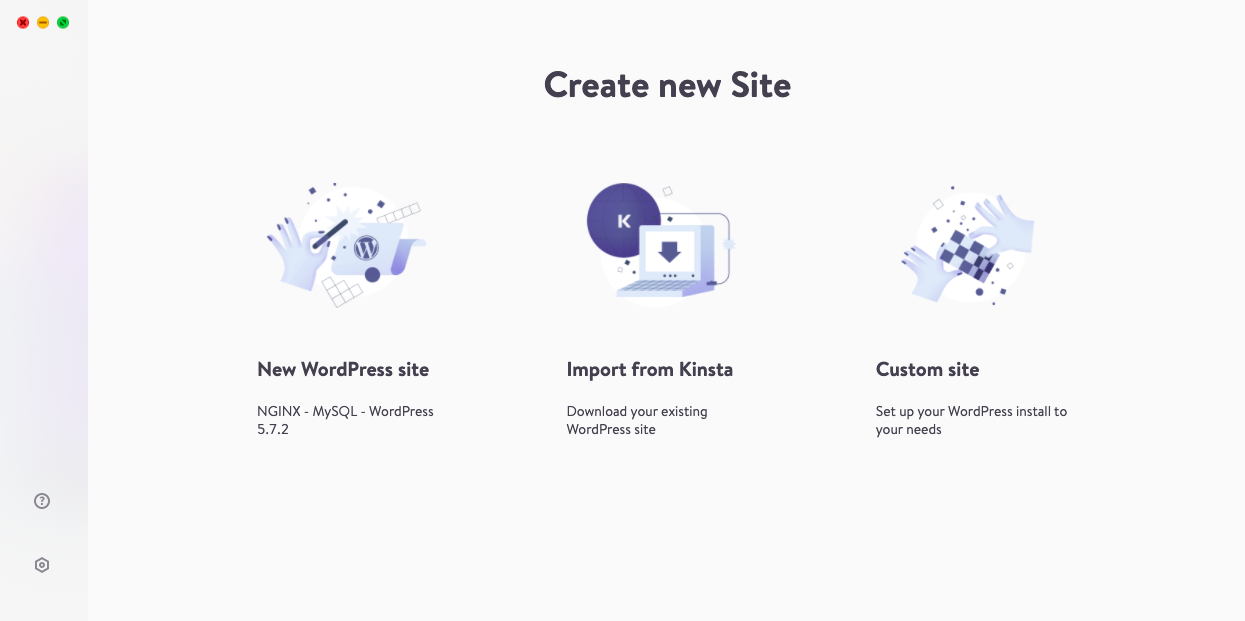
Creating a WordPress Site
If you choose the option to create a new WordPress site, you’ll be taken through a wizard. This should seem quite familiar if you’ve ever used a one-click WordPress installer on your hosting environment.
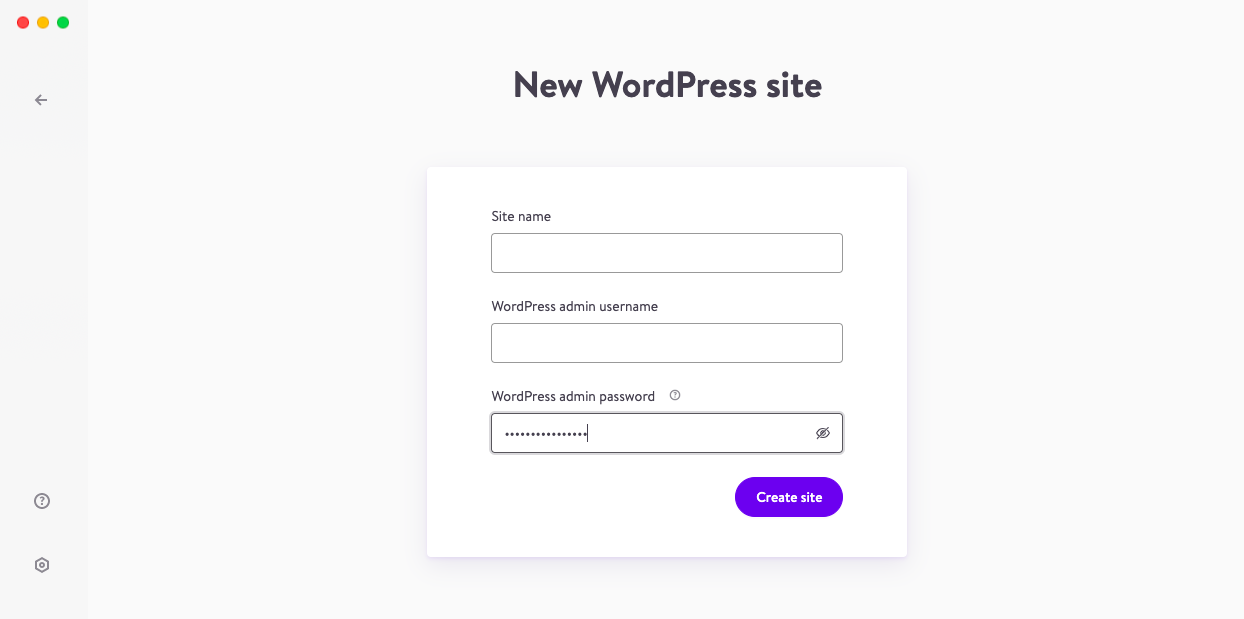
Just fill out your site name and an admin username and password and DevKinsta will go ahead and set up a new WordPress site. This will take a few minutes, depending on the speed of your machine. If you use the auto-generated password, make sure to take note of it, as you won’t be able to access it later.
Once WordPress is installed, DevKinsta will take you to the main admin panel. Here you can see a preview of your new site along with some basic info about the webserver setup, database, and WordPress version.
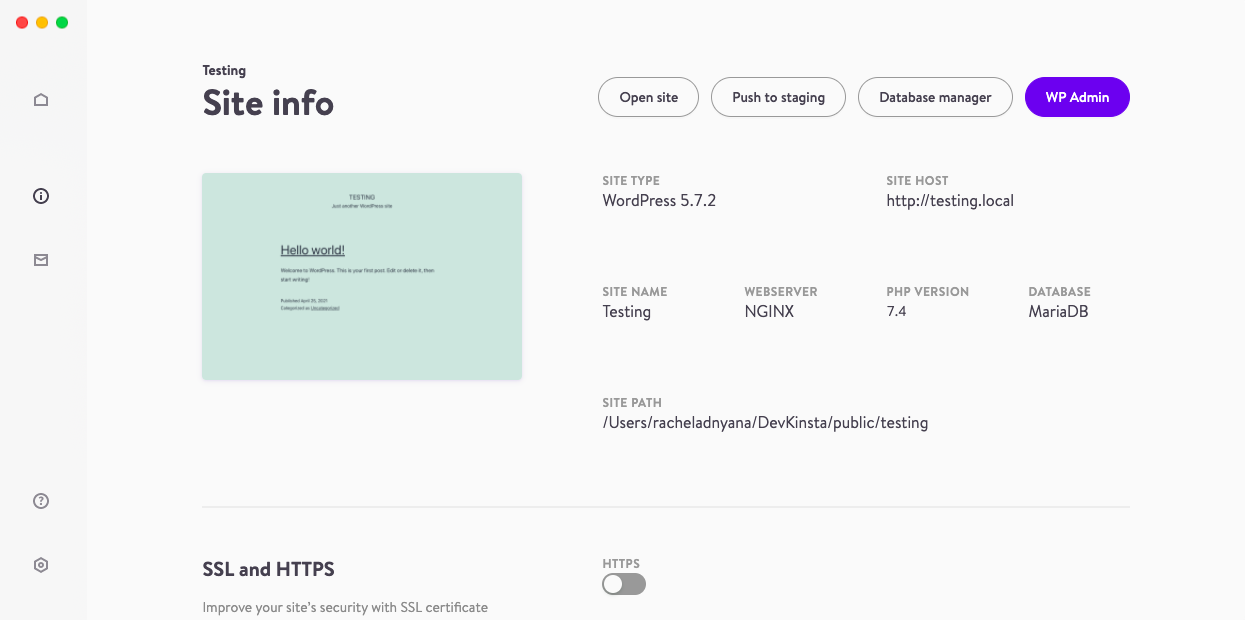
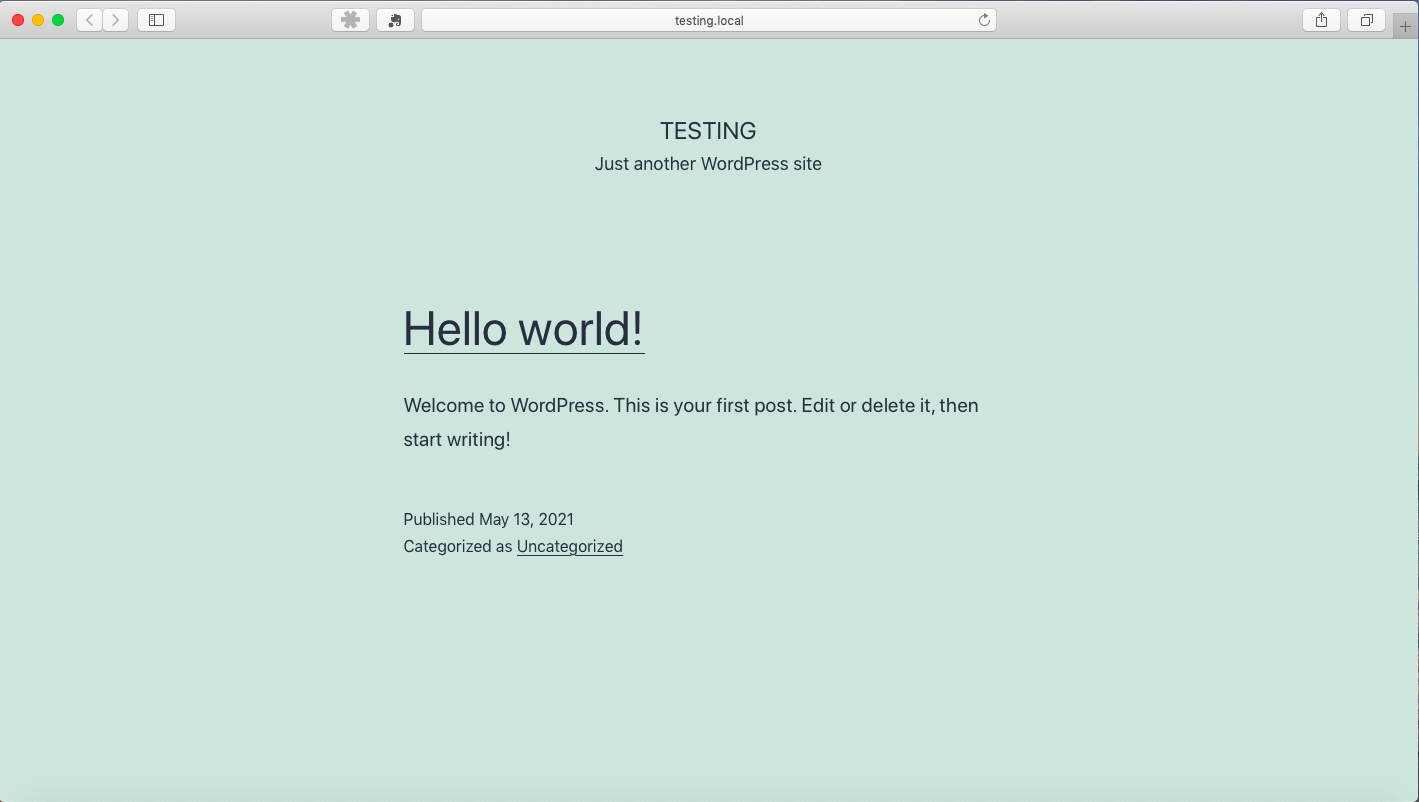
You can also see the site path, which you can paste into your web browser to view the live site. You can also click on the site preview thumbnail and it will open it in the browser directly.
From here, if you want to test out a WordPress theme or plugin or make any other changes to your site via WordPress, you can continue just as you would with a hosted WordPress site.
Managing your Site
From the DevKinsta admin panel there are direct links to:
- Open the site
- Push it to staging
- Open the database manager
- Go to the WP Admin panel.
You can also toggle HTTPS on and off and enable or disable WP_DEBUG.
If you click the home icon in the main dashboard navigation on the left, you can see a list of all your local sites. From this list there are shortcuts to open the site, WP admin for each site, and the local folder containing all the files for the site.
You can also open the database manager for each site and delete the entire site.
This is also the screen from which you can add a new site as a fresh installation of WordPress.
Database Management
Adminer, the database management tool that comes with DevKinsta, is a web-based platform that looks similar to phpMyAdmin.
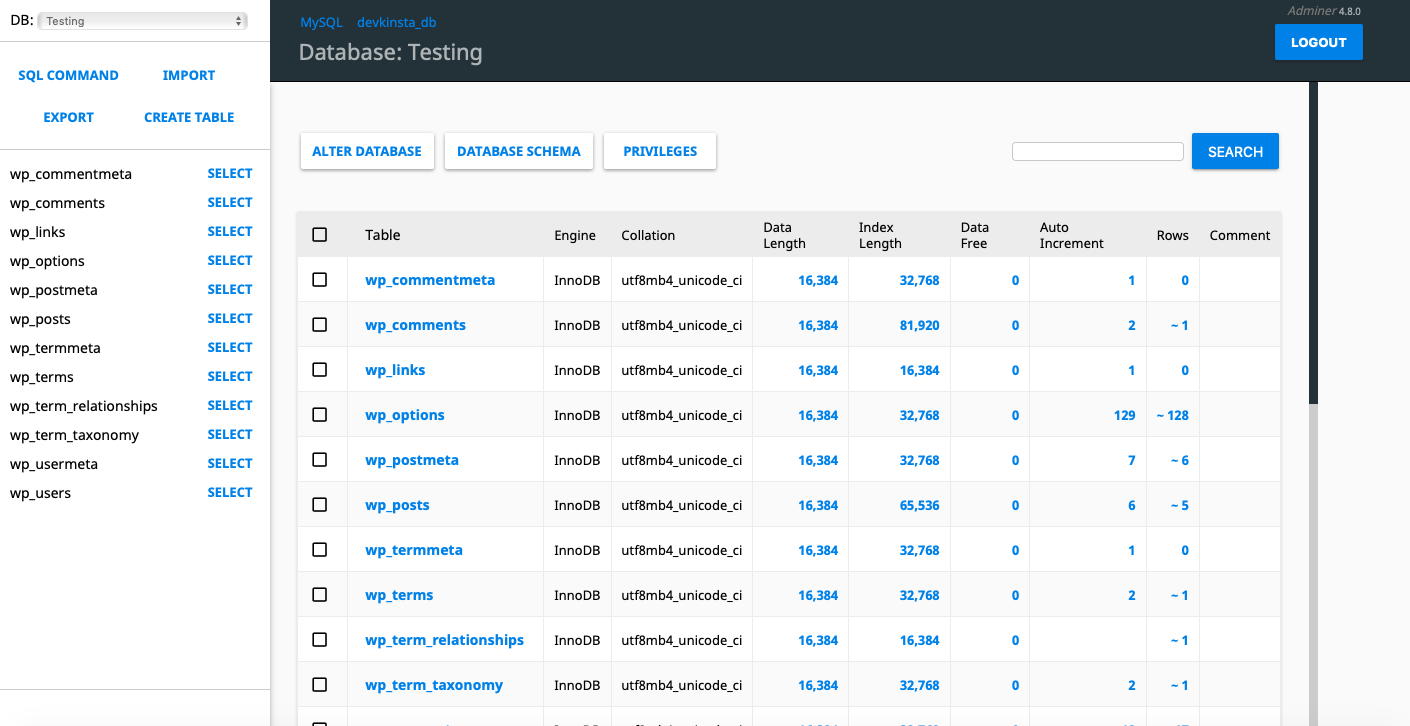
If you’ve done any database management with your hosted sites, this tool should seem familiar. You can easily browse to different tables, view and edit data, create new tables, import and export databases, and run SQL commands.
Testing Email
When you’re in the site overview on your DevKinsta dashboard, you can access your local email by clicking the envelope icon in the main navigation.
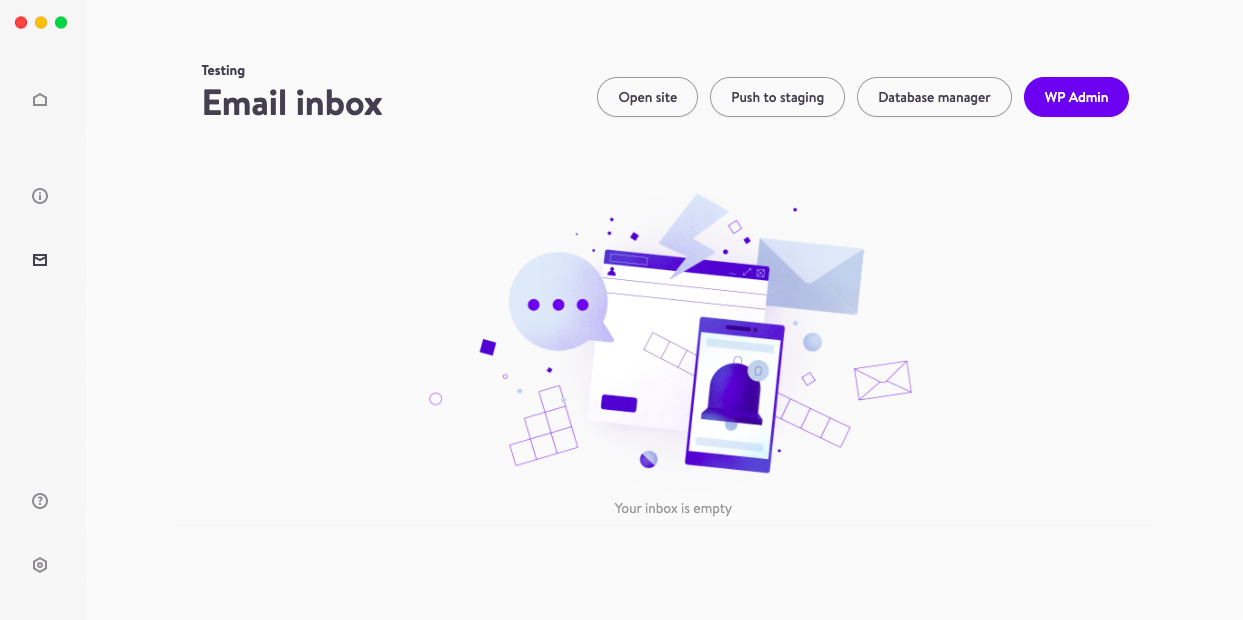
If your site generates any emails, they’ll end up here.
I tested this out by installing a contact form plugin on the local site I just created and sent a message.
Unfortunately, my inbox remained empty. I had a quick Google and look through the community forum but didn’t find anything that helped me to troubleshoot this problem.
DevKinsta Vs. Local by Flywheel
If you’re looking into different options for local WordPress development, you might be wondering how DevKinsta compares with Local by Flywheel.
The local development experience is very similar using the two tools. Clearly, Local is a better choice if you’re using Flywheel or WP Engine hosting and it makes sense to use DevKinsta if your site is hosted on Kinsta. But hosting aside, what’s the difference between the two tools?
Local has been around for longer, as it was launched in 2019. DevKinsta has only been available since early 2021, so it’s still in its early versions.
Because of this, Local offers some additional features like an image optimizer and a link checker. However, it’s important to note that some of the advanced features are not available in the free version of the tool.
Apart from that, the functionality of the two tools is very similar. The main difference is that Docker powers DevKinsta, while Local installs each piece of the hosting environment individually.
DevKinsta claims that this makes the system more secure and allows for easier updates and bug fixes, while Local maintains that virtualization with Docker impacts performance.
DevKinsta FAQs
You don’t necessarily need to buy web hosting to create a WordPress site. Instead, you can install WordPress on your local machine and develop locally. This can be useful if you have an unreliable internet connection or you want to keep a site private and off the web until it’s ready for launch.
To run WordPress locally, you’ll need to install a web server and database software. You can do this manually but it’s much quicker and easier to use a local development platform like DevKinsta to manage all the backend setup for you.
Start by downloading DevKinsta and run the installer. The app will take 5-10 minutes to download required files.
You can then launch DevKinsta and choose to either build a new WordPress site or import an existing site from Kinsta.
Complete each step of the wizard and DevKinsta will update the local webserver settings, create a MySQL database, install WordPress, and update your hosts file.
DevKinsta is a local development platform for anyone who wants to work on websites locally on their PC or Mac or develop WordPress themes or plugins. DevKinsta is a useful tool for developers, agencies, designers, and freelancers.
You can run DevKinsta on PCs running Windows 10 or a Mac running MacOS 10.14 or newer. You’ll also need at least 5GB of disk space and 2GB of memory.
DevKinsta is a free platform and doesn’t have live chat support but there is a free community forum where you can search for help topics or ask questions.
No, currently DevKinsta is a local development platform for WordPress only.
Yes, DevKinsta includes a local email application called MailHog. This will enable you to test if emails generated and sent from your site are working properly.
DevKinsta sends emails to the local machine only and you can’t send them to an external mail server.
Final Thoughts
DevKinsta is a great tool for streamlining your workflow when you’re developing and testing WordPress sites, themes, and plugins locally.
If you’ve never worked on a WordPress site locally because you think it’s too complicated or you don’t understand the benefits, it’s definitely worth downloading DevKinsta and giving it a whirl.
Once you have a local development environment on your machine you can work from anywhere, even if you don’t have an internet connection. Developing locally is much safer and more secure than working online.
For example, if you want to test out a new plugin or theme, it makes sense to try it out on a local version of your site before making the changes live.
If you’re a WordPress developer or designer or an agency or freelancer working with WordPress sites for clients, give DevKinsta a try and see how much easier it is to develop and test site changes. It’s also much cheaper working locally than paying for hosting costs for dozens of sites.
Naturally, if you’re a Kinsta customer, you’ll get the most out of this tool as it integrates so seamlessly with the online hosting environment. But even if you’re using another company for hosting, DevKinsta is still a handy tool.
I did find the setup process a little buggy. Apart from the delay of having to install Docker manually, there were a couple of other points where the installer failed.
Once DevKinsta was installed and the WordPress site was up and running, I found it quick and simple to use. The user interface is also attractive, simple, and intuitive.
There are obviously a few bugs to sort out (I never did figure out why the email feature wasn’t working for me!) However, this software is still only a few months old so some issues are to be expected.
Kinsta already has a great reputation for providing world-class hosting services so my expectations were high for this tool. While there are still obviously improvements to be made, I’m looking forward to see how it develops in the future.
You can download DevKinsta for free here and try it out yourself.
If you’ve used DevKinsta, feel free to share your experience in the comments!
Leave a Reply