How to Use the Quick Selection Tool in Photoshop
The Quick Selection tool in Photoshop has a bad reputation, but it can be a photo editor or artist’s secret weapon! That’s because Photoshop’s quick selection tools are rough around the edges. They can extract complex images in just a few clicks with a few minor regimens and tweaks.
It’s excellent for pinpointing adjustments and creating quick mockups. It can be surprisingly accurate on simple shapes and solid colors. If you’re not using the Quick Selection tool in Photoshop, you’re missing out. Let’s look at each quick selection tool, how to use it, and when might be the best time to use any of them.
What Are Quick Selection Tools in Photoshop?
The quick selection tools in Photoshop are a group of tools that automatically select pixels based on color and contrast. Each quick selection tool works best with images with well-defined edges and high-contrast colors. Three tools qualify as quick selection tools.
Quick Selection
The Quick Selection tool itself. In Photoshop 2022, you’ll find the Quick Selection tool on the Tools panel. By default, it will be the fourth option below the Polygonal Lasso Tool. The Quick Selection icon is a paintbrush with a circle of dotted lines around the tip.
The Quick Selection tool in Photoshop is ideal when you want to make a fast selection where accuracy is not as important, like creating quick mockups of images. It also works well for selectively adjusting a section of your image.
Object Selection
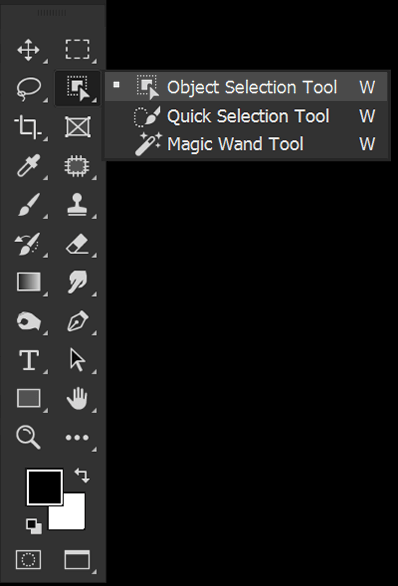
The Object Selection tool was introduced in Photoshop 2020. The Object Selection tool will identify objects based on well-defined, high-contrast edges. Object Select will highlight what it deems to be an object in blue as you move your mouse around an image.
The Object Selection tool also houses Select Subject in its upper Options bar. It’s best used for selecting objects that are in focus and well-defined. The Subject Select is best used on people subjects, though it can also select animals.

Magic Wand
The Magic Wand tool selects pixels based on color and tone. When you select an area using the Magic Wand tool, it will select pixels similar in tone and hue. You can control the Tolerance, which controls how different a pixel can be before being excluded from the selection.
The Magic Wand tool is ideal for selecting large areas of similar color, like skies.
Select and Mask & Refine Edge Brush
The Refine Edge brush is found in Select and Mask. You can enter Select and Mask by choosing a quick-select tool and choosing the Select and Mask button in the upper Options bar.
Select and Mask is where you can refine the edge created using any quick selection tools. You can add or remove from a selection and refine hair and smooth edges.

How to Use the Quick Selection Tool In Photoshop
Step 1: Choose the Quick Selection Brush
Select the Quick Selection tool in the left-hand side Tools bar. It will be the fourth tool in the stack. If you don’t see it, Right-click on whatever quick selection tool is active to open a list of all three quickie selection tools. The Quick Selection tool’s icon is a paint brush.
The primary setting for the Quick Selection tool is toggling Enhance Edge on or off. Enhance Edge will automatically smooth the selection.
Enhance Edge can be helpful when selecting very smooth objects like a sphere. But Enhance Edge can be less ideal when selecting sharp or complex items like hands. I like to keep it off, but you can try it both ways.

Step 2: Drag the Brush to Create a Selection
Now, drag the Quick Selection brush over the subject you want to select. You can increase and decrease the Quick Selection Brush size using the [ and ] keys.
As you drag the brush, Quick Select will select more pixels.

Step 3: Edit Your Selection
By default, you can click to add to a selection without holding down a key.
To take away from a selection, hold it and click on the portion of selection you want to be removed.
The Quick Selection tool will always try and snap to well-defined edges, so you don’t have to be overly accurate with where you click.

Step 4: Create a Layer Mask
To use your selection to extract an object, you can add a Layer Mask to the layer. You can find the Add Layer Mask button at the bottom of the Layer’s Panel.
The layer mask will automatically take the shape of the Selection.

How to Use the Object Selection Tool in Photoshop
Step 1: Choose the Select Object Tool
Select the Object Selection tool in the left-hand side Tools bar. If not visible, Right-click on whatever quick selection tool is active to open a list of all three quickie selection tools. The Object Selection tool’s icon is a square with a pointer.
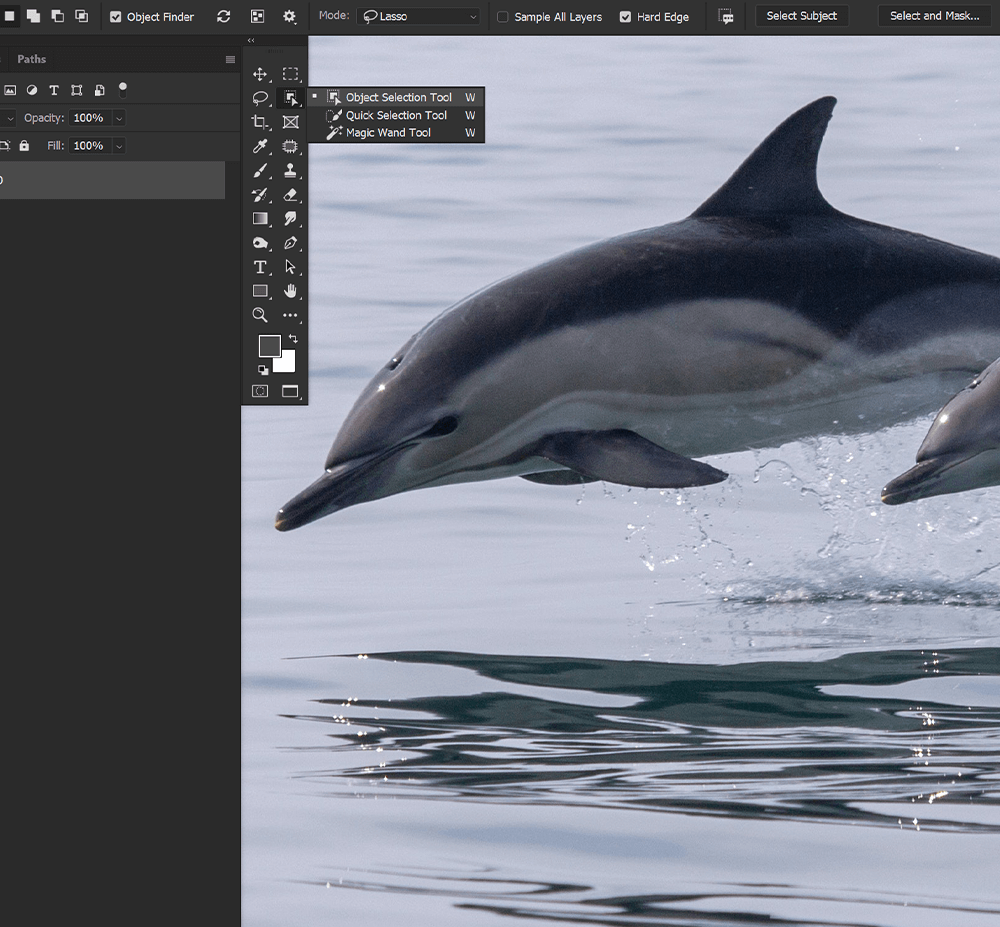
First, make sure Object Finder is checked. Object Finder tells Photoshop to look at the whole image for potential objects.
Next, select your Mode, either Rectangle or Lasso. This will control how you select the area with the object. I prefer the Lasso mode, but you can try both.
Step 2: Select Your Object using Object Finder
If Object Finder is checked, Photoshop will scan the image and detect any possible objects. Hover your mouse over an object. If Photoshop sees it as an object, Object Select will highlight it in blue.
Click to create a selection automatically.
You can also toggle Show All Objects on and off using the Show All Objects icon in the upper Options toolbar. The icon is of three squares.

Step 3: Select an Object Manually
You can select the area using your mouse if you want to manually tell Photoshop where to look for an object.
Depending on the set Mode, you will have either a rectangle or a free-style lasso.
Mask a rough selection around the area with the object, and Photoshop will snap to the object’s edge.

Step 4: Remove From & Add to a Selection
If you want to select multiple objects simultaneously, hold Shift and select another object to add to the selection.
To remove an object from a selection, hold Alt and click on the object you want to remove.

Step 5: Select People Using Select Subject
If you want to select the main subject of an image, you should use Select Subject. Select Subject works particularly well on people subjects.
With any of the three quick selection tools active, find the Select Subject button in the upper Options Bar.
Choose Select Subject, and Photoshop will create a selection around what it thinks to be the image’s main subject.
How to Use the Magic Wand Tool in Photoshop
Step 1: Choose the Magic Wand Tool
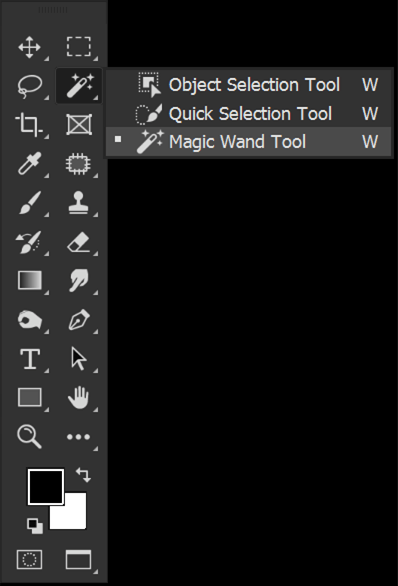
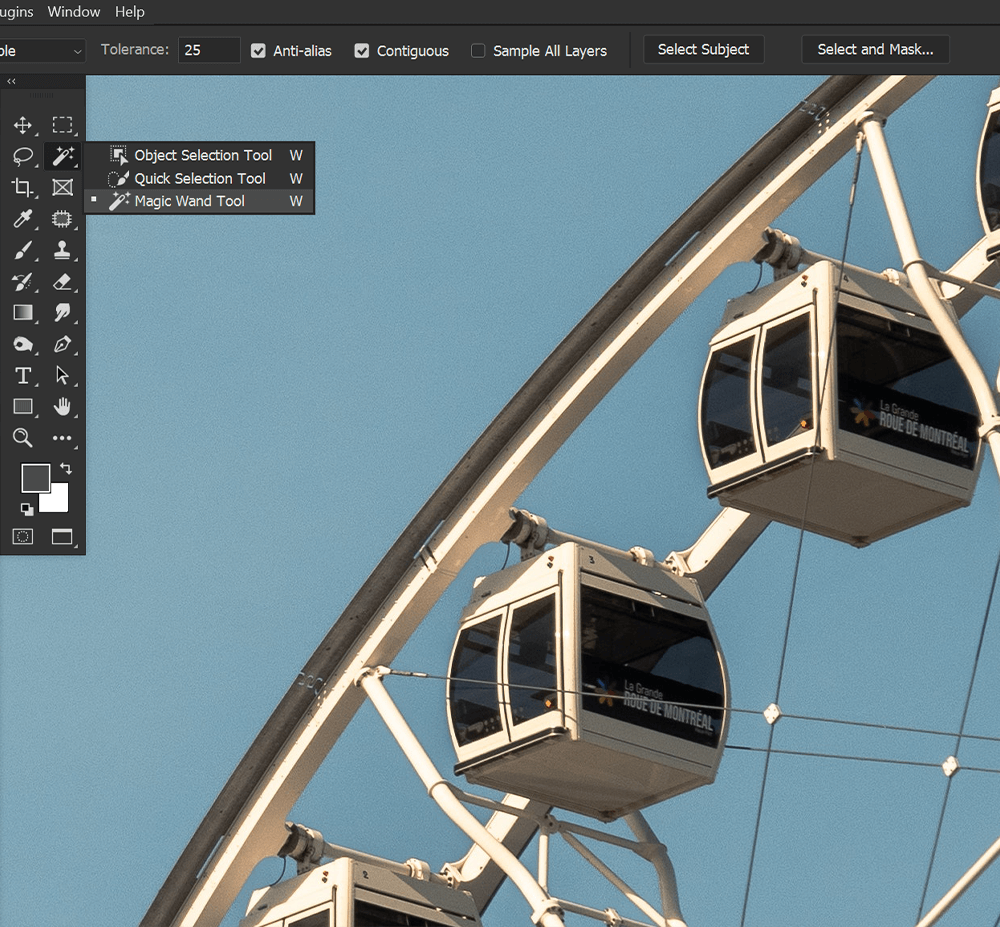
Choose the Magic Wand tool in the left-hand side Tools bar. If not visible, Right-click on whatever quick selection tool is active to open a list of all three quickie selection tools. The Magic Wand tool’s icon is a magic wand surrounded by stars.
The primary setting you’ll want to adjust when using the Magic Wand tool is the Tolerance level. Tolerance tells Photoshop how much should be selected. The higher the Tolerance, the more selected.
I found a Tolerance of 25 to work well for our example image. However, you can go all the way up to 255. Every image will call for a different level of Tolerance.
Step 2: Click and Select an Area
With the Magic Wand tool active, click on an area you want to be selected. The Magic Wand tool works best with larger regions of similar color and tones.
For our example image, I want to extract the Ferris wheel, but I’ll click to select the sky, not the Ferris wheel itself.

Step 3: Add to & Remove From a Selection
After your initial click, if you click again, a new area will be selected, and your first selection will disappear.
To further add to a selection, hold down Shift and click on the area you want to add.
To remove from a selection, hold Alt and click.

5. How to Use the Select and Mask & the Refine Edge Brush in Photoshop
Step 1: Enter Select and Mask
Once you’ve created your selections and added a Layer Mask, you’ll have your extracted subject or object. However, they will likely need some refinement using Select and Mask.
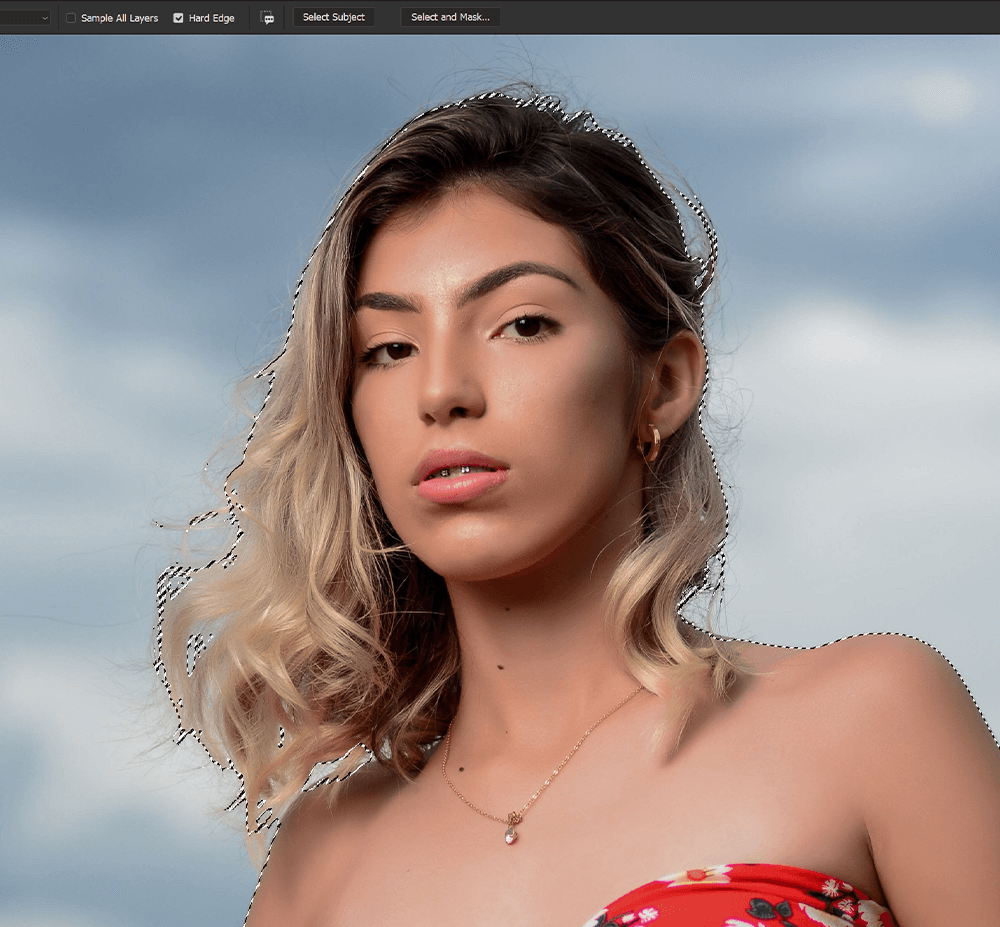
Below, the model was selected and extracted using the Object Select button and a layer mask. Select Subject would have done a better job; however, this will give us a clear view of how Select and Mask works.
You can enter Select and Mask by choosing any quick-select tool and choosing the Select and Mask button in the upper Options bar.
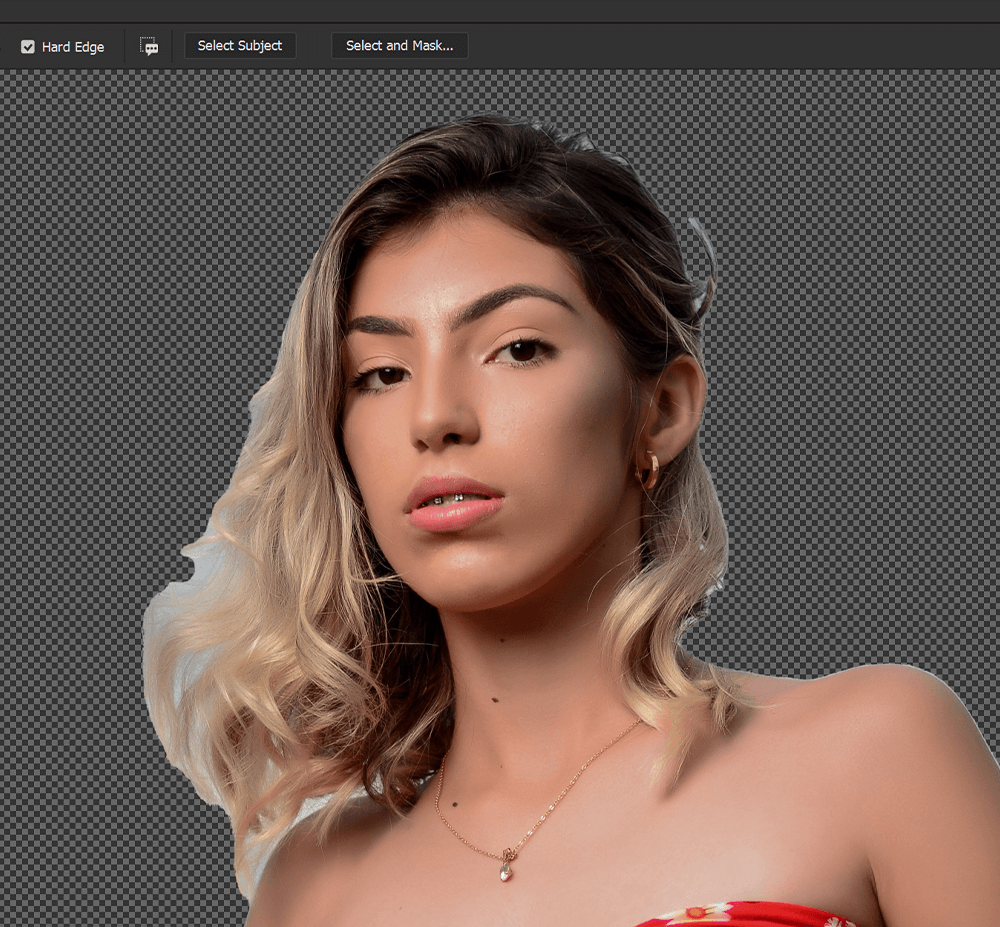
Step 2: Refine Hair in Select and Mask
One of the most helpful tools in Select and Mask is the Refine Hair button found in the upper Option bar while in Select and Mask.
Click the button, and the hair will automatically become more refined and accurate.
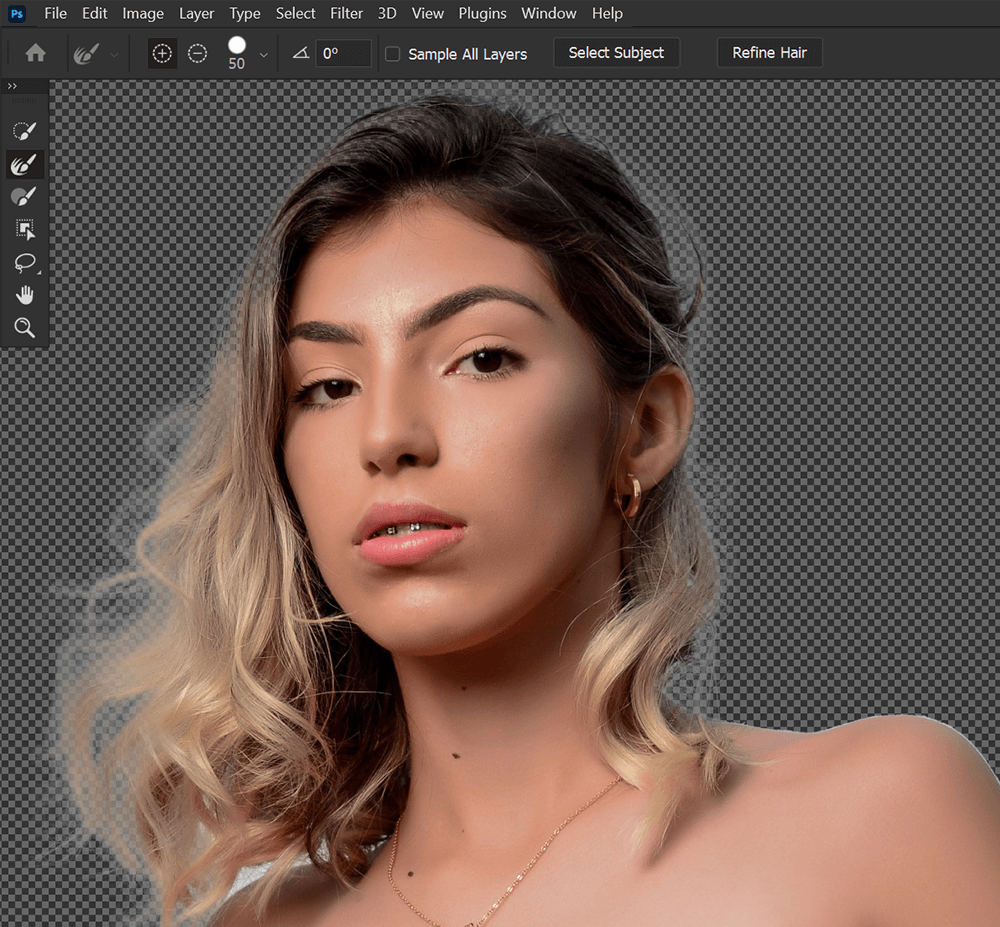
Step 3: Add to and Remove from Mask
If you want to add or remove from your Layer Mask, select the Refine Edge brush found on the left-hand toolbar.
Next, Under Edge Detection, toggle On Smart Radius. Set Radius to 3-5 pixels. You can try different Radius settings. I find 4 pixels work for most things.
Now, you can drag the Refine Edge brush over the areas you want to be selected and masked.
You can remove part of a mask by holding Alt and clicking and dragging.
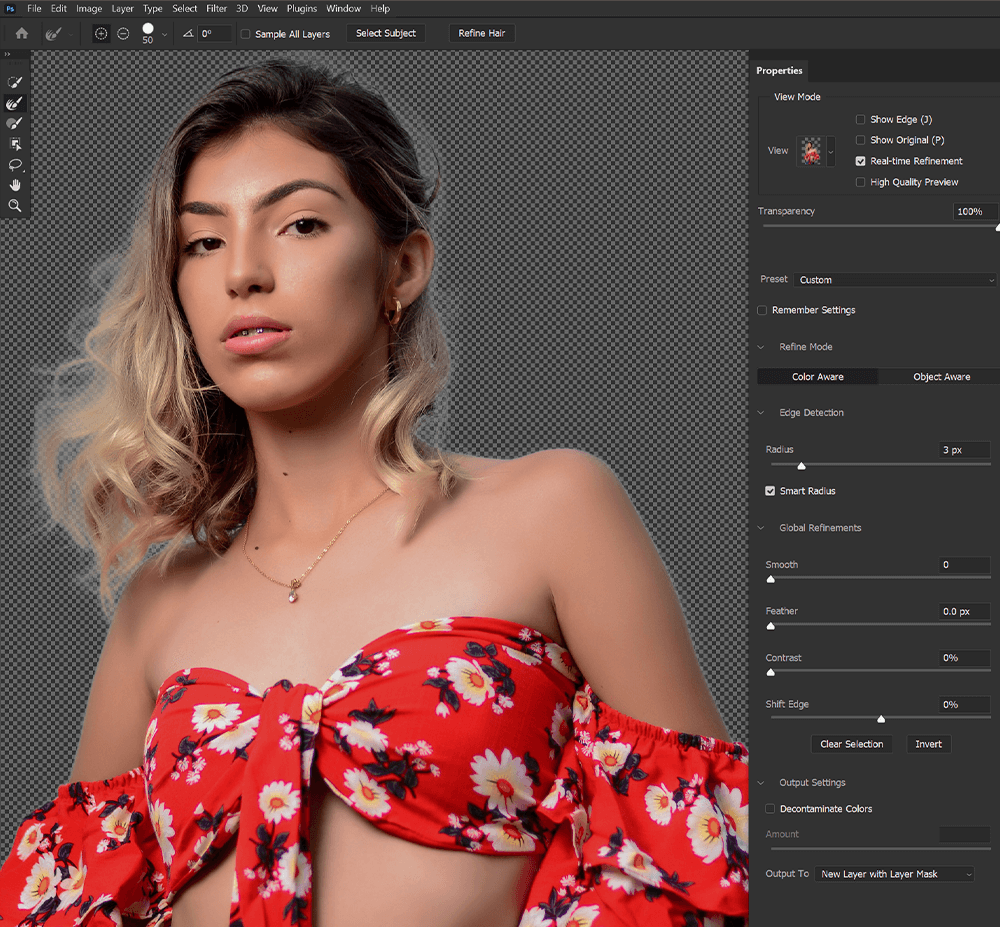
Step 4: Remove Fringe Edges
Finally, you can remove any leftover background color, also known as fringe edges, by going to Output Settings in the right-hand panel.
Toggle on Decontaminate Colors, setting the amount to somewhere around 50 to 100%
The amount will depend on the image and how much leftover background is visible. It’s best to try and set it to as low as you can.
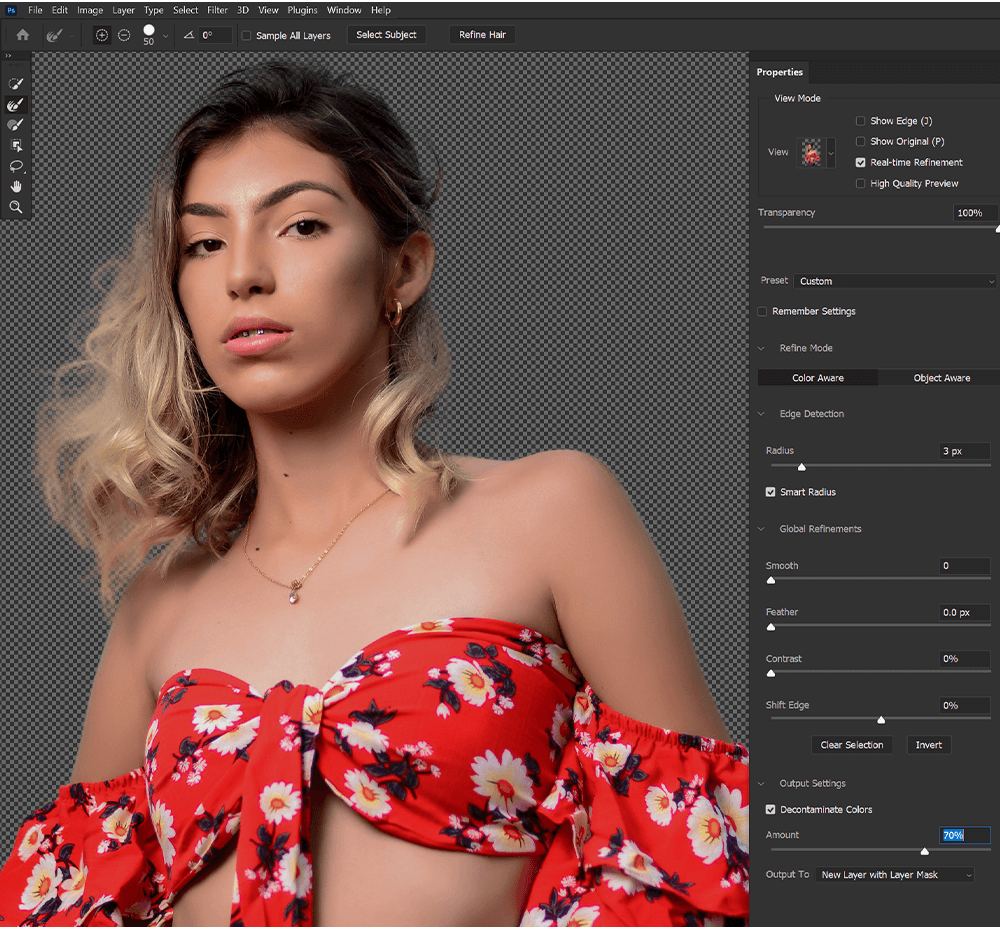
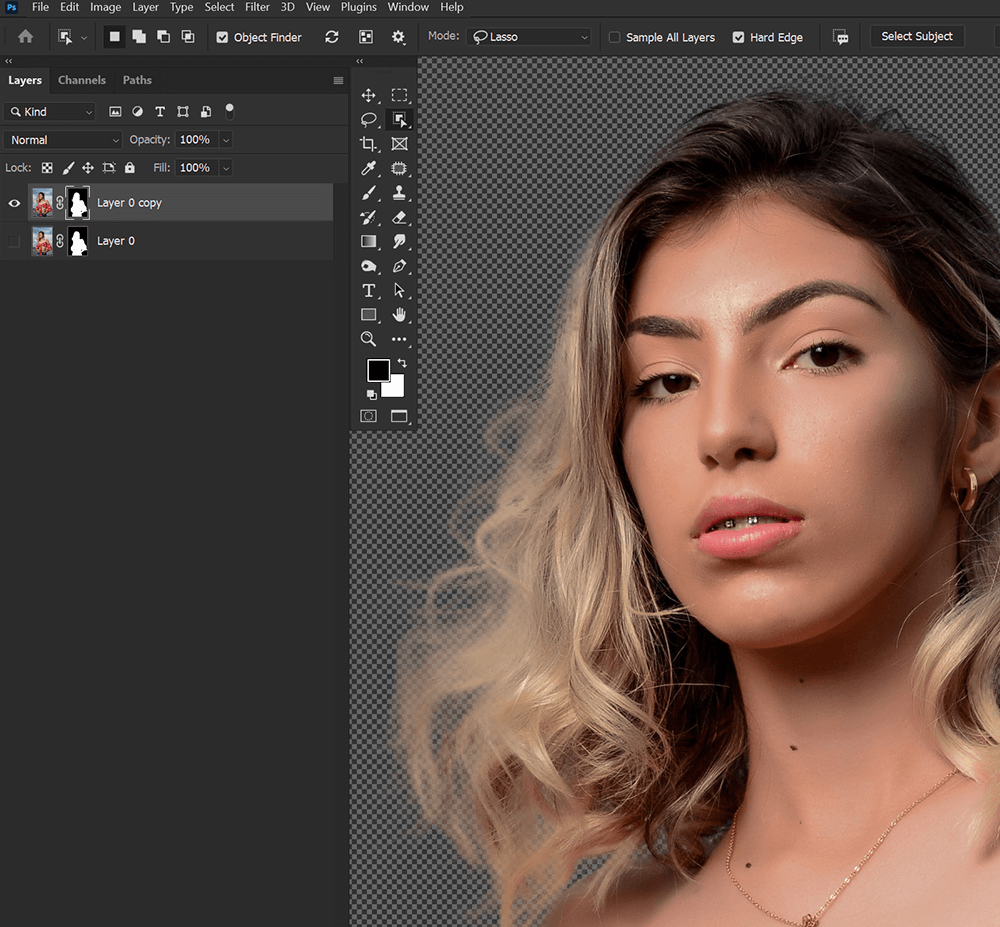
Decontaminate Colors is destructive, meaning it permanently edits your photo. It should output to a new copied layer. Your original layer will be turned off but not deleted.
Conclusion
That’s the Photoshop quick selection tool in a nutshell. While using any of the quick selection tools means you’ll have to go back and do a second round of refinements, that doesn’t mean they still don’t end up saving you time. And every year that goes by, a new Photoshop update gets released and makes them even more accurate.
Learning how to use the quick selection tools in Photoshop and knowing when to use them is a must for any artist or photo editor. Luckily, it’s quick and easy to do.


Leave a Reply