How to Create an Online Course with LifterLMS: A Step-by-Step Guide
If you are considering setting up an online eLearning business, then LifterLMS may be the WordPress plugin for you.
LifterLMS is packed full of features and functionality, making it a great option for all, from entrepreneurs, to global businesses.
In this article, we look at the top features provided by LifterLMS and the user experience it offers.
We will then guide you, step-by-step, through the installation and set up process for this plugin, as well as discuss how to design your first online course.
Ready to get started?
What is LifterLMS?

To create and sell online courses on your WordPress website, you need to install a powerful learning management system (LMS) plugin. An LMS plugin will assist you in designing interesting and varied courses, as well as provide numerous management tools enabling you to register and organize members, take payments, track course progression, and much more. Luckily LifterLMS takes care of all of these needs, and more.
LifterLMS is a freemium all-in-one plugin that will support your eLearning business. This plugin will allow you to turn your WordPress website into a fully functioning membership site, where you can sign up members and allow them access to your numerous courses.
LifterLMS Top Features
Let’s have a look at the top features from LifterLMS…
- Course Creation – Use the LifterLMS drag-and-drop course builder to design a wide assortment of courses. Create multimedia lessons, quizzes, worksheets, eBooks, assignments, and certificates. You can also add student discussion areas and set up student dashboards so users can track their activity and progress on the front-end of your site.
- Membership Options – With LifterLMS you can offer a range of membership options. Set up sitewide memberships, course bundles, or content restrictions. You can also create members-only forums or private discussion groups for members on specific subscription plans.
- Platform Management – LifterLMS allows you to easily manage your eLearning platform from within your WordPress website. Create and brand courses, manage teachers and students, set tough security measures, and monitor course and site metrics.
- Monetization – Create your own pricing model and take online payments on your website. You can choose to charge users a one-off payment or recurring monthly subscription fees, as well as offering course bundles, bulk sales, and coupons. The streamlined checkout page also makes for a smooth transaction process, and users can manage their account and payment details at any time.
- Integration – Integrate this LMS platform with all the third-party tools you need, including numerous payment gateways, email marketing solutions, forum plugins, and much more.
- Support – LifterLMS offers top-quality support, including an extensive knowledge base, and email and phone support.
The core WordPress LifterLMS plugin comes for free, with enough features that work out of the box for you to easily create a successful eLearning website. However, LifterLMS also provides an array of premium extensions, allowing you to add advanced functionality to your website as and when is needed.
So now we know exactly what this plugin has to offer. Let’s next find out more about its user-experience as we learn how to create an online course with LifterLMS.
Step 1: Install LifterLMS
Installing the LifterLMS plugin is the first step in this process. To do so, open your WordPress dashboard and select Plugins > Add New.

Then, in the Search bar, type in LifterLMS.

Once the plugin has been retrieved, click on Install Now > Activate.

The LifterLMS Startup Wizard will now open to help you configure the plugin and you guide you through the basic settings. Let’s take a look…
Step 2: Complete the Startup Wizard
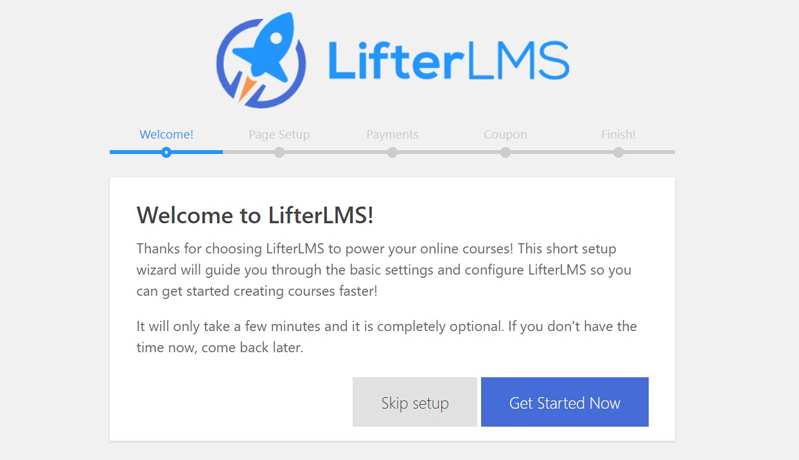
Although completing the Startup Wizard is optional, we recommend that you do it as it gives you a good understanding of what this plugin has to offer and how to navigate your way around its many features. To use the wizard, click on Get Started Now.
LifterLMS will now share information on the pages it has automatically created for your site. These include…
- Course Catalog – Here visitors can browse all available courses.
- Membership Catalog – This page will display a list of all membership options.
- Checkout – Here visitors can purchase the course or membership plan they are interested in.
- Student Dashboard – This is where students can manage their courses and account.
By clicking on each of these page names within the Startup Wizard, LifterLMS will send you to its knowledge base where you can find out more information on each of these pages, as well as how to customize the settings.
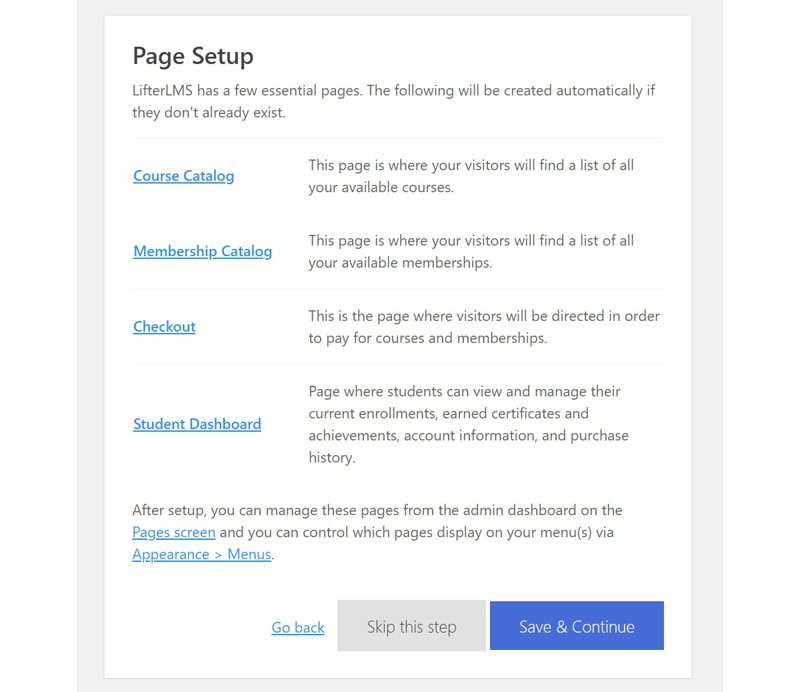
Note: All pages can be edited or deleted, or new pages added, within your WordPress dashboard. To do so, click on Pages > All Pages.
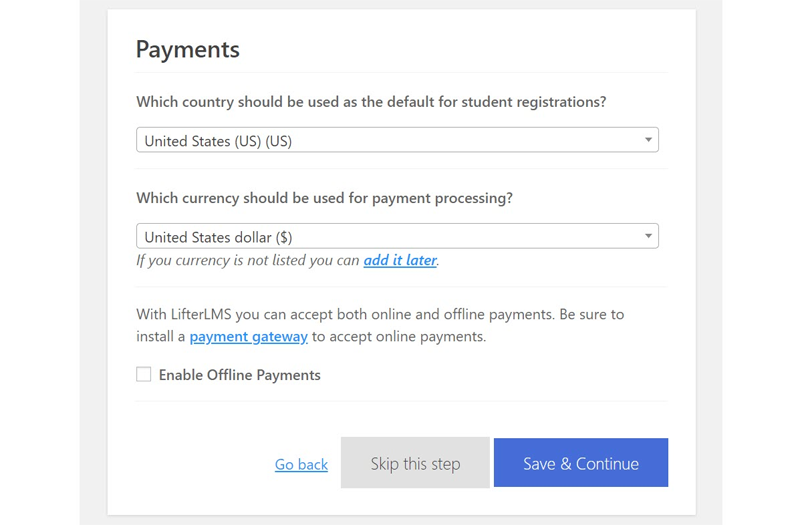
Next, under Payments, select which default country and currency you want to display on your website.
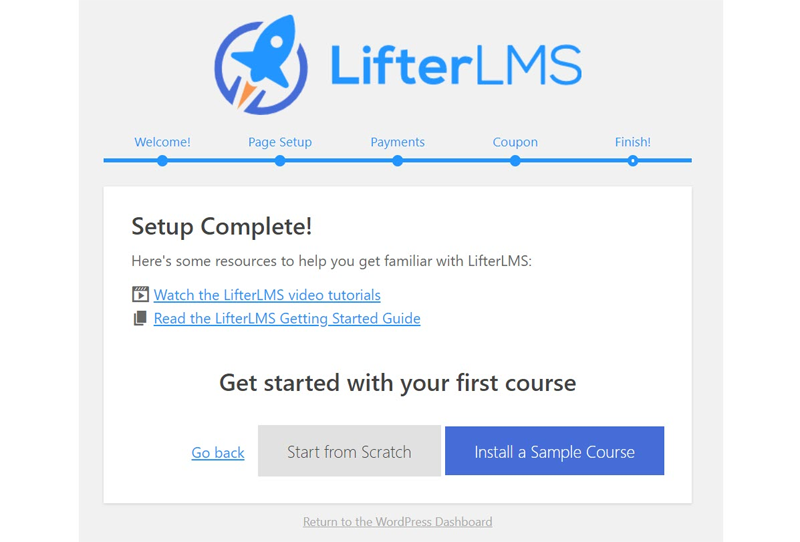
Lastly, the Wizard will provide you with further reading to get you started, a link to video tutorials, and the option of installing a sample course if you don’t want to create a course from scratch. (We recommend selecting Install a Sample Course).
Step 3: Create an Online Course with LifterLMS
Once you have completed the Wizard, you will be able to access the LifterLMS plugin from the menu within your WordPress dashboard. To create a new course, from your WordPress menu select Courses > Add Course.

Write a Course Description
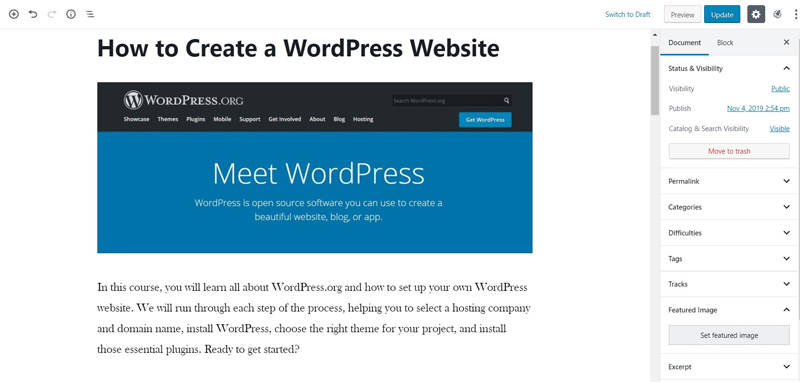
Within the editor you will find a template for the course description. Give your new course a name and then add a description, featured image, details about the course instructor, and more. Simply add and delete content blocks using the Gutenberg editor depending on what you want to display on your course description page.
Create a Course Structure
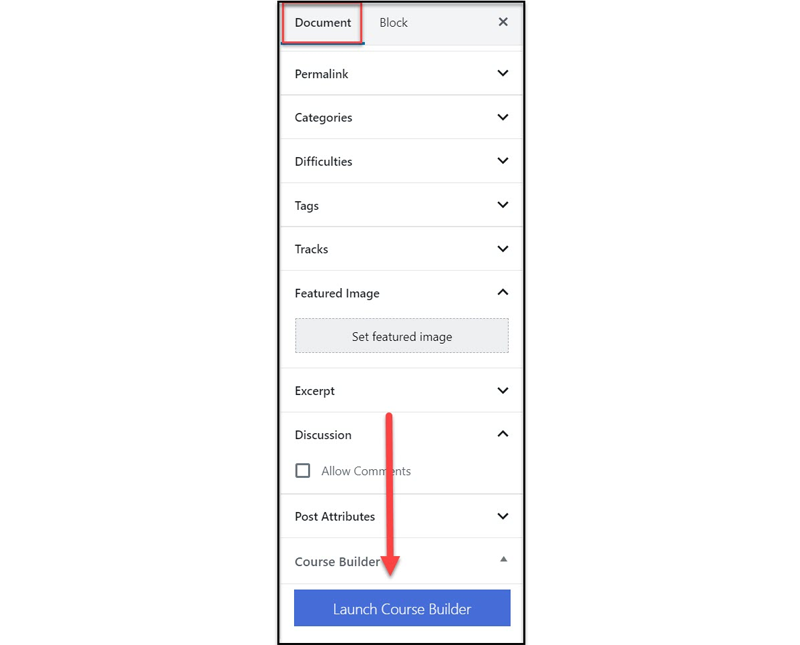
Next you need to create your course structure. To do this, click on Launch Course Builder from the right-hand editor menu. The course builder will now open and you can begin to create your course.
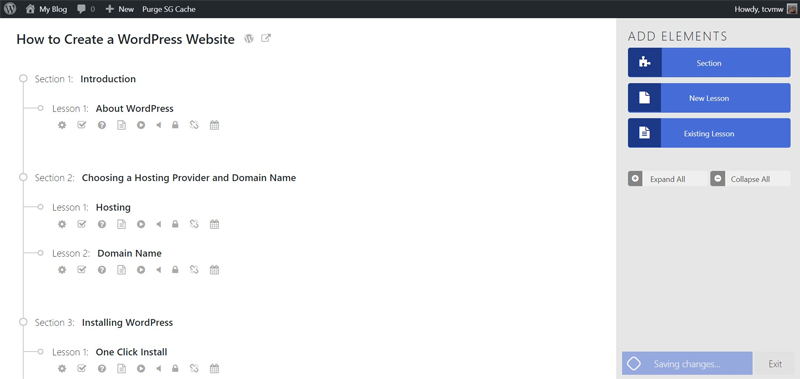
Courses are broken down into sections and lessons. Here you can see I have added numerous sections and then a range of lessons for each section. To add a section or lesson, simply click on the appropriate button from the right-hand side menu.
Add the Course Content
Next to each lesson, you will find a number of icons.

These include…
- Open WordPress Lesson Editor
- Add an Assignment
- Add a Quizz
You will also find icons for viewing your course on the front-end of your site, and editing the settings.
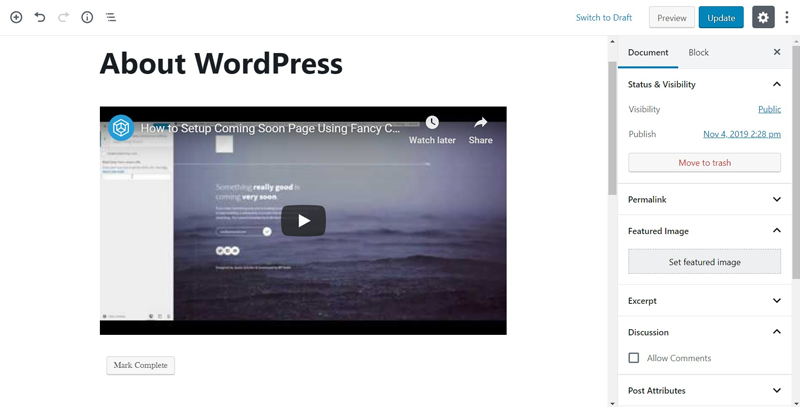
Here, we have clicked on the Open WordPress Lesson Editor icon, so we can add our content within the lesson editor. You will see we have used the Gutenberg editor to add a YouTube embed block, and we have embedded an interesting video to help grab our students’ attention.
You will now need to go through and add content for each of the lessons you have created in the Course Builder.
Display Progress and Lesson Widgets in the Sidebars
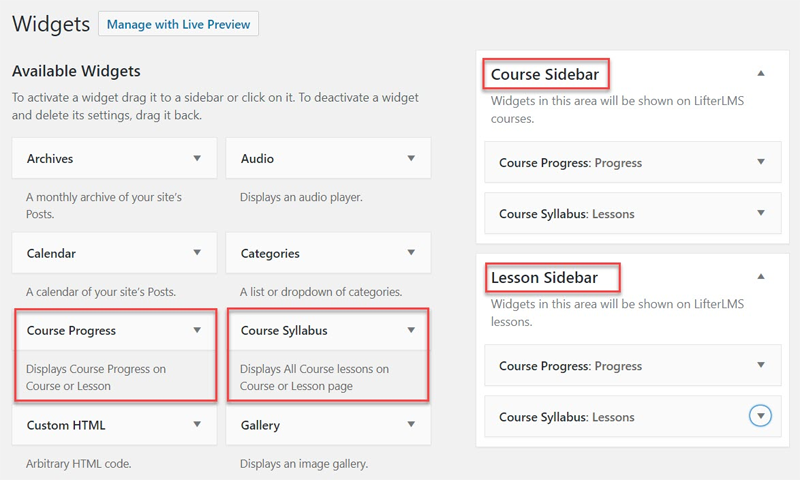
Once you have created all your lessons and the course content is complete, you now need to add progress and lesson widgets to your site’s sidebars to ensure the course is easy for your students to navaigate. To do so, within your WordPress dashboard, click on Appearance > Widgets.

Here you will find two widget areas – the Course Sidebar and the Lesson Sidebar. To both sidebars, add the Course Progress and Course Syllabus widgets. Here, I have given them the titles Progress and Lessons.
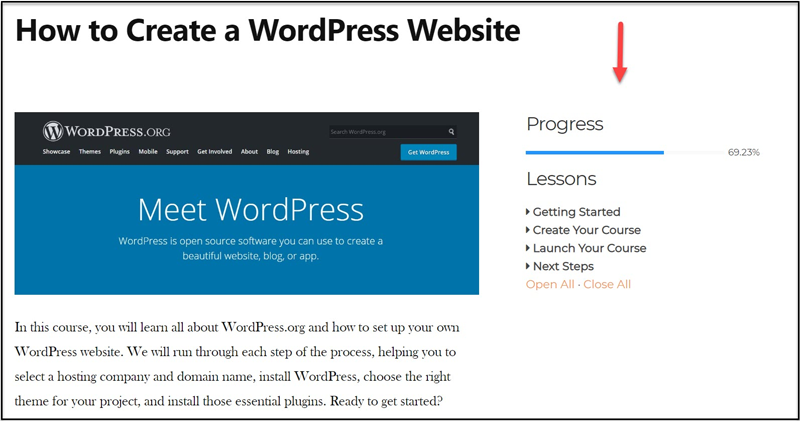
Now, when you preview your course overview and the individual lessons, you will find a progress report in the sidebar, as well as links to each lesson in the course.
Step 4: Set a Price
After you have finished creating your course, all that is left to do is to set the price and access requirements. To do so, within the course editor, scroll down to Access Plans and click on Add New.
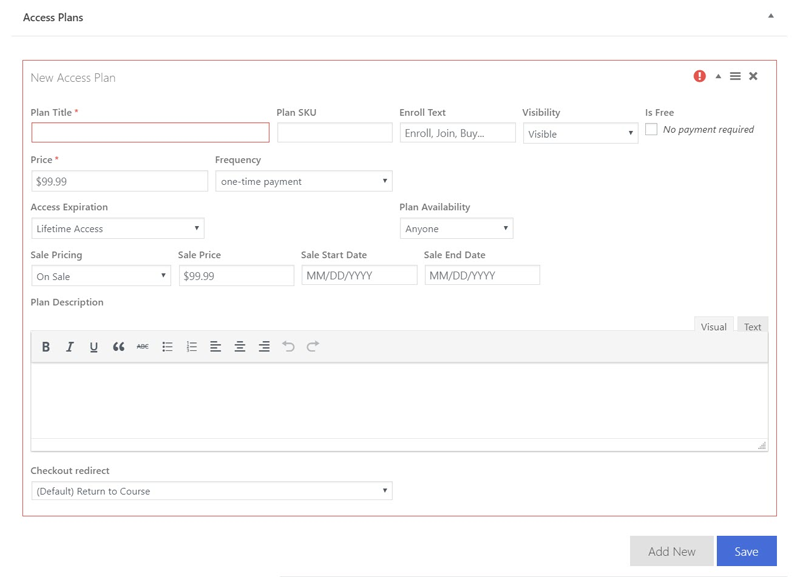
Here you will need to give your plan a name and add a description. You can also set the price, whether you want a one-time payment or subscription plan, start and end dates for user access, and much more. If you want your course to be offered for free, you can also select this as an option.
It is worth pointing out that if you want to sell your online courses you will need to purchase one of the premium eCommerce extensions provided by LifterLMS. Currently this plugin integrates with…
- PayPal
- Stripe
- WooCommerce
- Authorize.Net
Alternatively, you can take manual payments via check through your website with LifterLMS.
Final Thoughts on How to Create an Online Course with LifterLMS
Although there is a lot of information in this startup guide, LifterLMS actually provides many more features that we just simply don’t have time to cover. Remember, you can use this plugin to create different types of course content, like quizzes and assignments, set up advanced membership plans, create course certificates, and much more.
I hope you enjoyed our review of LifterLMS plugin. You may also want to check out our roundup on best WordPress LMS plugins or best WordPress membership plugins.
Ready to install LifterLMS? If you are thinking of buying any of the premium extensions then don’t forget to use the Design Bombs LifterLMS coupon to get money off your purchase.
Any questions on using LifterLMS? If so, please feel free to ask away in the comments below…


Leave a Reply