
What is cPanel? Everything You Need To Know
If you’re learning how to make a website, I can almost promise you that as part of that quest, you’re going to become very intimate with a tool called cPanel. That’s because most hosting providers, especially those on the more affordable end of things, use cPanel to help you manage your web server.
But as widespread as it is, cPanel is…well…let’s just say that it’s not always very beginner friendly. Especially if you’ve never built a website before.
As a result, you might be struggling to understand how to make your way around cPanel, as well as how to take advantage of all of the functionality that cPanel offers.
If that sounds like you, you’re the person who’s going to benefit from this guide. I wrote this guide for beginners. That means I’m going to kick the technical jargon to the side and speak to you like a person.
📚 Here’s What You’ll Learn In This cPanel Guide
By the end of this post, you’ll be a cPanel master. Here’s everything that you’ll know about:
- What is cPanel is and how it helps you
- Accessing the cPanel dashboard for your server
- Using cPanel to Install software like WordPress
- Adding new domains and subdomains to your hosting
- Uploading files to your server in two different ways
- Creating your own email account
- Increasing security with cPanel
- Creating and managing databases
- Viewing server error logs
There’s a ton to cover, so let’s get started!
01. What Is cPanel? What Does It Help You Do?
cPanel is the control panel for your web hosting. It gives you a graphical interface to help you perform tasks that would otherwise require you to know about programming.
Essentially, it makes your web server “human friendly”. That’s a good thing because otherwise, you’d need to be like one of those hackers in the movies!

What Does cPanel Help You Do?
cPanel lets you perform a number of important functions like:
- Easily installing software like WordPress, Joomla, Drupal, and more
- Adding new domain names and subdomains to your hosting account
- Uploading files directly to your server
- Managing FTP accounts to upload files via FTP
- Creating and managing new databases to store content
- Increasing security in a few different ways
- Diagnosing issues with your computer
As you move through this cPanel guide, you’ll learn exactly how you can perform each of those functions.
How To Access cPanel At Your Host
Usually, your host should send you the details for your cPanel account in a welcome email. For example, here’s the welcome email I got for one of my test hosting accounts:
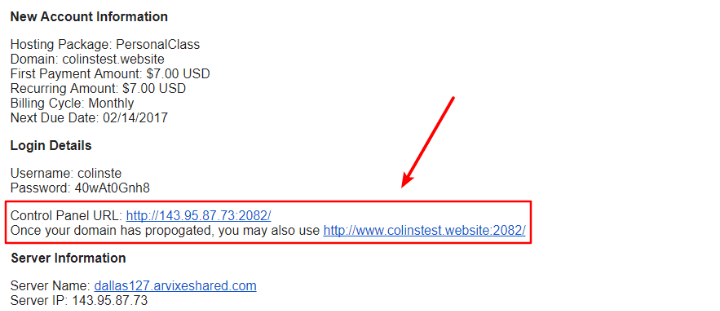
If you don’t see a welcome email that specifically references cPanel, you can usually also access cPanel by logging into your host’s customer area and clicking a link inside that area.
But here’s the foolproof way to access cPanel:
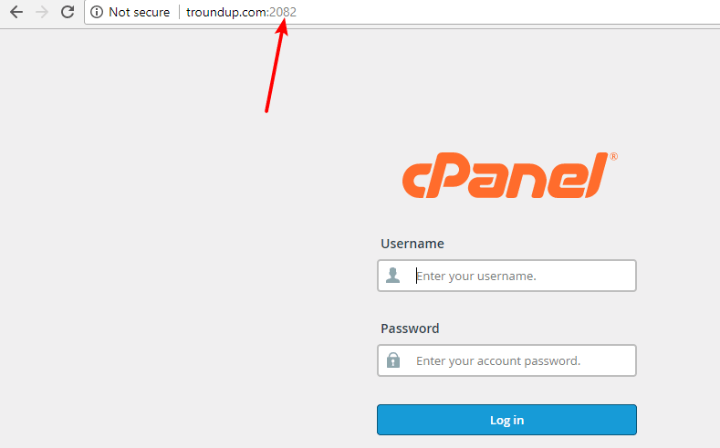
Append one of the following bits of text to the end of your site’s URL:
- :2082 – if your site uses HTTP at the beginning of its URL
- :2083 – if your site uses HTTPS at the beginning of its URL
For example, if your site is “http://yourdomain.com”, then you can access cPanel by going to “http://yourdomain.com:2082”:
From there, you’ll still need to enter your username and password, though. If you don’t know these details (and didn’t receive them in a welcome email), your best option is probably to contact your host’s support.
02. A Quick Tour Around The cPanel Interface
Ok, let’s start with a bit of a confounding factor to this interface guide:
There’s no single cPanel interface design. Instead, the actual design that you’ll see is up to your host.
For that reason – your cPanel might not look exactly like the one I’m going to show you in this guide.
There are two main cPanel interface themes…
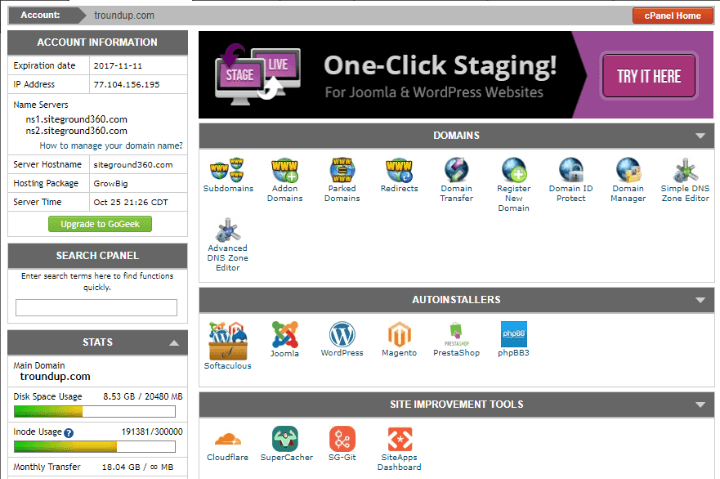
The older X3 theme, which looks like this:
The newer Paper Lantern theme, which looks like this:
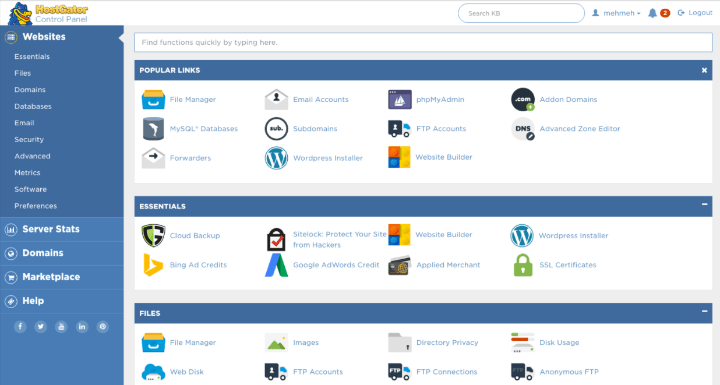
While the styles look fairly different, no matter which design you’re using, you should see a variety of options divided into different sections:
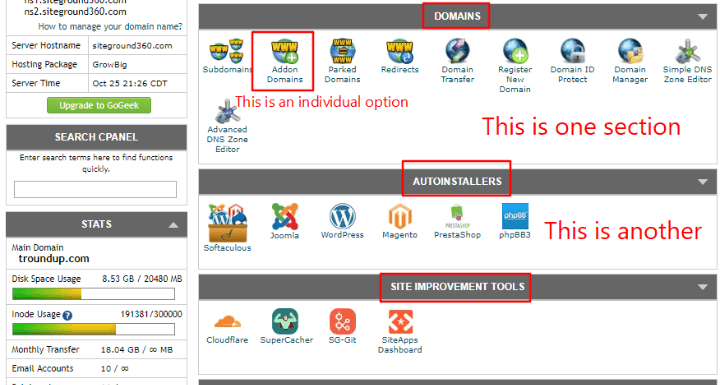
These options are where the meat of cPanel’s functionality lies and should be similar across all hosts.
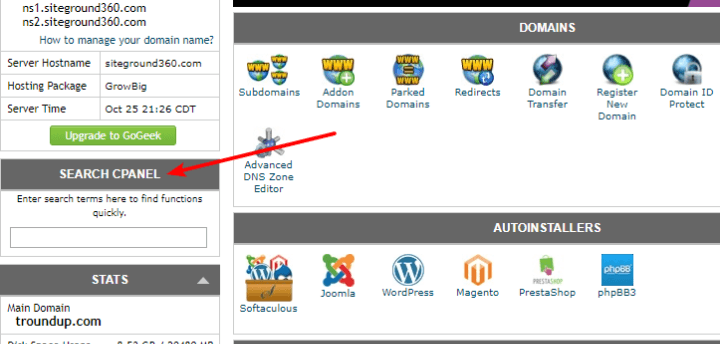
cPanel also includes a search functionality to help you quickly find specific functions:
I’ll be using the older X3 theme for the remainder of this guide because it’s what SiteGround, a popular WordPress host, uses. But even if your host has the newer Paper Lantern theme, you should have no problem following along.
03. Using cPanel To Install Software Like WordPress
After signing up for hosting, one of the first things you’ll likely want to do is install WordPress or another content management system to actually start building your site.
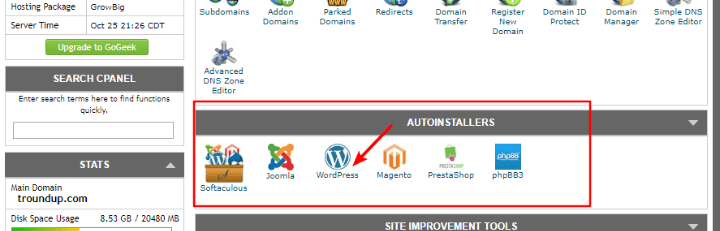
To help you do this, cPanel usually includes tools called Autoinstallers that offer a user friendly method for installing popular software packages.
You can see these different autoinstallers laid out in the Autoinstallers section of my example cPanel dashboard.
They’re pretty easy to use. For example, if you want to install WordPress, all you need to do is click on the WordPress option:
Then, follow the beginner-friendly install wizard to install the program on your site.
Because some hosts use different Autoinstaller software, it’s hard to give a specific tutorial for the rest of the process. If you need more help, though, WPKube has actually published a post on how to use each individual Autoinstaller to install WordPress.
04. Adding New Domains And Subdomains
When you signed up for your hosting account, you should’ve configured at least one domain during the signup process. This will always be your primary domain. For the purposes of the examples below, let’s say your primary domain is “designbombs.com”.
If your host allows it, you can also add two types of new domain names:
- Addon Domains – these are an entirely separate domain name. For example, something like “mysite.com”
- Subdomains – these are an addition to your primary domain name. For example, something like “mysite.designbombs.com”.
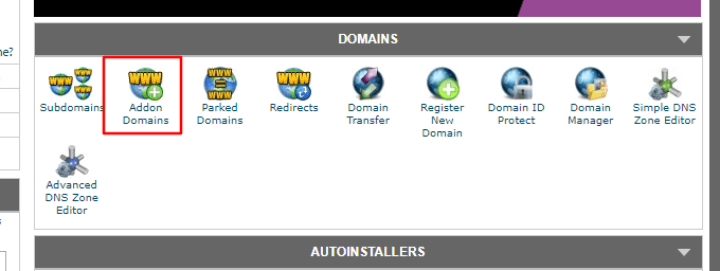
Both of these options (and more!) are located in the Domains section.
Adding A New Standalone Domain Name
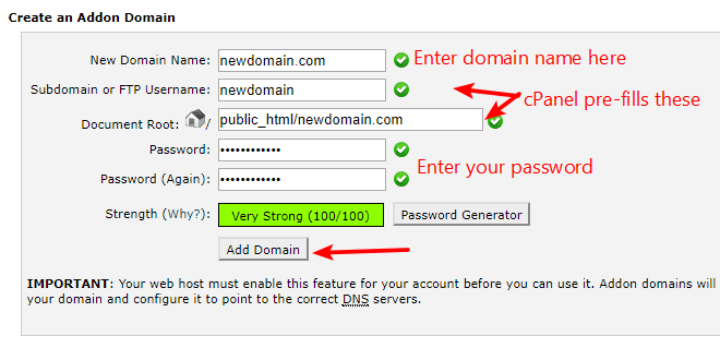
To add an entirely new domain to your site, you need to click on Addon Domains:
On the next screen:
- Enter your domain name in the New Domain Name box.
- Once you do that, cPanel should pre-fill two of the other boxes.
- Then, all you need to do is enter your desired password and click Add Domain.
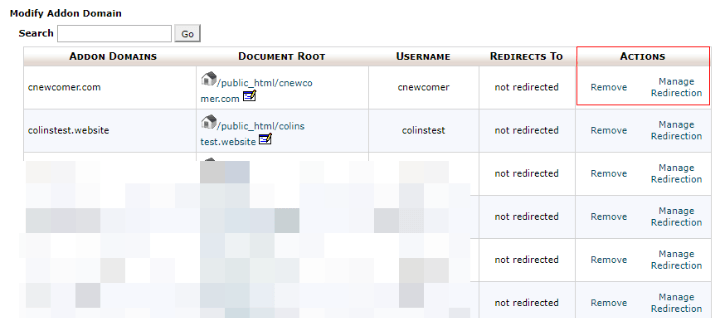
You can also remove or modify existing domain names in this area by scrolling down to the Modify Addon Domain section:
Adding A New Subdomain
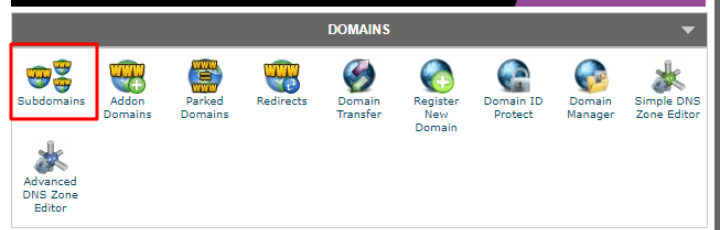
To add a new subdomain to either your primary domain name or any of your addon domains, click on the Subdomains option from your main cPanel dashboard:
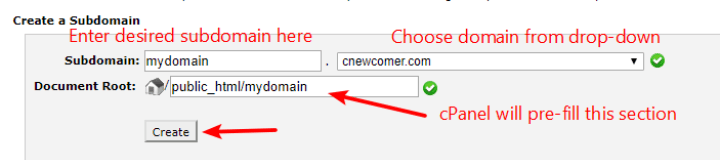
On the next screen:
- Enter your desired subdomain
- Choose the domain to which you want to add the subdomain from the drop-down
- Click Create
As with Addon Domains, you can also use this section to manage any of your existing subdomains.
05. Uploading Files Via cPanel
cPanel helps you access two different ways to upload files to your web server:
- File Manager – this tool lets you directly upload files via your web browser.
- FTP Accounts – these let you connect to your web server using something called an FTP program.
Generally, you can use File Manager to:
- Upload a few files at a time
- Move files around on your server
File Manager is nice because it’s convenient and doesn’t require any third-party programs (remember – it works right in your web browser).
But if you need to upload a large number of files (like a whole album of images), File Manager isn’t really the most effective method – you’ll be better off using FTP.
I’ll show you how to use both.
Using File Manager To Upload Files
To access File Manager:
- Look for the Files section in your cPanel dashboard
- Click on File Manager
- In the popup that appears, select the domain you want to manage from the drop-down
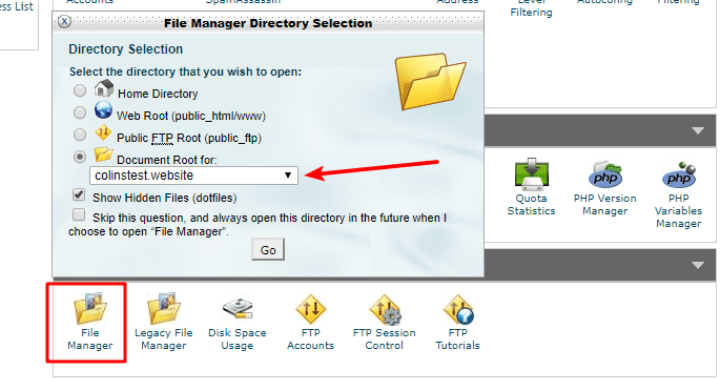
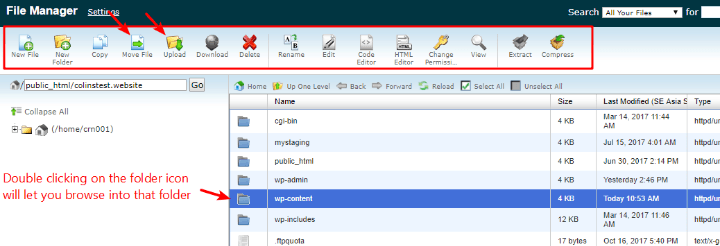
Then, you’ll be taken to the File Manager interface.
You can navigate between different folders by clicking in the interface. And you can upload new files or move existing files by using the toolbar at the top:
Managing FTP Accounts To Upload Files Via FTP
To upload and manage files via FTP, you’ll need two things:
- Your FTP account credentials
- An FTP program
cPanel only helps you with the account credentials part – you’ll need to download your own FTP program (I recommend FileZilla).
To manage FTP accounts, go to Files → FTP Accounts in your cPanel dashboard:
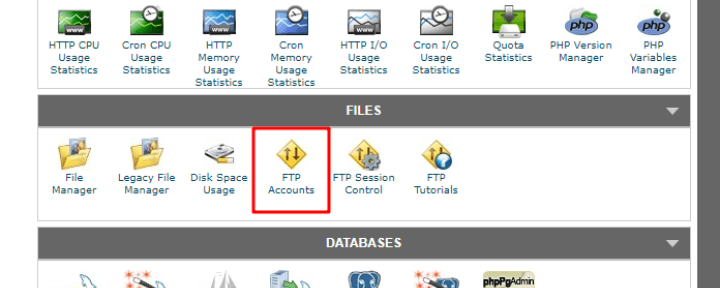
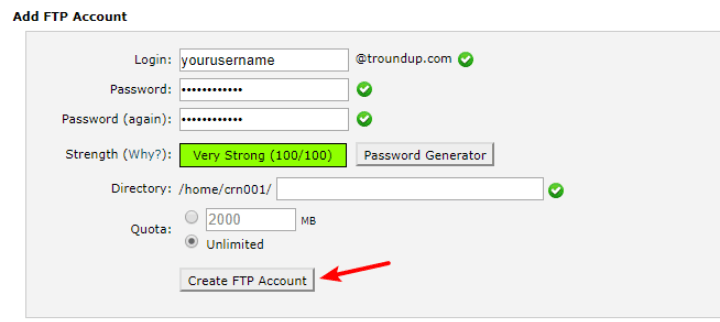
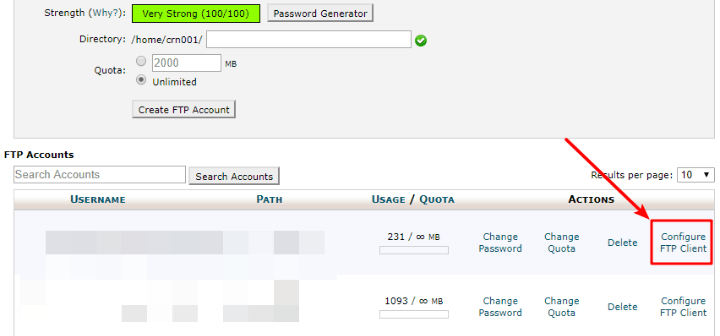
If you haven’t already, you can create a new FTP account on this page:
- Login – enter your username in this box.
- Password – enter the password you’ll use to connect via FTP – make sure it’s secure because FTP is powerful.
- Directory – leave this blank if you want to be able to access all folders. If you want, though, you can use it to restrict FTP access to only specific directories on your server.
- Quota – leave this unlimited unless you want to set an arbitrary limit on how many MB this account can upload.
Once you create your account, use those credentials to log in to your FTP program of choice.
You can also scroll down and use the Configure FTP Client option to help you get set up:
06. Creating Your Own Email Account Using Your Domain Name
One of the neat things about owning a website is that you can create your own email account using your domain name, instead of needing to rely on something like Gmail.
That is, you can be “james@yoursite.com” instead of “james@gmail.com”.
To start using your own email address, though, you’ll need to first get everything set up in cPanel.
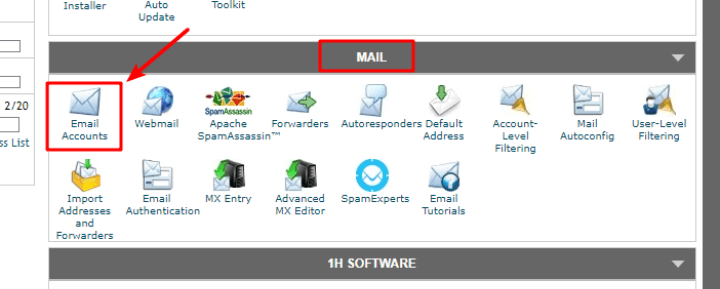
To do that, look for a section called Mail or Email (the actual name depends on your host). Then, choose the option for Email Accounts:
On the next screen, configure your email account by setting up the following details:
- Email – this is the part of your email address that comes before the “@” sign.
- Select the domain name you want to use from the drop-down
- Password – this is the password you’ll use to connect to your email via webmail or your own email client
- Mailbox Quota – this is how much server space you want to allocate to your email address.
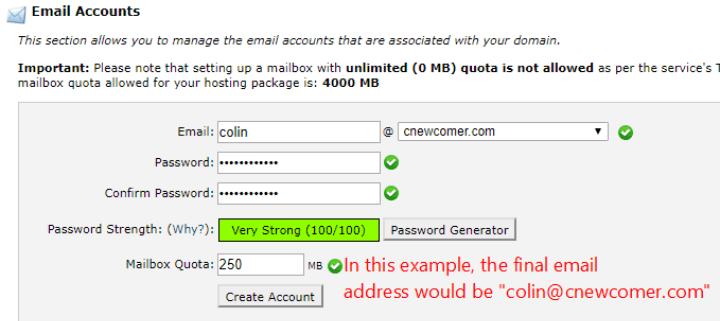
Then, click Create Account.
How To Send And Receive Emails With Your New Email Account
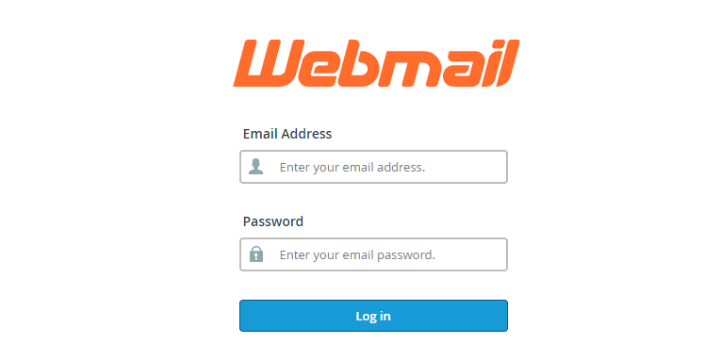
Once you create your email account, you can use Webmail to start sending and receiving emails right away. To access your webmail, all you need to do is append “/webmail” to your domain name.
For example, “yourdomain.com/webmail”.
Then, you’ll be able to log in using the credentials that you just created:
You can also set up your new email address to work with something like Google Apps or Outlook, but that falls a bit outside the purview of this guide. If you need help, SiteGround has a good series of tutorials for different email programs.
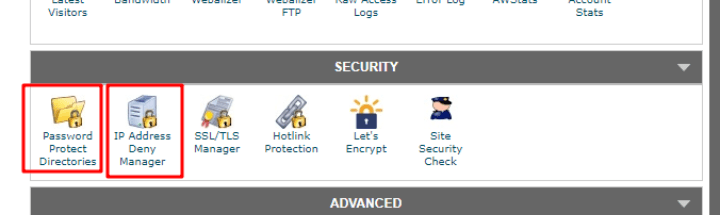
07. Increasing Security Via cPanel
If you want to increase the security of your websites, cPanel gives you a few helpful tools, notably the ability to:
- Password Protect Directories – this lets you add a password to certain folders on your server.
- IP Address Deny Manager – this allows you to block traffic from a specific IP address that might be causing you trouble.
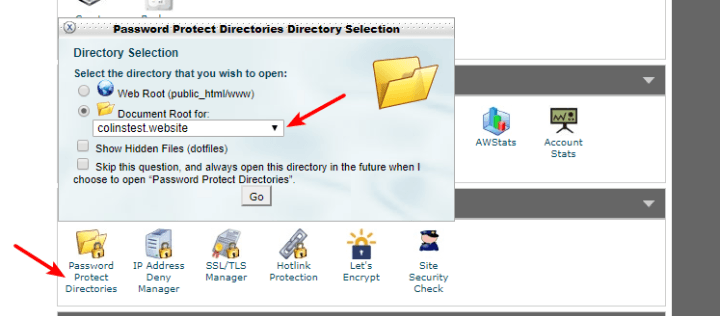
To add a password to a directory in cPanel, choose the Password Protect Directories option. Then, choose the domain you want to use in the popup:
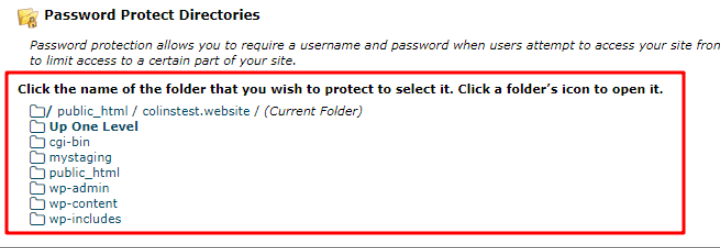
Then, you can click on a specific directory to add password protection:
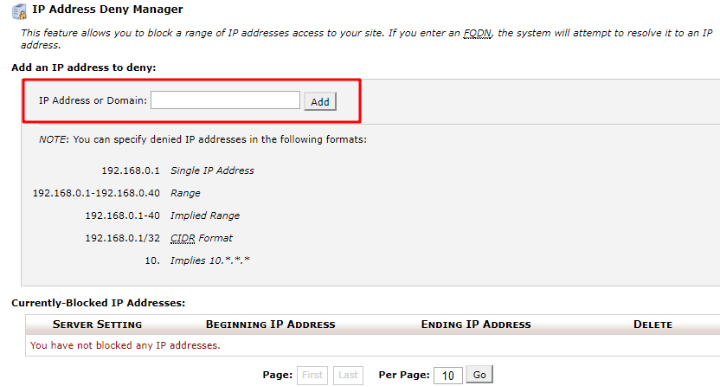
To block specific IP addresses, click on the IP Address Deny Manager. Then, on the next screen, you can enter the IP addresses that you want to block:
08. Creating And Managing Databases
Databases are tools that help you store and access data. If you’re using a tool like WordPress, all of your website’s data is stored in a database.
Most of the time, you’ll never need to think about your database.
But it does come in handy to know how to manually create a database if you ever need to, say, migrate your WordPress site manually.
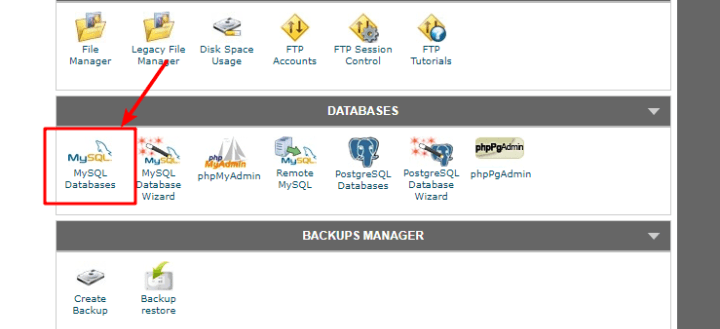
To create a new MySQL database, go to MySQL Databases in the Databases section:
Then, you’ll need to complete a 3-step process.
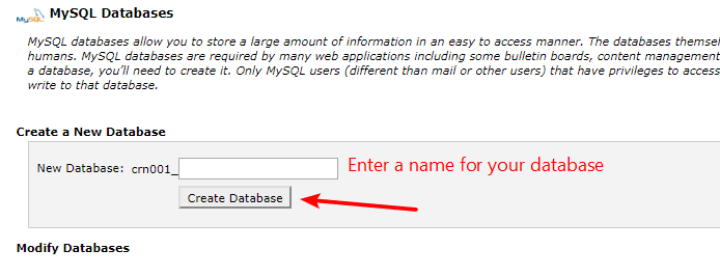
First, complete the Create a New Database section:
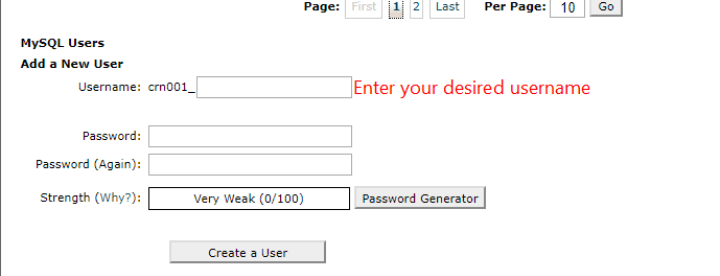
Then, scroll down and Add a New User:
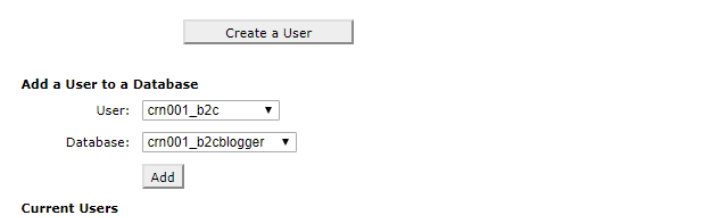
Finally, scroll further down to the Add a User to a Database section and use the drop-downs to add the User that you just created to the Database that you also just created:
As I said, you’re unlikely to need to use this functionality on a daily basis. But in certain situations like site migrations, it is definitely handy to know how to create a database in cPanel.
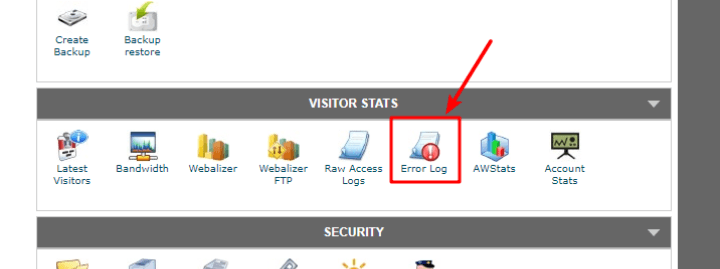
09. Viewing Error Logs In cPanel
Like databases, error logs are a niche feature that you’re unlikely to regularly come in contact with. But if you’re running into issues with your website, your server’s error logs are an invaluable tool in helping you (or your developer!) diagnose what’s happening.
To access your server’s error logs, all you need to do is go to Error Log in the Visitor Stats section:
cPanel Is Your Server Management Buddy
And that wraps up my massive cPanel guide!
If you’re using shared hosting, I can pretty much guarantee that your host uses cPanel, which is why it’s so vital that you understand how to navigate your way around the cPanel dashboard.
At this point, I hope you have the skills to do everything you need! If not, you can always leave a comment and we’ll help you get things sorted.
And if you’re interested in more big guides like this one, I encourage you to check out our guides on How to Minify Your WordPress Site’s CSS, HTML, & JavaScript and How to Choose a WordPress Hosting.
Leave a Reply