How to Create a Portfolio Site Using Advanced Custom Fields
Today we will cover how you can make your own, easily manageable, fully fledged portfolio site using WordPress and the Advanced Custom Fields plugin.
While there are a lot of portfolio themes out there, some of them great, some of them not so much, if you find yourself wanting full control over the project, it’s always better to start from scratch.
If you do want to make a portfolio site from scratch using WordPress, there’s no better tool to get you started than Advanced Custom Fields.
Create A Custom Post Type
Now before you go into ACF, you’re going to want to create a custom post type for the portfolio items. You can either do this manually, shown here in this article, or you can use a plugin like Custom Post Type UI to add a new custom post type named ‘portfolio’.
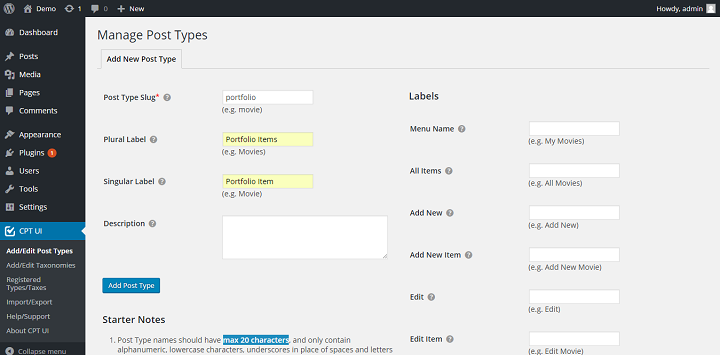
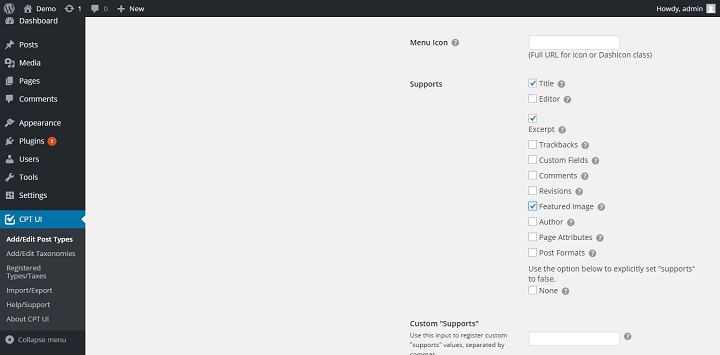
When you’re creating a post type with CPT UI, you can decide what metaboxes you want to support. Do you need images? Then you can set featured image as supported, do you want excerpts?
Then you can support excerpt as well. For simpler portfolios, you might not even need any custom fields, but if you need extra information like price, date published, publication, and things like that, you’re going to want to bust out the custom fields too make your portfolio easier to update and manage.
What Kind Of Portfolio Do You Want To Make?
Are you a photographer, designer or digital artist? Do you want to make a portfolio that mostly showcases visual content in a grid (or other) format?
Are you a writer, journalist or storyteller that wants to showcase both images and excerpts along with links to your work, dates, publication, etc.
We will cover how to add different functionality that fits each use case below, but first let’s get started with the basics.
Getting Started With Advanced Custom Fields
ACF basically lets you add extra information to posts, images or text etc, specifically to custom post types that you select.
This means that we can single out many different pieces of content and work with them separately, even from within a single post.
This is great for making a portfolio because it lets us write code that will automatically place things where we want them, and style things how we want them to look.
For a portfolio page, this means that you don’t need to for example go into a pagebuilder and add a new thing to a column, style the different pieces of text like published date, publication, headlines, etc, every time you add a new item, you just submit a new post (in the correct custom post type) from the dashboard, and it ends up in your portfolio.
For example we can add text boxes for subheadline, excerpt, date published, publication. (Or price, location, artist name, etc).
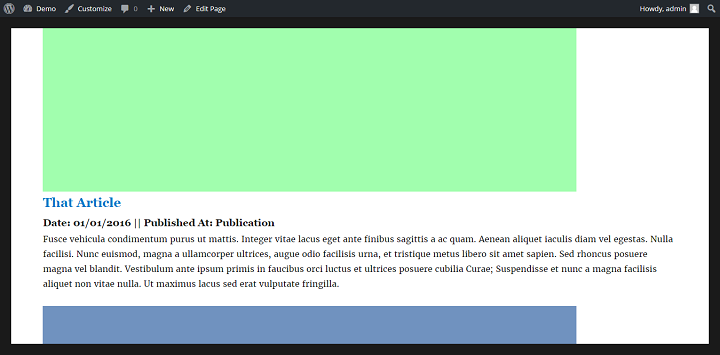
For example if the input is only “That Article” “01/01/16” “Publication” “http://linktoarticle.com” “excerp” and a featured image, we can output something like this:
Set Up Your Custom Fields
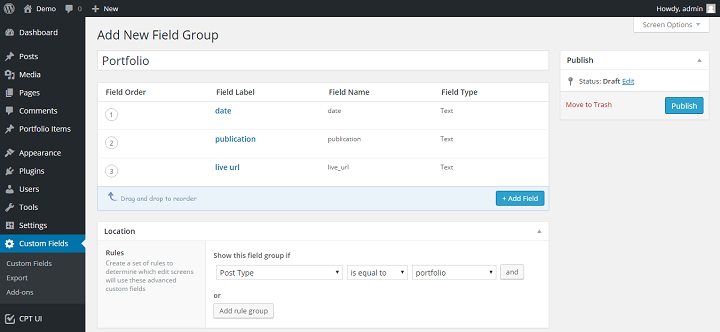
What kind of custom fields you want to set up depends on what kind of content you want to show on your portfolio site.
Let’s say you’re a journalist, you might want to add these fields:
Subheading, excerpt(or enable it in CPT UI), publication date, publication, image(you can also use featured image and pull that in), link to full piece. Then you can choose whether or not to hide normal WP meta boxes.
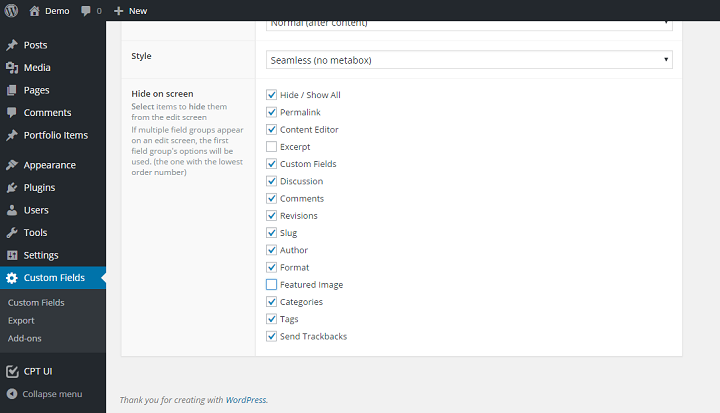
In this case, we just want to add date, publication and live URL. we will use the featured image option built into WP for images, and we will use the title and excerpt functions in WP for the title and excerpt(you can also just use the normal editor for this, but we use the excerpt because we don’t want the visual editor in there in case an author thinks he should add the image inside the visual editor for example.)
After following the steps so far, you should be able to go to Add New under Portfolio Items, and you should see a uses interface that looks like this:
Great, now we’re finished already right? Not quite. If you enter in the information and publish a complete portfolio piece, you might notice that it does not show up anywhere.
This is where things start to get a little more tricky.
Making The Page For Displaying The Custom Post Type Content
This next part involves editing the code of your theme, so unless you’ve developed your own theme, you should probably create a child theme for this part. (You can easily do so by following this guide. I also recommend that you do this editing on either a staged version of your site online, or local copy of your site, not on your live website.)
Now we’re going to create a template for the portfolio page where we will display our portfolio content.
Now just save your page.php template as page-portfolio.php into the folder of your child theme, and you’ll have an easy starting point.
In the commented area, change
* The template for displaying pages
* This is the template that displays all pages
or equivalent to:
* Template Name: Portfolio
* The template for displaying the portfolio of our website.
This will make WordPress recognize it as a specific page template for a page named “portfolio”, and you will also be able to choose it as a page template if your portfolio page is named something else, or you want your homepage to display your portfolio.
This part here makes sure that we show the actual content of the page first (for example if you want to have an introduction or something, you can just edit that on the page that you choose to use this template for instead of having to hardcode every time you wanted to change something.)
This is what it looks like for Twenty Sixteen, but it might look different in your theme, the important part is that you will see “The Loop” there.
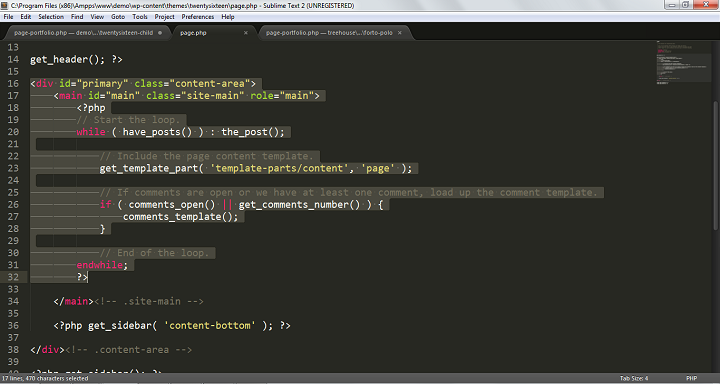
Add the plain text: ‘testing’ after the loop, outside of the PHP block and save. Create a page called portfolio (or select the template manually) and view the page.
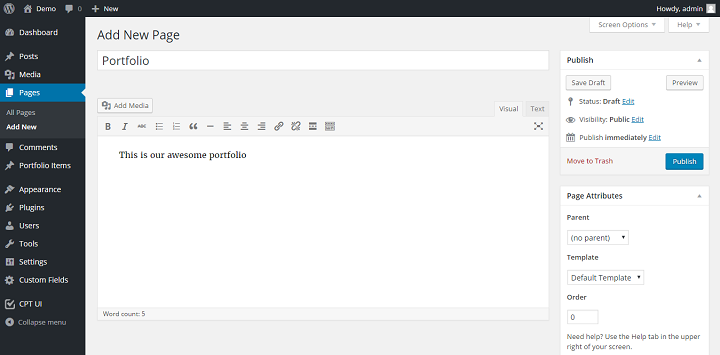
You should see testing appear on the page even though you didn’t write it when making the page.
Now, after the loop, after the endwhile command, we want to start a new WP Query.
This WP Query will only ask for posts that meet.
Open a new php block and add the following:
<?php $args = array( 'post_type' =>portfolio', );
$query = new WP_Query( $args ); ?>
This tells the query to only find posts that match the custom post type of portfolio.
<?php if ( $query->have_posts()) : while ( $query->have_posts() ) : $query->the_post(); ?>
If there are any portfolio items, this will find them and start the_post function. (Which means it will repeat the process set out below it for every item that is found in the database.)
This means that we can finaly start coding how we want the portfolio to look.
First off, we’re going to display every item that we want on our page.
We start by opening a div for the portfolio items:
<div class="portfolio-item">
Then we open another div for portfolio images:
<div class="portfolio-image">
Now we display the featured image using the the_post_thumbnail() function.
<?php the_post_thumbnail(); ?>
Then we close the portfolio-image div.
</div>
Then we show the title in h2 tags, using the_title() function, and link to the published piece using ACF’s the_field function: targeting the ‘live_url’ field only.
<h2><a href="<?php the_field('live_url'); ?>"> <?php the_title(); ?></a><h2>
There’s two ways of working with ACF, you can either use their custom function the_field() to display text and get_field pull out information, or you can use WordPress’s innate function get_post_meta() to pull out the information, and then echo it out.
Bill Erickson makes a good case for doing the latter in this article.
If you use get_post_meta for the heading url instead, it would look like this instead:
<h2><a href ="<?php echo( get_post_meta ( get_the_ID(), 'live_url', true))?>" ><?php the_title(); ?></a><h2>
Now that we show the thumbnail and title, we can show whatever we want, in this case, publication date and publication.
<h3>Date: <?php the_field('date'); ?> || Published At: <?php the_field('publication'); ?> </h3>
Or using the alternate method:
<h3>Date: <?php echo( get_post_meta ( get_the_ID(), 'date', true))?> Published At: <?php echo( get_post_meta ( get_the_ID(), 'publication', true))?> </h3>
Then finally we show the excerpt.
<?php the_excerpt(); ?>
Now you can close the div, while and if, and we’re basically done.
</div> <?php endwhile; ?><?php else: ?> <?php endif; ?>
Styling The Content (Making It Actually Look Like A Portfolio)
After doing this, the portfolio items you post should start to show up. But right now they’re unstyled, coming in at 100% width so it might not look much like a portfolio, but rather a standard blog page.
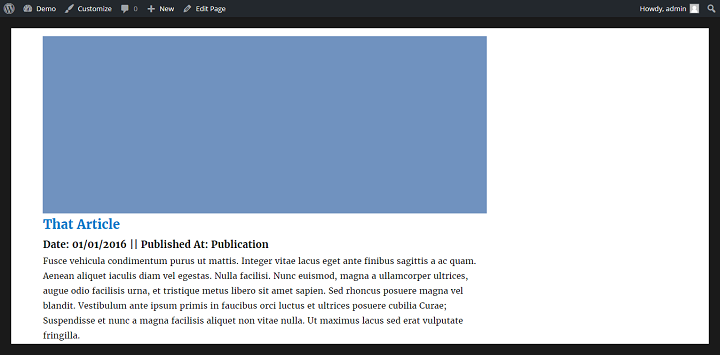
If you don’t want a sidebar on your portfolio page, you need to remove the get_sidebar() function from the page-portfolio.php file. Then go into the wp-admin, check the id for your portfolio page, then open your child theme’s style.css file, and add these lines of code, but replace the id number with the id for your page.
.page-id-6 .content-area{width: 100%;}
If you set the page template to portfolio manually, you can also write it out like this:
.page-template-page-portfolio .content-area{width: 100%;}
Now that we have a full width page, your portfolio page should look like this:

From here we just need to style the individual items. Let’s say, for example, that you want to display 4 portfolio items in a row, you would need to find the relevant breakpoint in your theme’s CSS (either by inspecting the content area and looking at the different @media requests or by doing a search for your sidebar, and seeing at what screen width it’s assigned.
For Twenty Sixteen, I chose the 56.875em breakpoint(920px).
@media screen and (min-width: 56.875em) {
.portfolio-item {
float: left;
width: 25%;
}
}
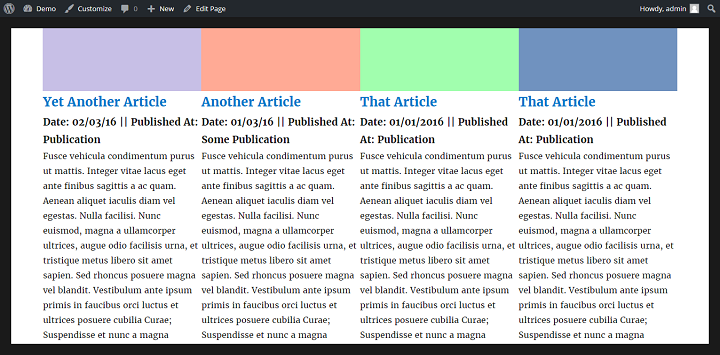
Now we just need to add some padding, and it will look okay. For example:
padding-left: 1em;
padding-right: 1em;
In the good old days, it would have been important that you used the same height and width for your images. If you didn’t, the height will become uneven.
Even more so for text. Even a small difference could mean that the next rows became unordered. (Basically if the items at the end are shorter than the earlier ones, the next div will start next to the longest one instead of under.)
Avoiding this would mean sticking to a strict character limit (not going over or under) for any of the parts, or manually setting static heights for the divs for different screen sizes.
But now, if you want a real, tangible solution to this problem without having to hardcode anything, or always follow a character limit to the T, you can install the equal height columns plugin.
With the plugin all you need to do is install it, and go to Settings > Equal Height Columns and then enter in .portfolio-item, and set an appropriate breakpoint for your theme. (The breakpoint should be for when the design turns into a single column design for mobile or tablet.)
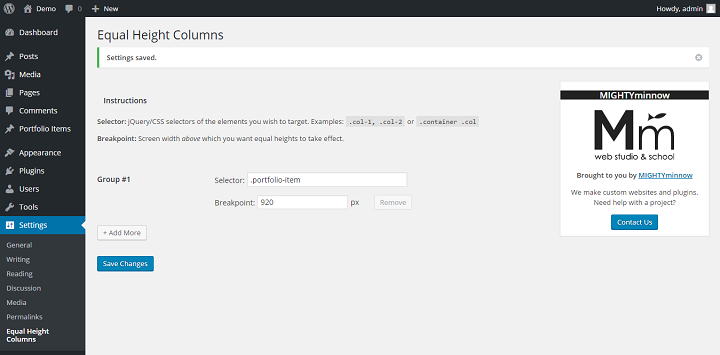
But even if you use this solution, try to keep the differences small, as too much difference will create a lot of whitespace.
If your plugin is correctly set up, your portfolio page should look like this now:
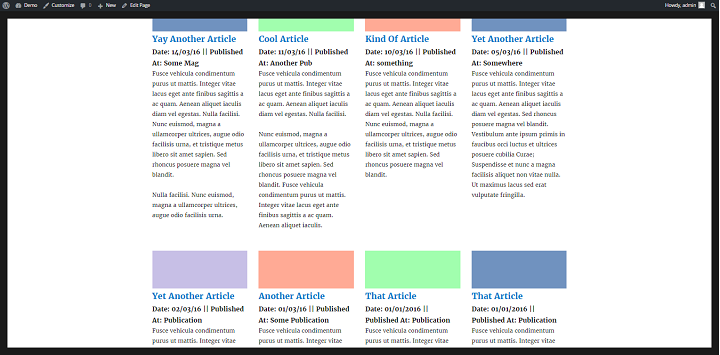
Now let’s move on to style how the portfolio items look on smaller screens(or windows), tablets and mobile.
For smaller computer screens or windows or tablets, you should set a breakpoint where we make 3 columns instead of 4. All we need to do is set another breakpoint and set the width to 33.33333%. For example:
@media screen and (min-width: 44em) {
.portfolio-item {
width:33.33333333%;
}
}
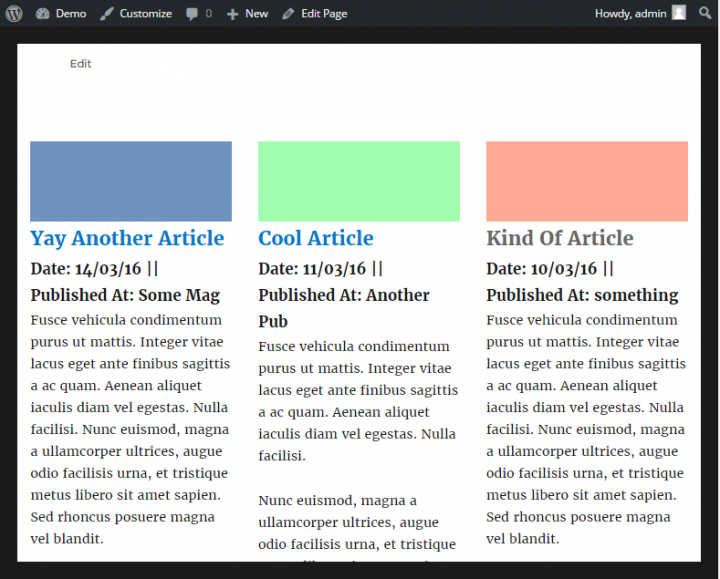
Then for smaller screens still, like a tablet that is not in landscape mode, or a phone in landscape mode, we can choose to show two items at a time with another breakpoint, and then set the width to 50%.
Then finally you can set another breakpoint, or just set the standard width of the portfolio-item to 100%.
When you have multiple breakpoints, it’s important that you set your breakpoint to the last one for mobiles that shows only one column, or the Equal Height Columns plugin will not work for some of your layouts.
Done… Almost
We have created a functional, responsive portfolio site that looks pretty good on any device. But there’s still a lot of styling left to be done if you want to make the perfect portfolio site for you.
Have you used Advanced Custom Fields before? What kind of website did you build with it?


Excellent guide – I’ve managed to create a great portfolio using this today – thank you!
Just a heads up that the below is missing a closing question mark:
And portfolio is missing an ‘
portfolio’, );
$query = new WP_Query( $args ); ?>