
How To Create An eCommerce Store In An Afternoon’s Work
So you want to create an eCommerce store, huh? You’re definitely not alone!
eCommerce has gone from this thing that used to cost tens of thousands of dollars and require specialized help to something that’s affordable and accessible to non-developers. And that accessibility has led to an explosion in eCommerce stores.
Two major platforms driving this growth are WooCommerce and Shopify. In fact, when you look at the stats for high-traffic eCommerce stores, those two platforms are the most popular options.
In this post, I’ll first help you choose between WooCommerce vs Shopify for your eCommerce store. Then, I’ll show you how to create an eCommerce store using Shopify which, spoiler alert, is the platform that I recommend for most users looking to start an eCommerce store.
WooCommerce vs Shopify: Which One Is Right For Your Store?
Both of these platforms are massively popular for a reason. That is, there’s no clear winner for all types of eCommerce stores.
But the two do approach things pretty differently, so we can probably suss out which one is right for your specific store.
At a high level, WooCommerce and Shopify take a fundamentally different approach to how you create, manage, and maintain your store:
- WooCommerce is a self-hosted solution based on WordPress. That means you’ll actually install the WordPress software and WooCommerce plugin on your own host. This potentially gives you more control and flexibility if you want to tweak things, but at the cost of ease of use.
- Shopify is a hosted solution. That means Shopify handles hosting and maintaining your store for you. For the most part, all you need to do is focus on adding your products and handling your orders. You’ll lose a little flexibility, but for most people, the ease of use benefits are definitely worth it.
With WooCommerce, you can always hire a developer to dig into the code to make it do pretty much whatever you want. It might be expensive – but you can do it.
With Shopify, on the other hand, you don’t have the same level of control because everything is hosted on Shopify’s servers (though Shopify does give you a good degree of flexibility, still).
In the end, I think it comes down to…
What Type Of Store Are You Creating?
If you’re just creating a “standard” eCommerce store (that is – a store that doesn’t need some unique functionality that most other stores don’t offer), Shopify should still be plenty flexible enough to handle whatever you throw at it.
And most people love that, after you set up Shopify, you’re free to 100% focus on building your store, whereas WooCommerce requires that you spend time on maintenance pretty much every month.
I think these two Reddit responses on a Shopify vs WooCommerce thread illustrate this concept nicely:
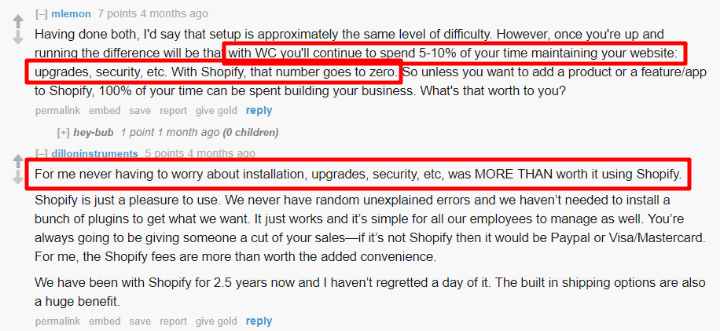
The peace of mind of never having to worry about downtime, security, updates, etc. shouldn’t be understated.
So while WooCommerce definitely has its place, especially for those who do want to dig into the source code, Shopify is going to be a better option for most eCommerce stores. Especially if you’re just getting started with your first eCommerce store.
Which Platform Costs More?
This is a hard question to answer because there are a lot of variables.
Shopify’s pricing is more easy to predict. You pay a flat monthly fee for your store, which makes it easy to know exactly how much you pay each month. Additionally, you might need to purchase a premium theme (one-time fee) as well as potentially some Shopify apps (usually another flat monthly fee).
WooCommerce itself is free, which can instantly save you some money compared to Shopify. But you’ll also need to pay for your own hosting, as well as likely some premium plugins and a theme (which can start to add up).
In the end, WooCommerce has the potential to end up being cheaper than Shopify. But it could also end up more expensive depending on the specific tools that you use to enhance your store.
How To Create An eCommerce Store With Shopify
Because we believe that Shopify is the best and most accessible way to create an eCommerce store for most users, we’re going to show you how to create an eCommerce store using it as your platform.
If you do decide you’d prefer WooCommerce, though, you can head here for a good WooCommerce tutorial.
Step 1: Sign Up For Your Shopify Account
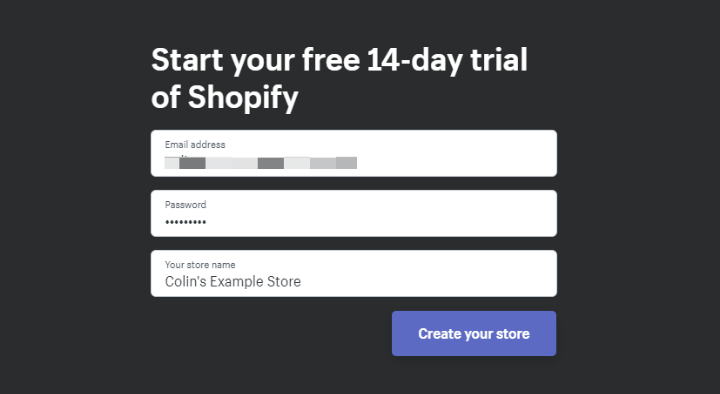
Because Shopify is a hosted solution, the sign-up process is surprisingly simple. You don’t even need to enter a credit card until you want to start accepting orders.
To get started, head to Shopify. Then. enter your basic account details:
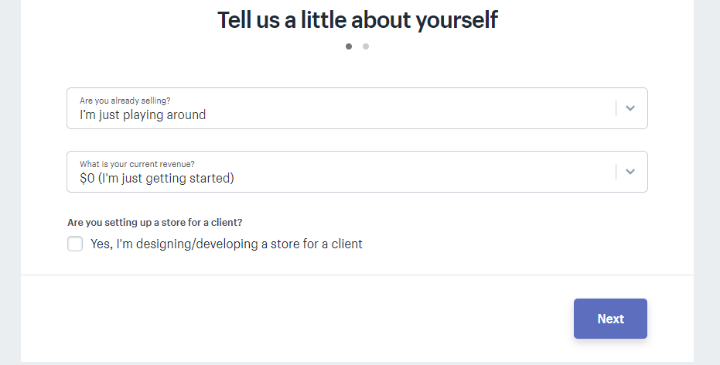
Then, you’ll need to configure a few more basic settings:
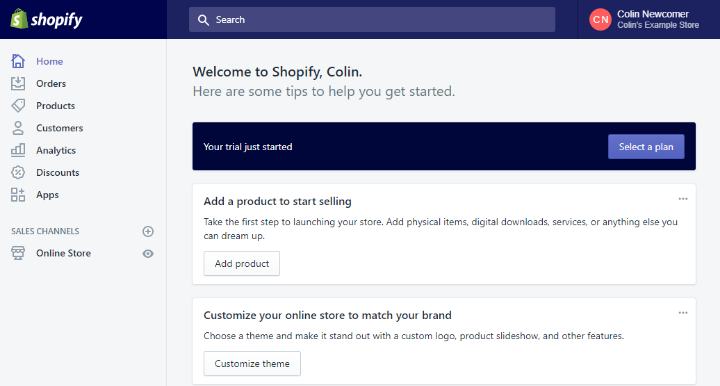
And just like that – you have full access to your new store! Everything will function like normal for the next 14 days, except you won’t be able to actually start accepting payments until you choose a paid plan:
Step 2: Choose Your Theme And Customize It
Your theme determines how your store looks and, to a smaller extent, how it functions (in terms of things like galleries, menus, etc.).
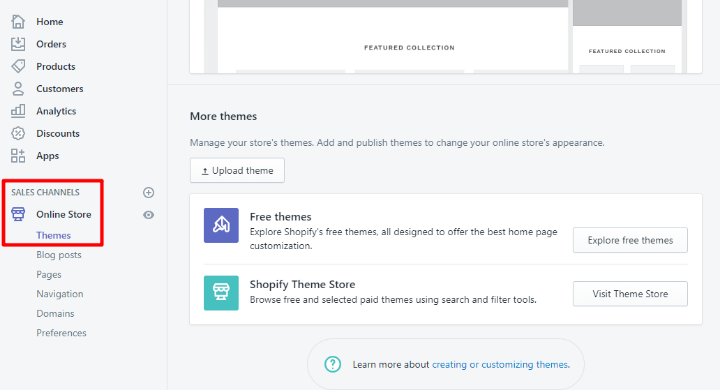
You can find both free and premium Shopify themes. To access these themes, go to Online Store → Themes under the Sales Channels section in your sidebar.
Then, you can click to view the free or premium options. Check out this post for a look at some of the best Shopify themes:
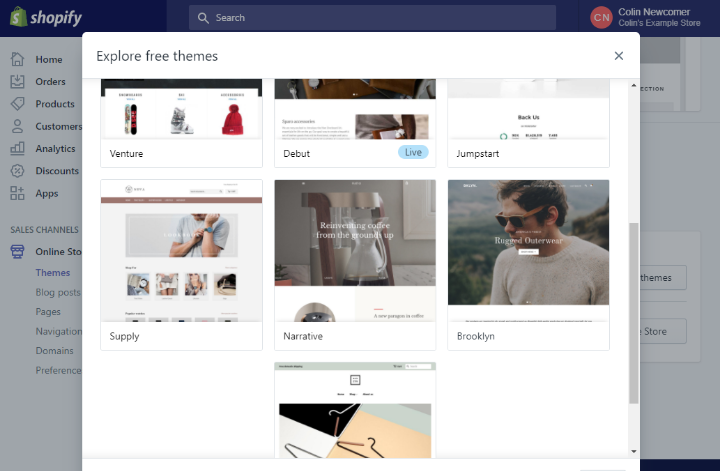
For example, if you choose the free themes option, you can browse them right there and pick the one that you like by clicking on it:
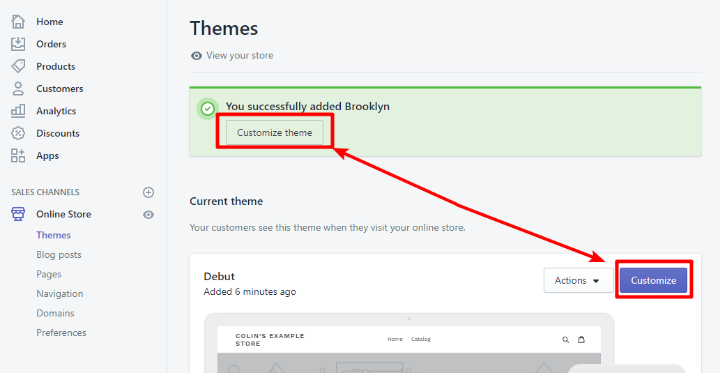
Once you’ve chosen a theme, you’ll want to customize it to add your own imagery and text. You can do this by clicking the Customize or Customize theme buttons:
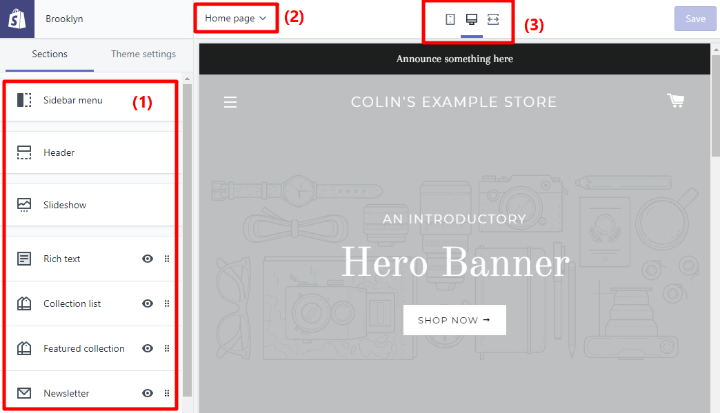
In the customize theme interface, you can:
- Customize individual sections of the page on the left side (click on a content block for more options)
- Change between pages by using the drop-down at the top
- See how your design looks on different devices by using the responsive preview icons
Once you finish making your changes, make sure to click Save.
Step 3: Add And Organize Your Products
Once you’ve set up the basic design for your store via your theme, you’re ready to start adding your first products!
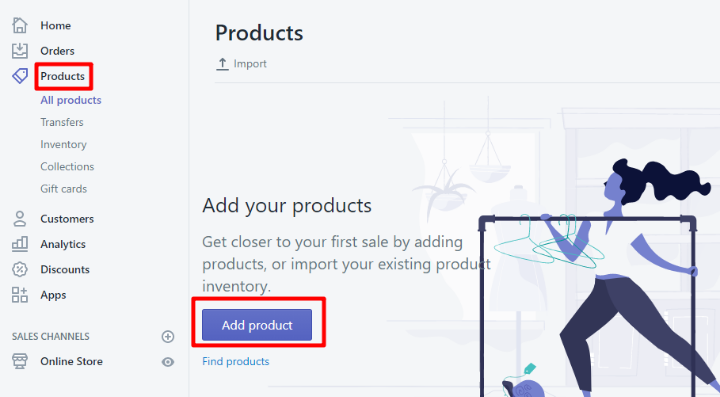
To add your first product, go to the Products tab and click the big Add product button:
That will take you to the Add product interface. There’s a lot going on here. In the main interface, you can add your product’s:
- Title
- Description
- Image(s)
- Price
- Inventory status
- Shipping weight
- Variants. For example, if you sell a t-shirt with different sizes, each size is a separate variant.
- SEO settings
Most of the above settings are fairly self-explanatory – variants is the only one that might take a little effort to grasp.
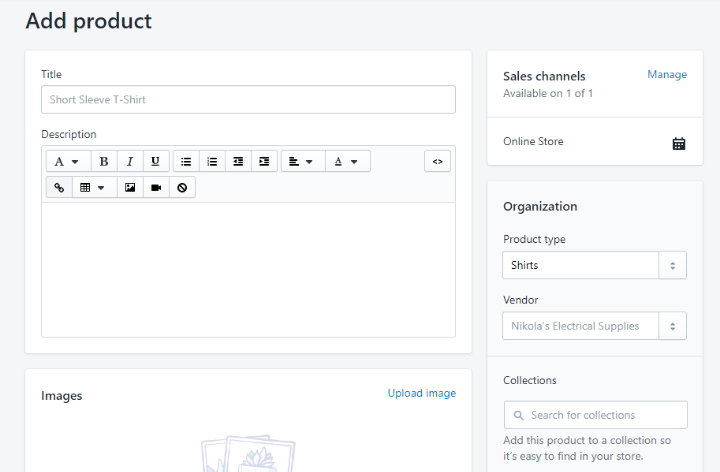
On the right side, you can select:
- Product Type – this is like a category.
- Vendor – lets you mark down a manufacturer or wholesaler. This information is not public – it’s just to help you stay organized internally.
- Collections – these help you organize products into groups that you can display at various parts of your store. For example, you could make a special collection of products to feature on your homepage.
- Tags – you can use multiple tags for each product.
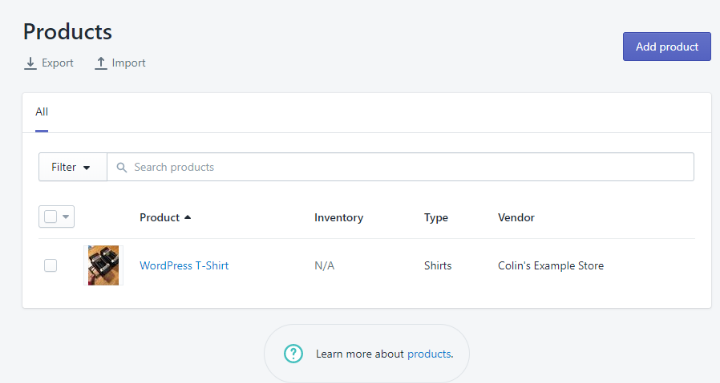
Once you’ve added a product, you can see it in the All products list:
To add additional products, just repeat the process.
Step 4: Add Other Core Pages
While the engine of your store is going to be the shop pages, you’ll probably want other pages to share more information with your visitors. For example, most stores include an About page that tells the store’s origin story.
To create a new page, go to Online Store → Pages under the Sales Channels area. Then, click Add Page and write your page using the editor:

Step 5: Set Up Your Navigation Menu
Your navigation menu affects how shoppers can browse your store. Because you want to make it easy for shoppers to find the products that they want, your navigation menu is super important.
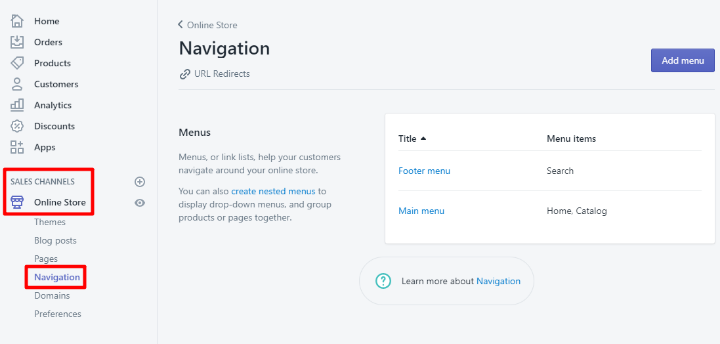
To manage your default menus and/or create new menus, go to the Navigation area under the Online Store sales channel:
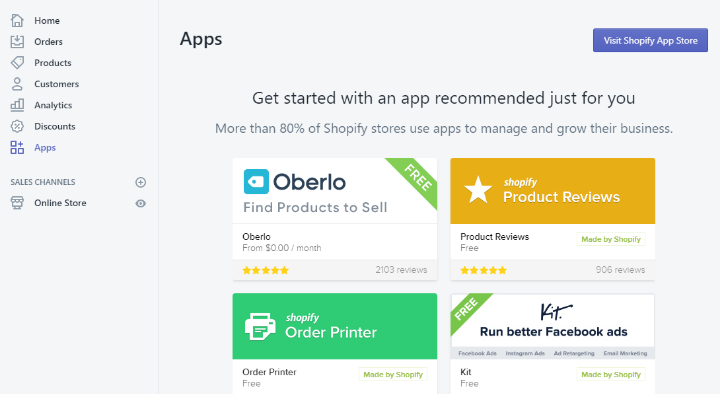
Step 6: Consider Whether You Need Any Apps
Apps let you add additional functionality to your store. If you’re familiar with WordPress, they function similarly to WordPress plugins.
You don’t necessarily need any apps – your store is fully-functional without them. But apps can add a lot of helpful functionality to your store, as well as make it easier to run certain aspects of your store (for example, there’s an app that helps you print out orders).
To browse and/or add apps, just click on the Apps tab in your Shopify dashboard:
Step 7: Configure General Settings
One last thing before you launch your store! Head to the overall Settings (bottom-left corner) to set up lots of important nitty-gritty details like:
- Payment providers
- Shipping
- Taxes
- Notifications

Shopify will try to automatically fill in as much information as possible, but you’ll likely want to customize many of these settings (or at least make sure that Shopify’s defaults are acceptable).
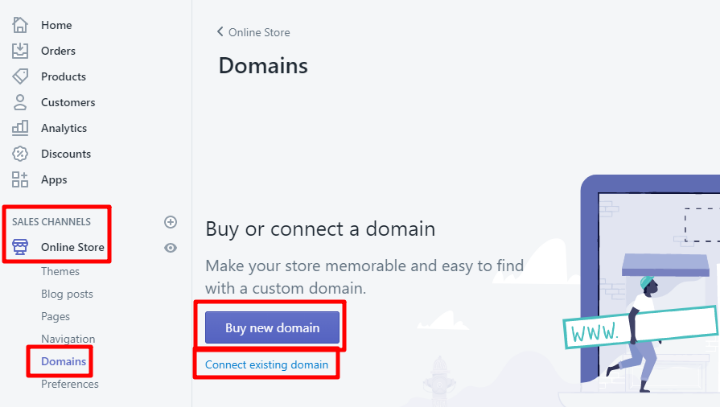
Step 8: Set Up Your Own Domain Name
Now, you just need to connect your own domain name to make things more professional.
This basically means that shoppers can access your store at yourstore.com instead of yourstore.myshopify.com.
To set up your domain name, go to the Domains area under the Online Store sales channel.
You can either purchase a domain name from Shopify or connect your own domain name that you purchased elsewhere:
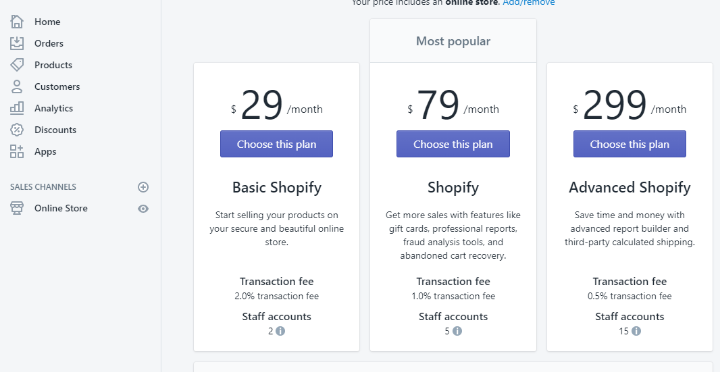
Step 9: Pick A Paid Plan And Launch Your Store
At this point, your store should be good to go! You’ll almost certainly want to tweak things as you get more experience – but you should have a working store to get you started.
To launch, all that you need to do is go to Pick a plan:
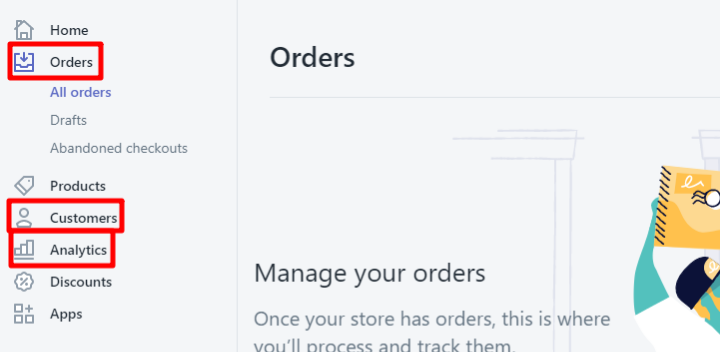
And once you start getting customers and orders, you’ll be able to manage them using the various options in your dashboard sidebar:
Enjoy Your New eCommerce Store
And there you go – that’s how easy it is to create an eCommerce store with Shopify. You can be up and running with something functional in an afternoon (and without touching any code). As much as we love WordPress and WooCommerce, the same just cannot be said for launching a WooCommerce store.
If you’re still on the fence, though, you can check out some WooCommerce examples to see if you like the look of them better than the Shopify method we showed you above.
Can you suggest a good woocommerce developer?