How to Use the Ally Plugin by Elementor: A Step-by-Step Guide
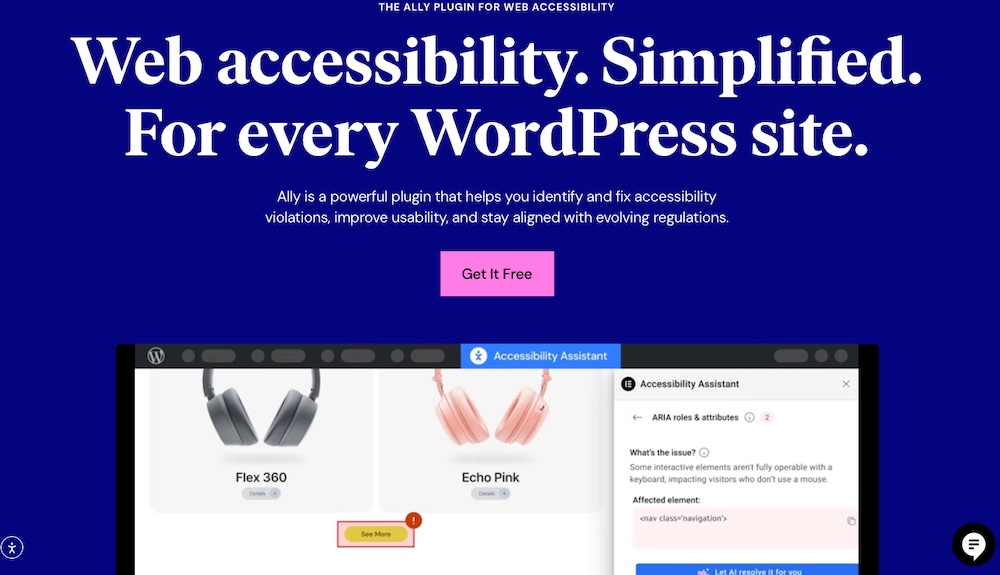
Creating a website that’s accessible to everyone isn’t just good practice. It’s good business. With the Ally plugin by Elementor, you can enhance usability, meet WCAG standards, and give visitors more control over how they experience your content.
Best of all, it doesn’t matter if you’re designing a website from scratch or improving an existing site. In every case, Ally makes it easy to identify and fix common accessibility issues while offering built-in tools for a more inclusive user experience.
In this step-by-step guide, we’ll show you how to use Ally to audit your site, apply improvements, and build a web experience that works for more people.
Let’s get started.
What Is the Ally Plugin for Web Accessibility?
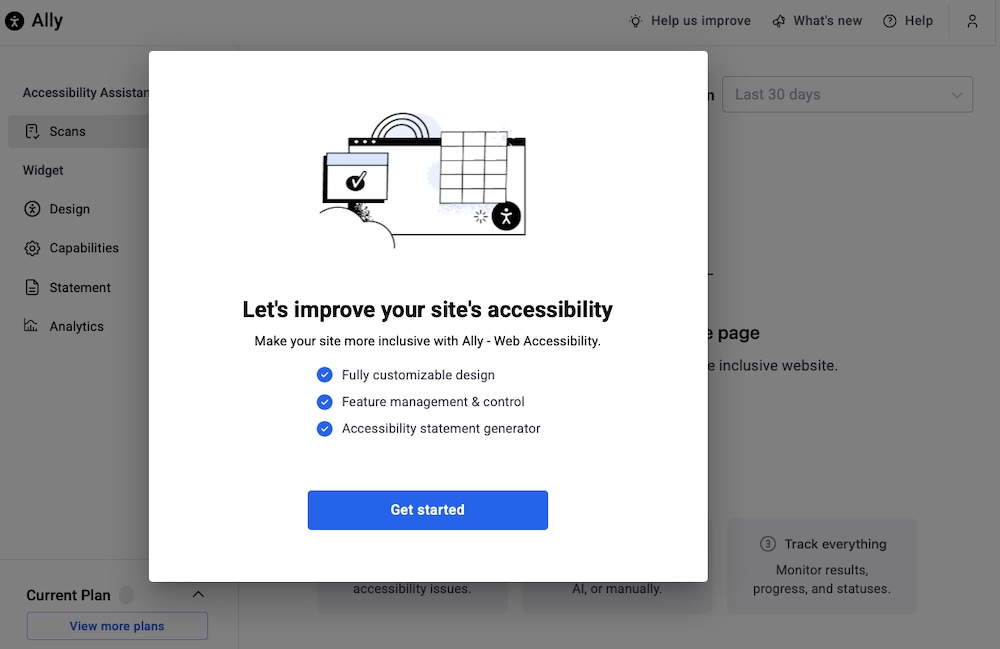
Ally by Elementor is a WordPress plugin designed to simplify web accessibility compliance and usability without needing to be a tech expert. It bundles three core tools into one accessible package: the Ally Assistant, a visual usability widget, and an accessibility statement generator.
Once installed and connected to your Elementor account, you can run automated accessibility scans, apply fixes, and offer visitors personalized browsing options like contrast modes, font resizing, and animation controls.
On the back end, Ally aligns with WCAG 2.1 AA standards, scanning for more than 180 accessibility violations, categorizing them by severity, and guiding you through solutions. While it’s not a full compliance guarantee, it brings you significantly closer by automating the detection and resolution of common issues like missing alt text, keyboard navigation gaps, ARIA roles, and input form errors.
Key Features of Ally Plugin
Ally is more than just an accessibility scanner. It’s a complete toolkit designed to help you create a site that’s both compliant and user-friendly. From automated audits to customizable user controls, every feature is built to streamline the accessibility process and improve the browsing experience for all visitors.
Here’s what the plugin offers at a glance:
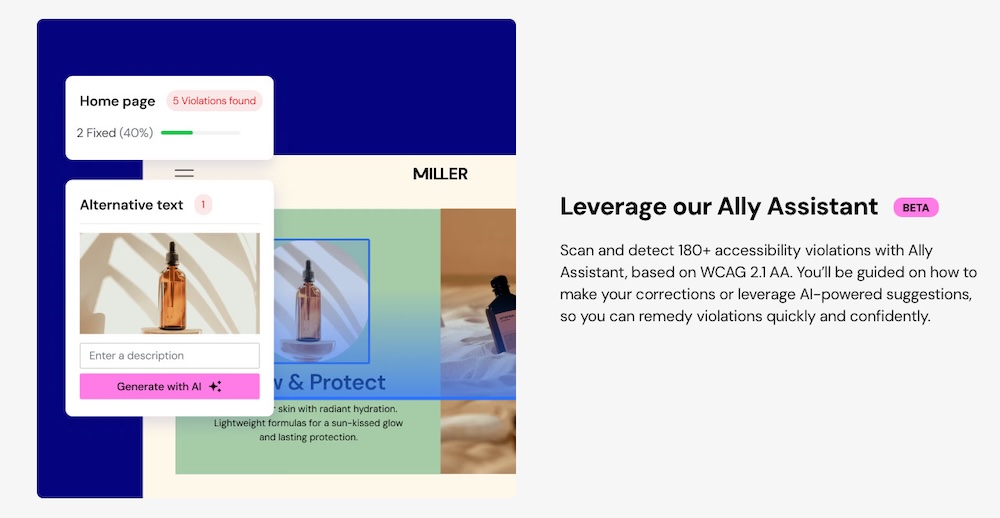
- Ally Assistant: Scan any URL and detect accessibility issues; get AI suggestions or manual guidance to fix violations.
- Usability Widget: Let users customize their browsing experience with tools like text resizing, contrast toggles, animation pause, font choice, screen reader support, and more.
- Accessibility Statement Generator: Auto-create and publish a compliance-aligned accessibility statement page.
- Scan Overview Dashboard: Track your accessibility progress, scan history, and open vs resolved issues.
- AI‑Powered Auto‑Fix (Paid features): Automatically resolve common issues like alt text, form labels, keyboard navigation, and table structure.
- Widget Customization & White Labeling; Adjust colors, icons, position, and remove Elementor branding (in higher tiers).
- Visitor Analytics: Monitor how users interact with the widget features (paid).
With tools like widget design customization, white-label options, and AI remediation, Ally helps you manage the technical stuff and keep on top of the usability side of accessibility.
Ally Plugin Pricing
Ally is offered as a freemium plugin—meaning you can get started for free, but more advanced features are behind paid plans.
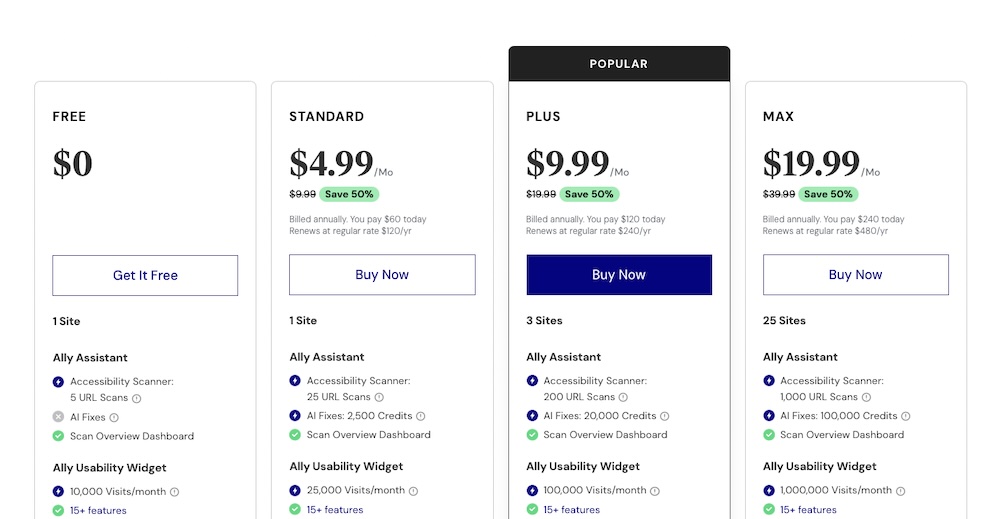
Free Plan (limited access)
- Includes the Ally Assistant scanner with 5 URL scan credits (scan any page repeatedly as it only counts once per URL)
- Access to the Usability Widget across up to 10,000 widget loads/month
- Basic widget customization, statement generation, limited styling options
- No AI fix credits, no analytics, no white‑label support
Standard Plan – $4.99/month (billed annually)
- 1 website activation
- Usability widget supports up to 25,000 visits/month
- 25 URL scan credits
- 2,500 AI fix credits
- Includes white-label branding, screen reader feature
- Full Overview Dashboard to track audit history and accessibility progress
Plus Plan – $9.99/month (billed annually)
- Up to 3 website activations
- Usability widget supports up to 100,000 visits/month
- 200 URL scan credits
- 20,000 AI fix credits
- All Standard features plus widget usage analytics
- Ideal for multi-site users or agencies
Max Plan – $19.99/month (billed annually)
- Up to 25 website activations
- Usability widget supports up to 1,000,000 visits/month
- 1,000 URL scan credits
- 100,000 AI fix credits
- Advanced analytics, enterprise-scale usability, and full feature set across sites
Each paid tier scales based on site traffic and device usage, so you can upgrade as your site grows or your compliance needs deepen.
Plan Summary
| Plan | Websites | Monthly Visits | URL Scans | AI Fix Credits | Key Features |
|---|---|---|---|---|---|
| Free | 1 | 10,000 | 5 | — | Basic widget, styling, dashboard |
| Standard | 1 | 25,000 | 25 | 2,500 | White-label, screen reader, full dashboard |
| Plus | 3 | 100,000 | 200 | 20,000 | Multi-site, usage analytics, full feature set |
| Max | 25 | 1,000,000 | 1,000 | 100,000 | Enterprise-scale, advanced analytics |
How to Set Up the Ally Plugin
Getting started with Ally is fast and straightforward. Whether you’re building a new Elementor site or improving an existing one, Ally integrates directly with the WordPress dashboard and starts working as soon as it’s installed. In this section, we’ll walk through the initial setup process — starting with installation and activation — so you can begin auditing and improving your site’s accessibility right away.
1. Install and Activate Ally
Before you can start scanning for accessibility issues or enabling the usability widget, you’ll need to add Ally to your WordPress site. Here’s how:
- Log in to your WordPress dashboard. You’ll need admin access to install plugins.
- Go to Plugins > Add New from the left-hand menu.
- In the search bar, type “Ally by Elementor.” Look for the plugin with Elementor listed as the author.
- Click “Install Now,” then “Activate” once installation is complete.
Once activated, Ally will automatically connect to your Elementor account (you may be prompted to log in) and begin scanning your site for accessibility issues.
No extra configuration is required out of the box. If you’re using Elementor Pro, you’ll benefit from deeper widget integration and more detailed scan results. Ally is designed to work seamlessly with both free and Pro versions of Elementor, but Pro users will notice added precision when issues are tied to advanced widgets or theme builder elements.
After activation, you’ll find Ally’s new menu option in your WordPress sidebar, where you can view your site’s accessibility score, scan history, widget settings, and more.
2. Run Your First Accessibility Audit
Once the Ally plugin is installed and activated, your next move is to run an audit so you can see where your site currently stands in terms of accessibility.
Here’s how to do it:
- In your WordPress dashboard, look for Ally in the left-hand menu and click it to open the plugin dashboard.
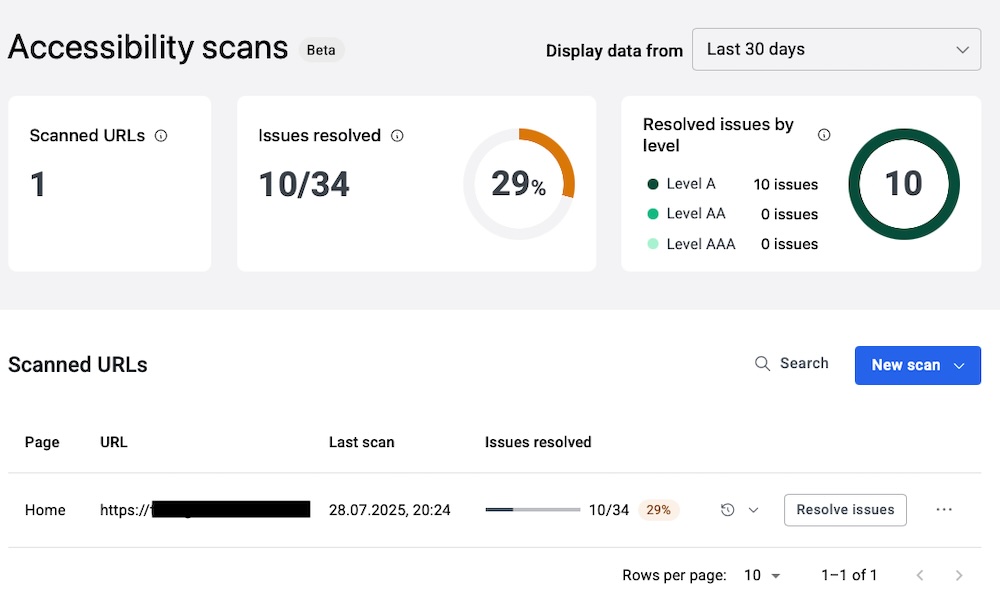
- You’ll land on the Scan Overview screen, which shows your current accessibility score and a breakdown of any known issues. If a scan has already been run, that is.
- If not, click the Scan home page button to launch your first audit. Ally will crawl your site and check it against WCAG 2.1 AA guidelines.
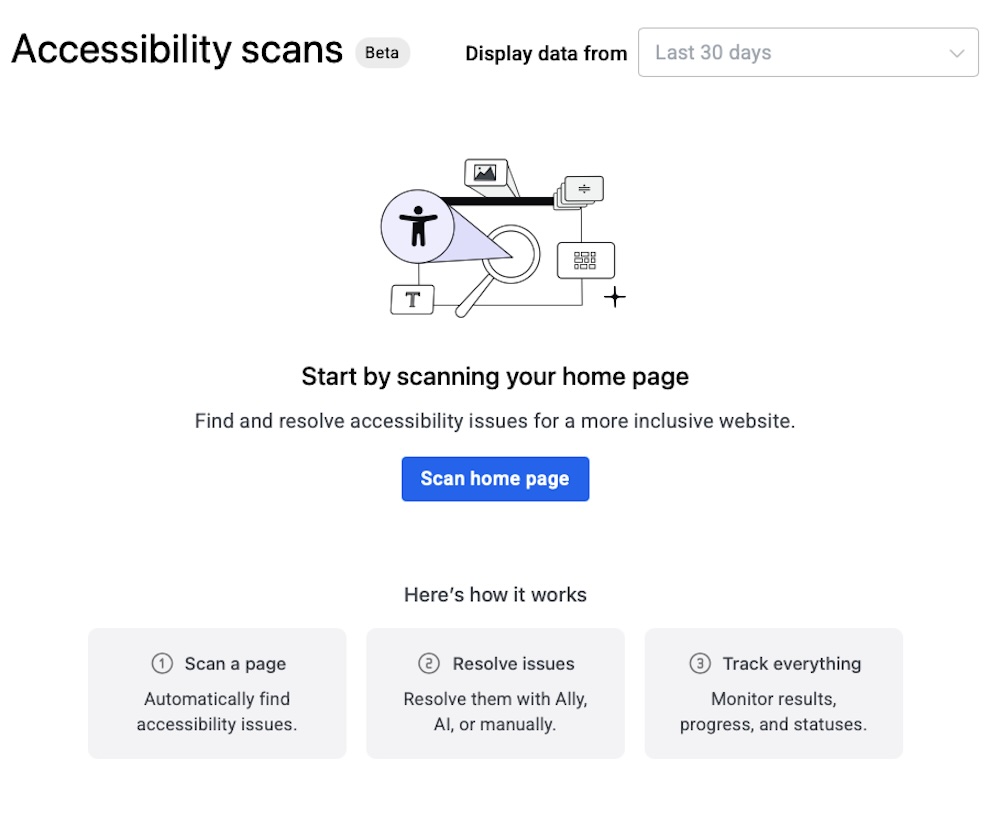
The scan typically takes just a few seconds to complete and covers over 180 accessibility checks. Once it’s done, you’ll get a prioritized list of any violations it finds categorized by severity like critical, warning, or minor, with links to more information about each one.

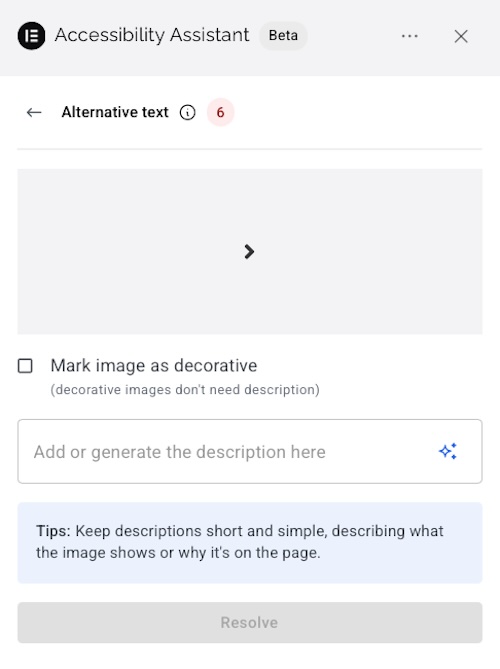
For instance, if images are missing alt text, this will alert within the Accessibility Assistant and you can input text yourself or use the AI tool to generate them.
You’ll also see a per-page breakdown, so you can focus on the areas of your site that need the most attention first. Pages are scored individually, making it easy to track which templates or layouts might need extra work.
What’s especially helpful is that Ally doesn’t just tell you what’s broken, it explains why each issue matters and, when possible, offers clear guidance or an AI-generated fix (if you’re on a paid plan). This saves a ton of guesswork and allows you to tackle issues efficiently, even if you’re not an accessibility expert.
3. Explore the Ally Dashboard
Once your first scan is complete, the Ally dashboard becomes your main control panel for accessibility. It’s designed to integrate cleanly with the Elementor experience, so navigating through issues and improvements feels intuitive, even if you’ve never dealt with accessibility before.
Here’s what you’ll see in the main dashboard:
- Accessibility Score: This is a quick-glance score (0–100) that reflects the overall accessibility health of your site. It updates in real time as you resolve issues.
- Top Issues: Ally prioritizes the most critical problems, things like missing form labels, poor color contrast, or improper heading hierarchy that are likely to impact users the most.
- Widget-Specific Warnings: If you’re using Elementor’s visual builder, you’ll appreciate this. Ally ties accessibility warnings directly to specific Elementor widgets, so you know exactly which section or block needs attention.
- Fix Suggestions: For every flagged issue, Ally provides step-by-step recommendations. If you’re on a paid plan, many of these come with one-click AI fixes, making resolution even faster.
You can click on any issue to view more details, including a short explanation of what’s wrong, why it matters, and how to fix it manually. Most entries also include links to relevant WCAG 2.1 documentation if you want to learn more or double-check compliance requirements.
The layout is clean, actionable, and clearly built with non-technical users in mind. You don’t need to hunt for elements or toggle between tabs. Everything is centralized in a way that supports fast, informed decision-making.
4. Fix Accessibility Issues with Inline Editing
One of Ally’s standout features is how tightly it integrates with Elementor’s visual editor. Instead of copying error messages into a spreadsheet or hunting through your site’s source code, you can address accessibility issues directly where they appear, right inside the builder.
Here’s how it works:
- From the Ally dashboard, click on any specific issue. Ally will highlight the affected page and element, then provide a Go to Page or Edit with Elementor link.
- Once you’re in the Elementor editor, Ally will visually flag the problematic widget or section. You’ll see an overlay badge or side notification showing what’s wrong, whether it’s missing alt text, a low-contrast color combination, or a skipped heading level.
- For many issues, Ally includes real-time suggestions or guided prompts in the sidebar to help you make the fix. These are usually paired with inline links to Elementor widget settings, so you can correct things like button labels or form field instructions without leaving the page.
If you’re on a paid plan, you can take advantage of AI, one-click fixes. For example, Ally can auto-generate alt text based on an image’s content, correct table structures, or add keyboard navigation cues, all while preserving your layout.
Common Inline Fixes
- Adding or editing image alt text
- Improving heading structure (like replacing multiple H1s with H2s)
- Adjusting color contrast between text and background
- Adding labels and placeholders to form fields
- Ensuring buttons and links have descriptive text
Best of all, as you make changes, Ally rescans the element automatically and updates your accessibility score and issue list in real time. You’ll know immediately whether a fix resolved the problem or if additional action is needed.
This tight Elementor integration keeps your workflow fast and focused with no jumping between screens or sealing with code required.
5. Keep Accessibility in Check with Ongoing Scans
Improving accessibility isn’t a one-and-done task. It’s an ongoing part of maintaining a high-quality website. As you add new content, update layouts, or install third-party widgets, you run the risk of introducing fresh accessibility issues without realizing it. That’s why Ally includes powerful monitoring features to help you stay on top of things long after the initial scan.
From the Ally dashboard, you can configure scheduled scans to automatically check your site at regular intervals. Choose from daily, weekly, or monthly scans depending on how often your content changes. These scans quietly run in the background and flag any new issues as they appear, so you don’t have to worry about manually auditing every update.
For tracking progress over time, Ally also keeps a full log of past scans and resolved issues. This is especially useful for agencies or site managers who need to show proof of ongoing compliance efforts. You can generate downloadable reports, filter by issue type or severity, and measure how your accessibility score improves from month to month.
If you’re managing multiple sites, these monitoring tools become even more valuable. Instead of bouncing between dashboards or running audits manually, you can let Ally handle the heavy lifting, which saves you hours of maintenance while giving you peace of mind that your site is still accessible.
6. Set Up the Ally Usability Widget
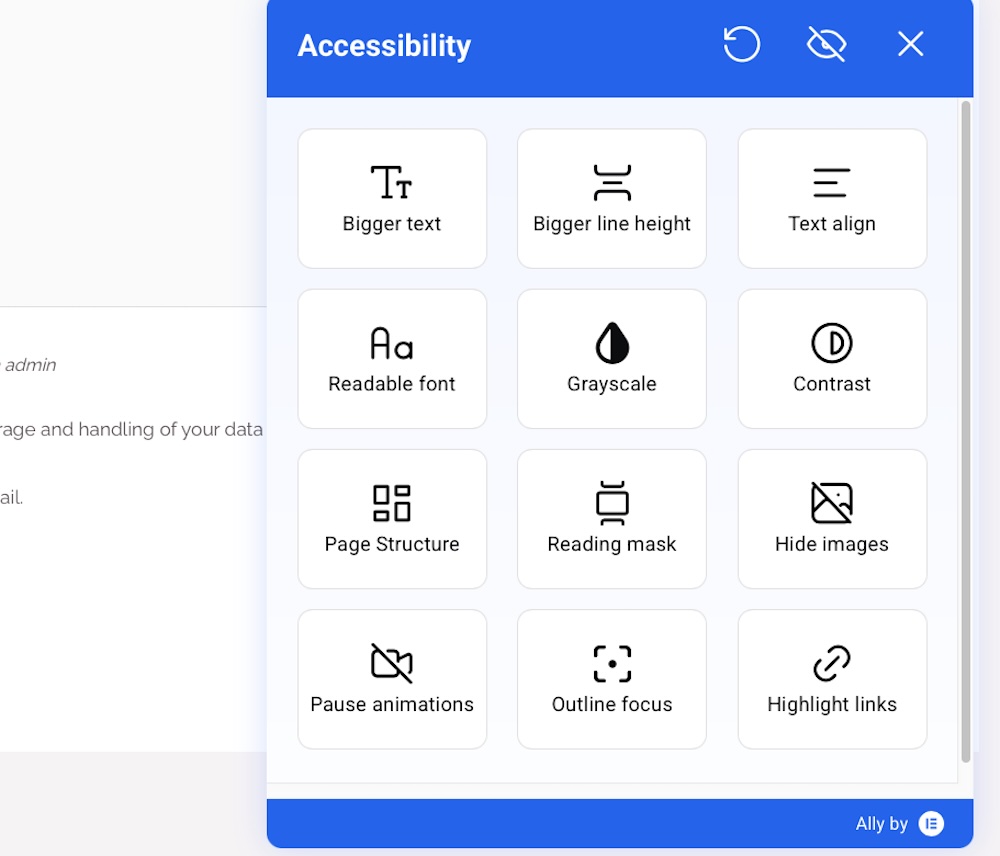
Ally isn’t just about fixing accessibility issues behind the scenes, it also gives your visitors tools to personalize how they interact with your website. The front-end usability widget is a key part of this. It appears as a small, clickable icon (often in the bottom corner of the screen) that opens a menu of accessibility enhancements users can toggle based on their needs.
To set up and customize the widget:
- Go to your WordPress dashboard and navigate to Ally > Capabilities.
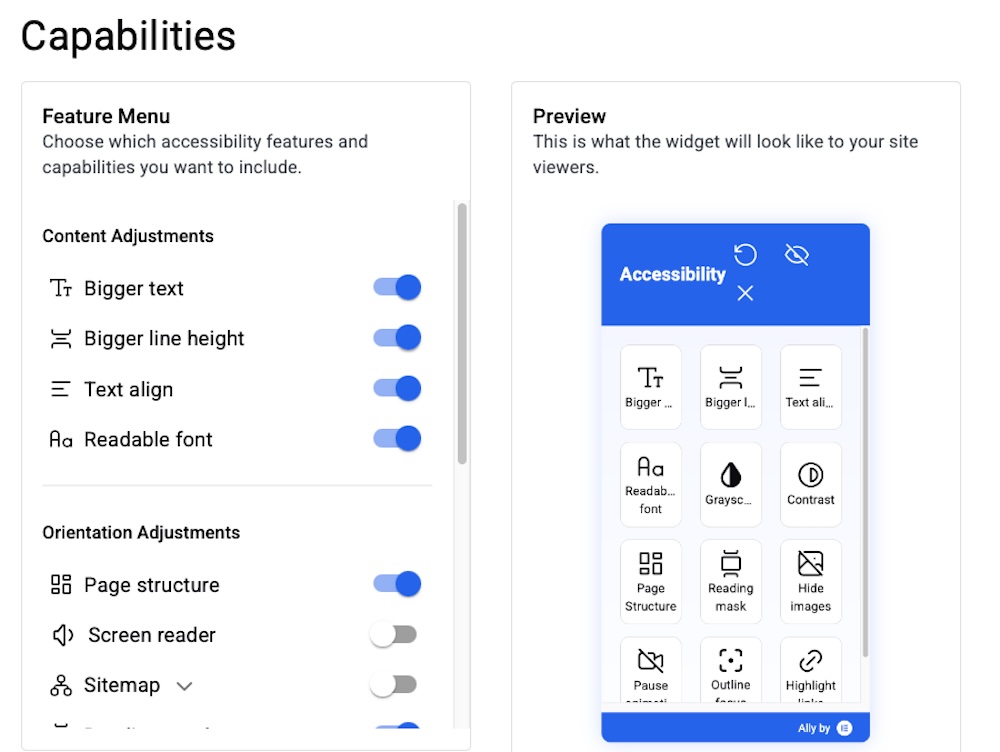
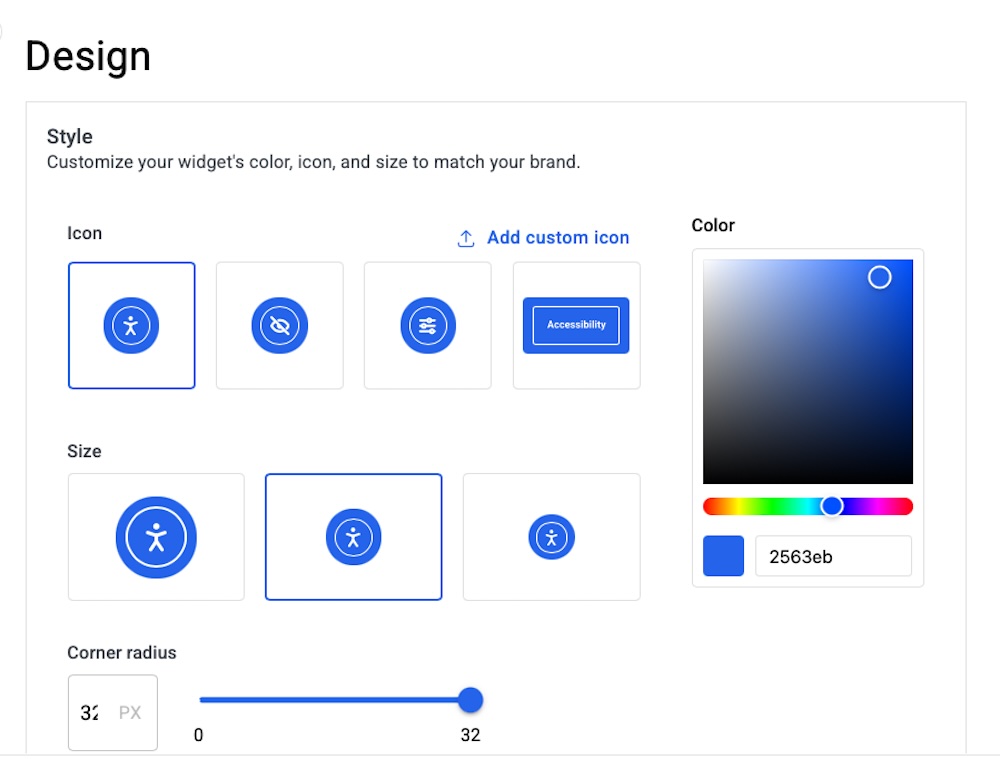
- You’ll see a live preview of the widget and a series of toggles and style options. From here, you can enable or disable features, choose the icon style, set its position on the screen, and adjust the color scheme to match your site’s branding.
Available user features include:
- Text resizing
- Line height adjustment
- Font switching (for dyslexia-friendly options)
- Dark/light/high contrast modes
- Pause all animations
- Highlight links
- Keyboard navigation support
- Screen reader enhancements (Pro plans only)
- Language selector (Plus and Max plans)
These tools are designed to help people with visual impairments, neurodivergent users, and others who benefit from a more customizable interface.
You can also choose to white-label the widget (removing Elementor’s branding) and access analytics on how often users engage with its features — both available in paid plans. For multilingual sites, the language selector ensures the widget instructions and tooltips are accessible in the visitor’s preferred language.
Once your settings are saved, the widget goes live automatically across your site, no need to touch your theme files or add custom code. It’s a simple way to give users more control, improve usability, and show that your brand takes accessibility seriously.
7. Generate an Accessibility Statement
Once your site is on its way to being more accessible, it’s a good idea to let visitors know what you’re doing and how they can get in touch if they need help. That’s what an accessibility statement can provide. It shows that you’re making an effort, outlines the standards you’re aiming for, and builds trust with your audience.
Ally makes it easy to create one without starting from scratch.
To do it:
- Open the Ally dashboard in your WordPress admin
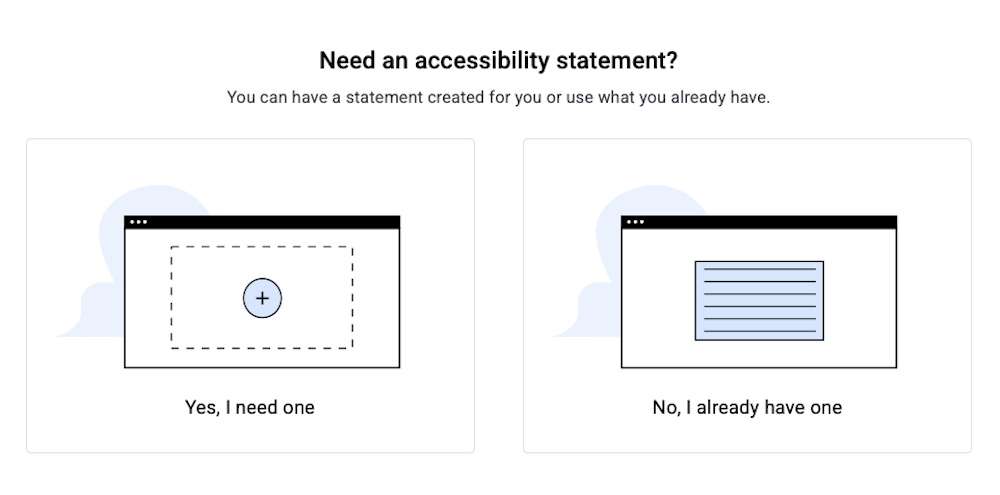
- Click on the Accessibility Statement tab then click Yes, I need one under Need an accessibility statement?
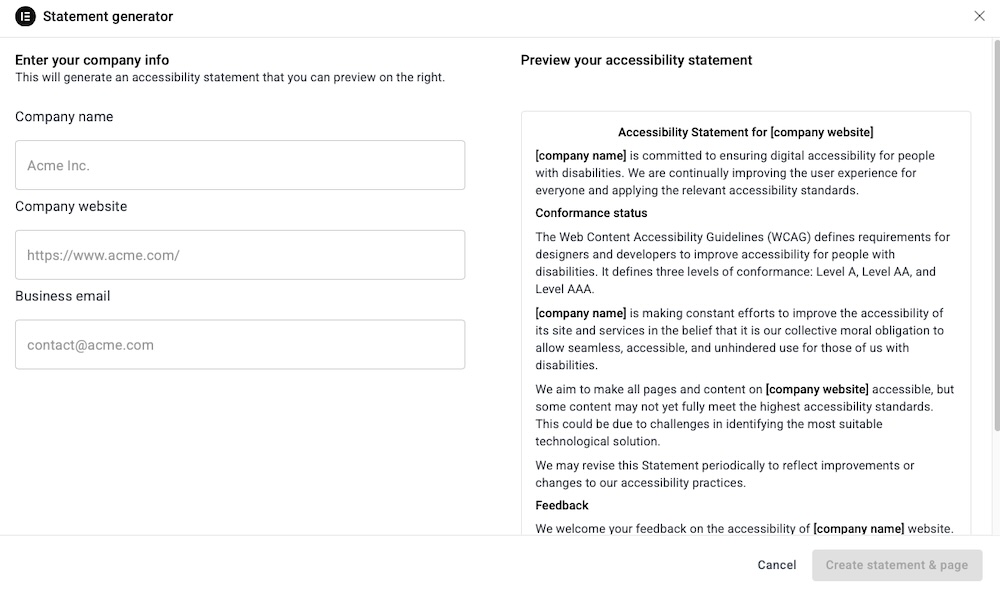
- Fill in a few quick details like your site name, the guidelines you’re following (usually WCAG 2.1 AA), and how people can reach you
- Hit Create statement & page, and Ally will create a fully formatted page with everything included.
You can publish the page as-is, or tweak the wording to match your tone. Either way, you’ll have a clean, accessible statement that covers all the essentials, from what your site is doing well to where you’re still working on improvements.
How Does the Ally Plugin Perform?
In short? Pretty impressively.
Ally doesn’t try to be everything. Rather, it just focuses on making accessibility easier for real site owners, and it pulls that off really well. It’s fast, easy to use, and fits naturally into your existing Elementor workflow. You don’t have to be an accessibility expert or know the ins and outs of WCAG to make real improvements to your site.
The audit tool is quick and surprisingly clear. You’ll get a list of issues organized by priority, with plain-language explanations of what’s wrong and how to fix it. No confusing tech speak or vague warnings. And if you’re on a paid plan, the AI-powered fixes are a huge timesaver, especially for stuff like alt text, form labels, or button descriptions. One click and you’re done.
It’s lightweight and doesn’t slow you down. Some accessibility tools are resource hogs or clash with Elementor. Ally doesn’t. It runs quietly in the background and the usability widget loads quickly without messing up your site design.
The front-end widget is more than just window dressing. Visitors can adjust text size, contrast, animation, and more all with a simple click. It’s not overstuffed with random features, either. Everything there serves a real purpose, especially for users who need assistive tools to navigate the web comfortably.
What really makes Ally stand out is how thoughtfully it’s integrated into Elementor. You’re not jumping between tools or copying code. You just scan, fix, and move on right inside the builder. It’s a solid option for anyone who wants to take accessibility seriously without getting overwhelmed.
Pros and Cons of Using the Ally Plugin
No plugin is flawless, but Ally gets a lot of the important things right. Here’s a quick breakdown of what it does well and where it could still improve.
✅ Pros
- Built for Elementor: Ally feels like a native part of the Elementor experience. No awkward integration, no clunky interface. Just point, click, fix.
- Clear, actionable audits: The scan results are easy to understand, even if you’re new to accessibility. You’ll learn what needs to be changed, why it’s important, and how to fix it.
- AI-powered fixes save time: On paid plans, Ally can apply smart fixes automatically for common issues like alt text and form labels. Huge win for solo site owners and small teams.
- Customizable usability widget: The front-end widget gives real users control over how they view your site, including things like text size, contrast, animation toggles, and more all in one tidy panel.
- White-label and reporting options for agencies: If you manage client sites, Ally’s exportable reports and widget branding options are major perks.
- Lightweight and fast: Doesn’t drag down performance or interfere with other plugins, surprisingly low impact for what it does.
⚠️ Cons
- No public pricing table without signup: The pricing isn’t listed in full detail upfront on Elementor’s site. You need to log in to see or manage plan details.
- Free plan is limited: Five scan credits and a capped widget aren’t much. Especially, if you’re managing more than a very small site.
- Doesn’t guarantee full compliance: Ally helps with WCAG 2.1 AA, but it won’t automatically make your site legally bulletproof. You’ll still need to use good judgment and sometimes manual tweaks.
- Advanced features locked behind paid tiers: AI fixes, analytics, and multi-site support all require a subscription. This may be a hurdle for hobbyists or casual users.
Should You Use the Ally Plugin?
If you’re using Elementor and want to take accessibility seriously without getting buried in technical work, Ally is a smart move.
It’s easy to install, simple to use, and packed with genuinely helpful features, like guided audits, AI-backed fixes, and a customizable usability widget that makes your site more inclusive for real users. And because it’s built by Elementor, it fits right into your existing workflow without extra plugins, custom code, or awkward workarounds.
The free version is a good starting point for small sites, while the paid tiers offer enough value to justify the cost, especially if you’re managing multiple websites, working with clients, or trying to stay ahead of accessibility requirements.
No, it won’t magically make your site 100% compliant overnight (no plugin can), but it will get you closer, more quickly and with a lot less stress. And for most WordPress site owners, that’s a big step in the right direction.
So yes, if accessibility is on your radar — and it should be — Ally is well worth trying.
Leave a Reply