
How to Fix the DNS Server Not Responding Error on Windows and Mac
If you want to access the internet, you would normally choose to use a browser, which accesses the Domain Name System (DNS). As such, if you have an issue such as the DNS Server Not Responding error, this is going to put up a brick wall between you and the World Wide Web (WWW).
The good news is that you can fix most browser errors – but especially DNS-based ones – with a few tweaks to some of the options. Regardless of the browser you use or the Operating System (OS), you should be able to fix the issue within a few minutes.
For this post, we’re going to show you how to solve the DNS Server Not Responding error. We’ll cover the steps for both Windows and macOS machines, and tell you everything you need to know to put things right again.
What the DNS Server Not Responding Error Is (And Why It Happens)
The cause of this error begins with the DNS. This is akin to one big lookup table, full of domain names and associated Internet Protocol (IP) addresses. When you type an address into the browser – for instance, example.com – the DNS runs down the list of domains, locates the corresponding IP address (such as 203.0.113.0), and connects the dots.
This give you the ability to type the domain URL rather than a string of server IP numbers, and achieve the same results. However, this system isn’t infallible. You can often find numerous DNS errors that crop up, and DNS Server Not Responding is a common one.
In a nutshell, this error means the browser can’t access the internet. As such, the issue is a client-side one. There are lots of ways to diagnose and fix the error though, and we’ll look at them next.
How to Fix the DNS Server Not Responding Error on Windows and Mac
We have seven differnt methods to help you fix the DNS Server Not Responding error. Most are cross-platform, although one is Windows only. Regardless, we’ll cover both Windows and macOS in depth throughout the article.
Here are the methods:
- Make sure you carry out some basic computer checks.
- Boot your machine up in safe mode.
- Flush out your DNS cache, and renew your IP address.
- Disable the secondary connections to your computer.
- Windows users can disable Peer-to-Peer connections, which could help.
- Disable IPv6 connections.
- Change the DNS server for your computer.
Of course, you’re going to waste your time if the problem turns out to be simple. First, let’s look at some of the basic checks you should carry out.
1. Carry Out Some Basic Checks Before You Begin
Before we get into the bulk of the solutions, it’s a good idea to rule out any simple issues that could stop your browser connecting to the internet. For example, there are some ‘duh’ tasks that are good to tick off first:
- Switch your browser and test out the website in question, as you may have a problem with the one browser.
- Restart your computer, as some need to re-validate dependencies and components that you install or update. Also, this gives you a clean slate to start from.
- Disable your antivirus and firewall, if you use them. You’ll only want to do this on a temporary basis, and you’ll more likely want to do this on a Windows machine, as many macOS setups don’t use either. This type of software deals in blocking connections, so you’ll want a clear path between the server and the browser.
It’s likely that you’ll have carried out some of these steps already, but it’s good to double-check each one to rule them out. Once you do this and still get the DNS Server Not Responding error, you can move onto the solutions proper.
2. Start Your Computer In Safe Mode
Because the DNS Server Not Responding error is client-side, you’ll want to scour your own computer for the cause. There’s no bigger cause than your OS, and while we mention restarting the machine in the previous section, there’s an advanced version you can try too.
Every OS has a ‘safe mode’, which loads the bare minimum it needs to work. This is great for diagnosing issues, as you can pare back everything on the system and check whether problems still crop up.
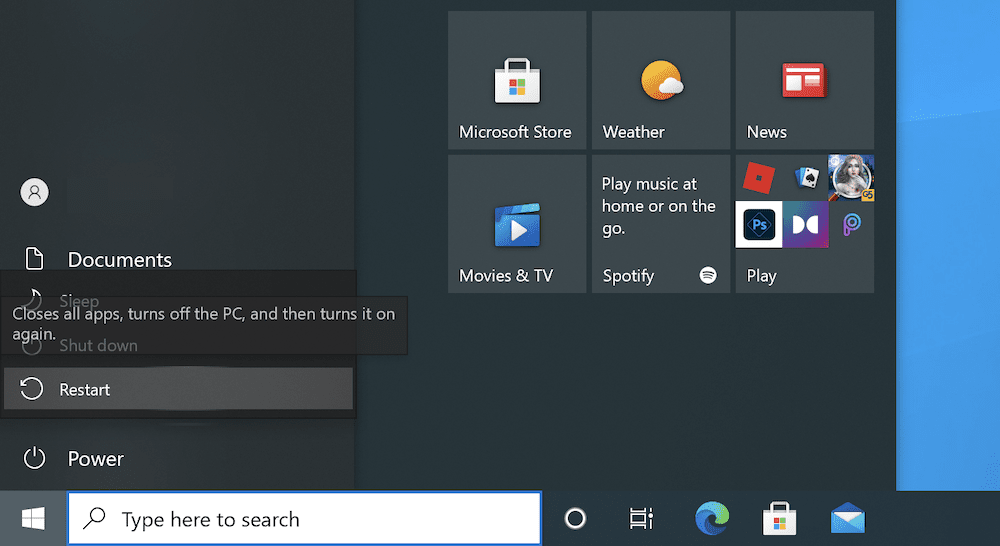
To do this on a Windows machine, head to the Windows menu, click Power, then hold Shift and hit Restart:
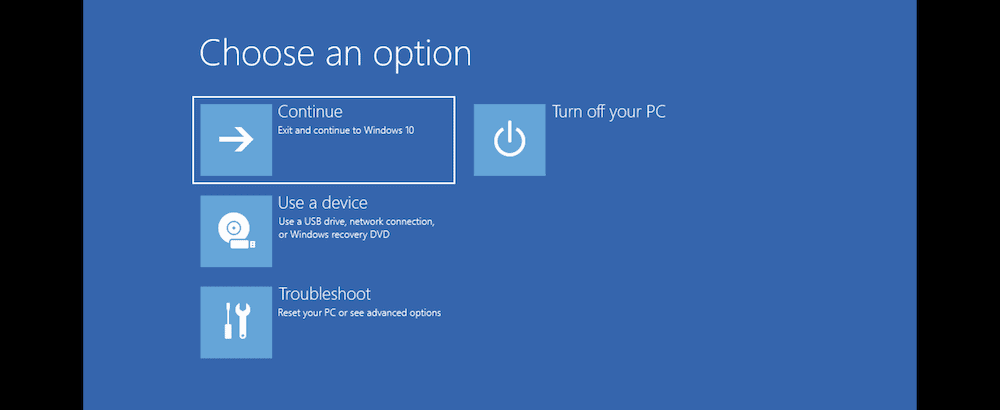
This will load up a menu, and here you’ll want to choose Troubleshoot:
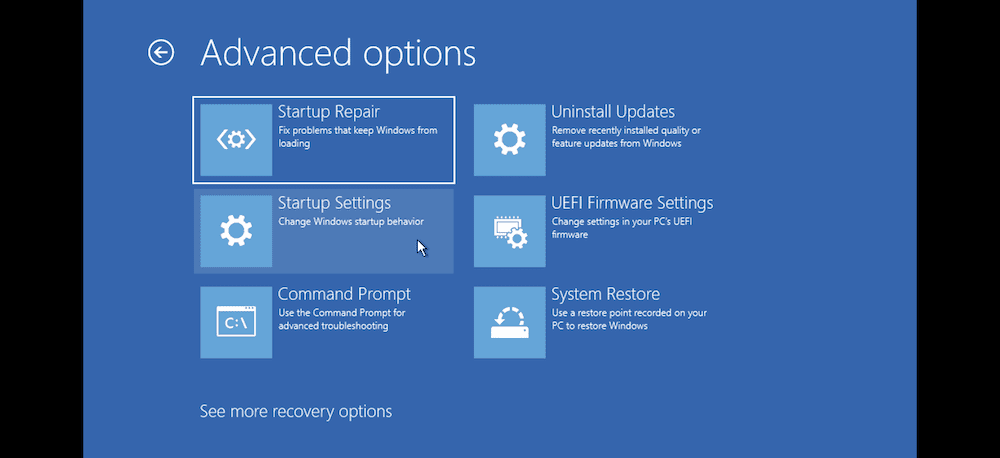
Under the Advanced Options menu, choose Startup Settings, then Restart:
You then get to play a game of ‘Pick a Number’. The one you want is either 4, 5, or 6:
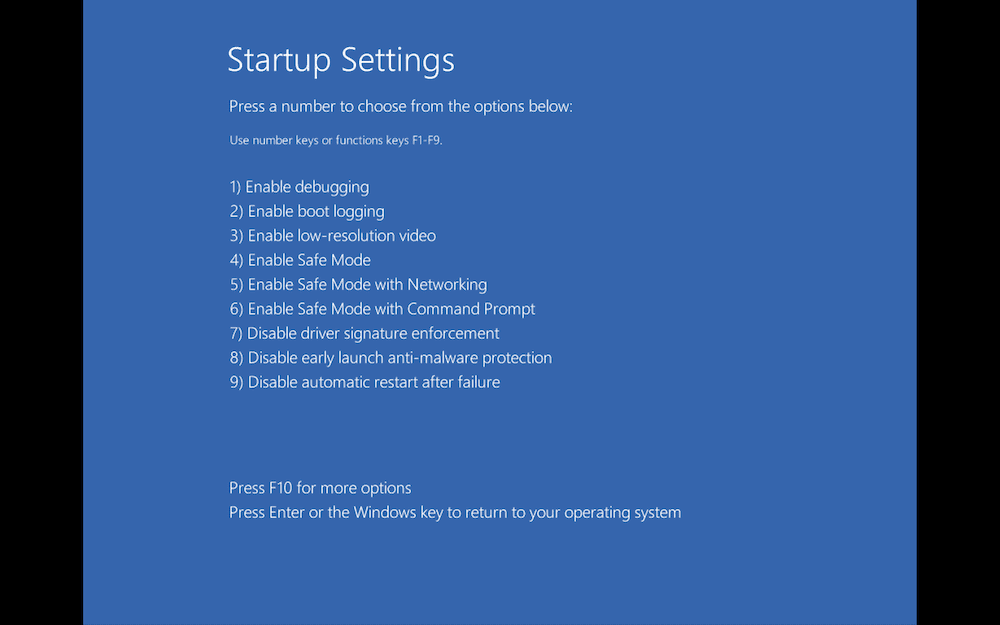
From here, Windows will restart in safe mode. Using it is almost the same as the ‘full-fat’ version, but you might see some basic graphics and other anomalies.
On macOS, there are two different methods to access safe mode depending on your processor. With Intel processors, simply hold the Shift key when you start the machine. For Apple Silicon processors, there’s a more convoluted workflow.
First, power down the machine. Then, hold the power button to turn on the Mac. You’ll see the Startup Options window. Here, select your startup disk, then hold the Shift key as you click Continue in Safe Mode.
Once you log in, you’ll be in safe mode.
3. Flush Your DNS Cache (And Release Your IP Address)
Much like other solutions that use a cache, the one for your computer’s DNS settings could need a refresh. To do this on macOS, you can open a Terminal window using Spotlight:
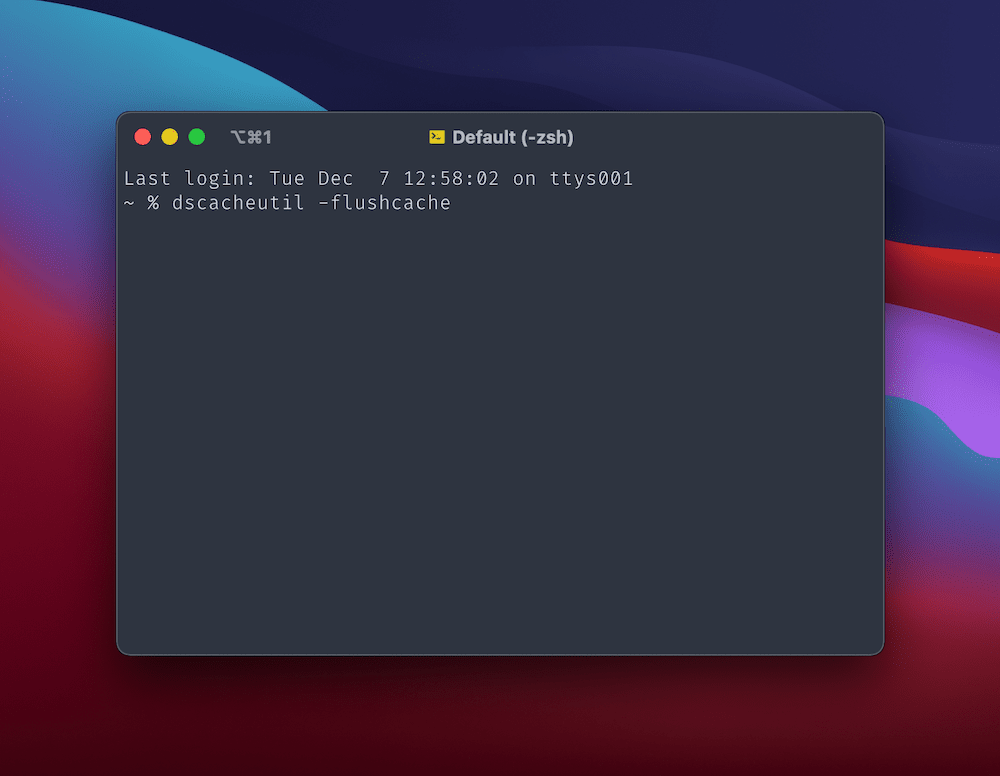
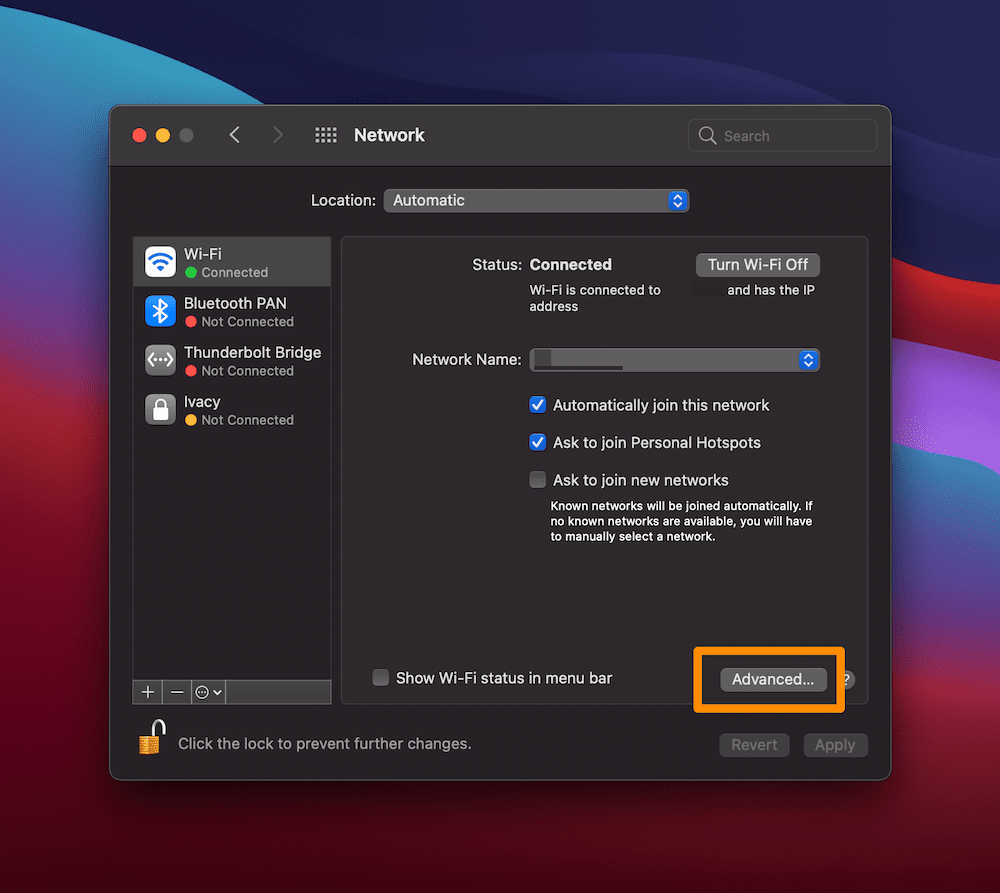
Next, enter dscacheutil -flushcache, then press the Enter key. You won’t see a success message, but this will flush the DNS cache. To release your IP address, open the System Preferences > Network screen, then click the Advanced button:
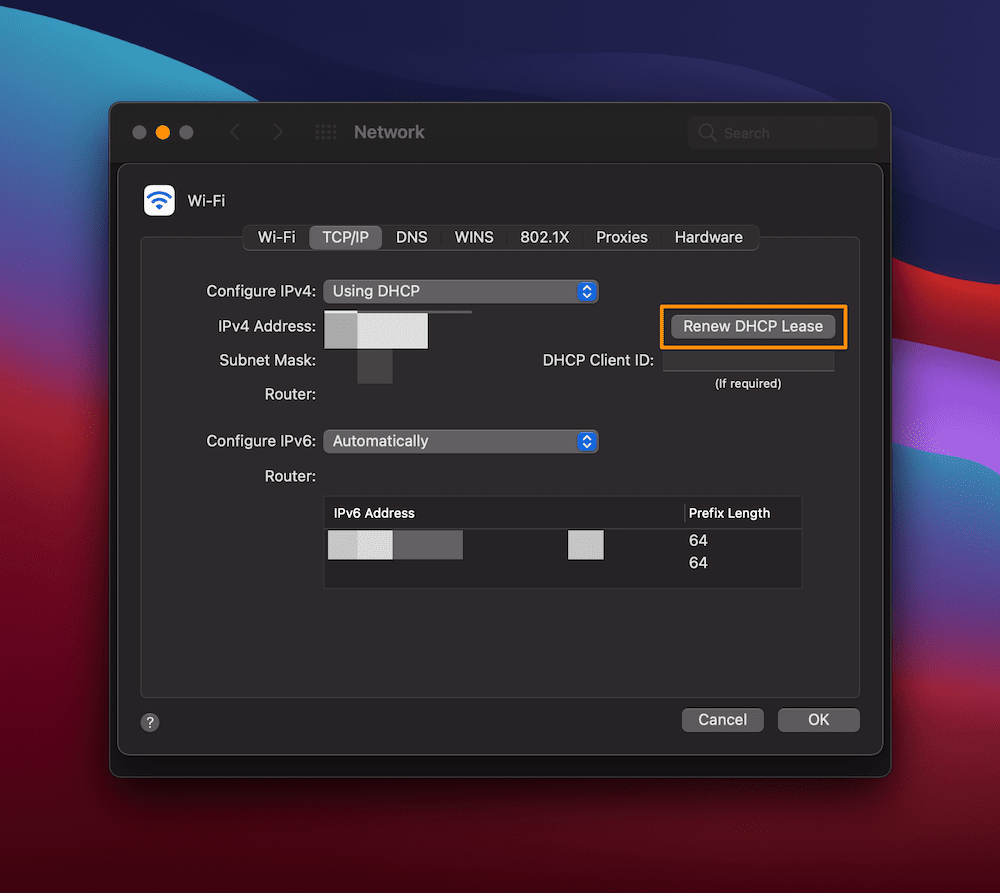
On the next screen, click the TCP/IP tab, then the Renew DHCP Lease button:
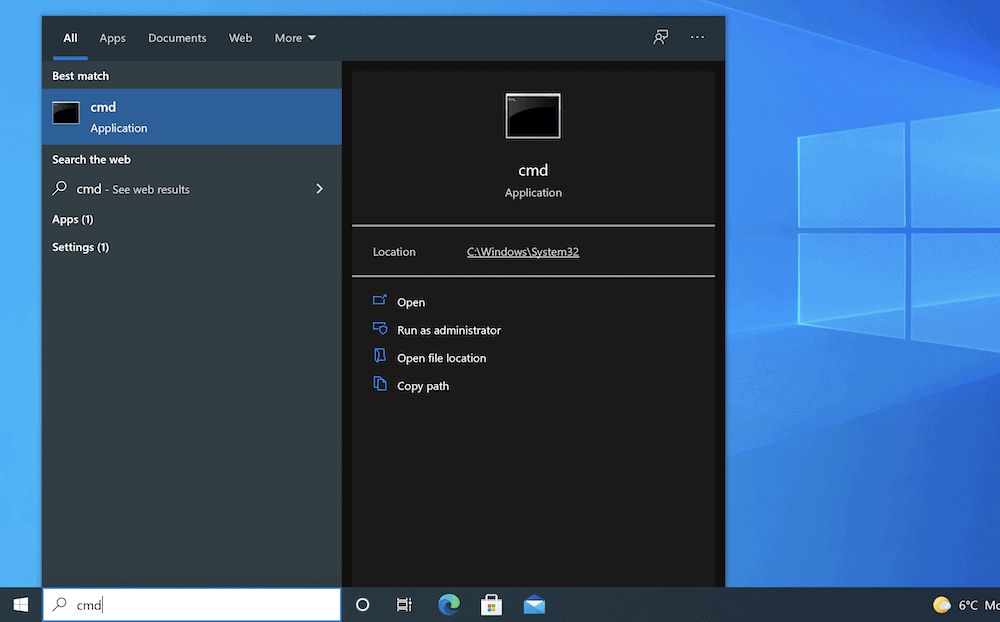
For Windows, the process is similar. First, open a Command Prompt through your preferred method – here, we’re going to search for the app from the Windows Search Bar:
When the Command Prompt opens, type ipconfig/flushdns, then run the command. You’ll get a success message this time, at which point you can also run the following commands one at a time:
ipconfig /registerdns
ipconfig /release
ipconfig /renew
Once you finish, you can check for the DNS Server Not Responding error and move on if you still get it.
4. Disable Any ‘Secondary Connections’ to Your Computer
While you’re in the respective network screens for your OS, you can also look to disable any secondary connections that could interfere with your primary one.
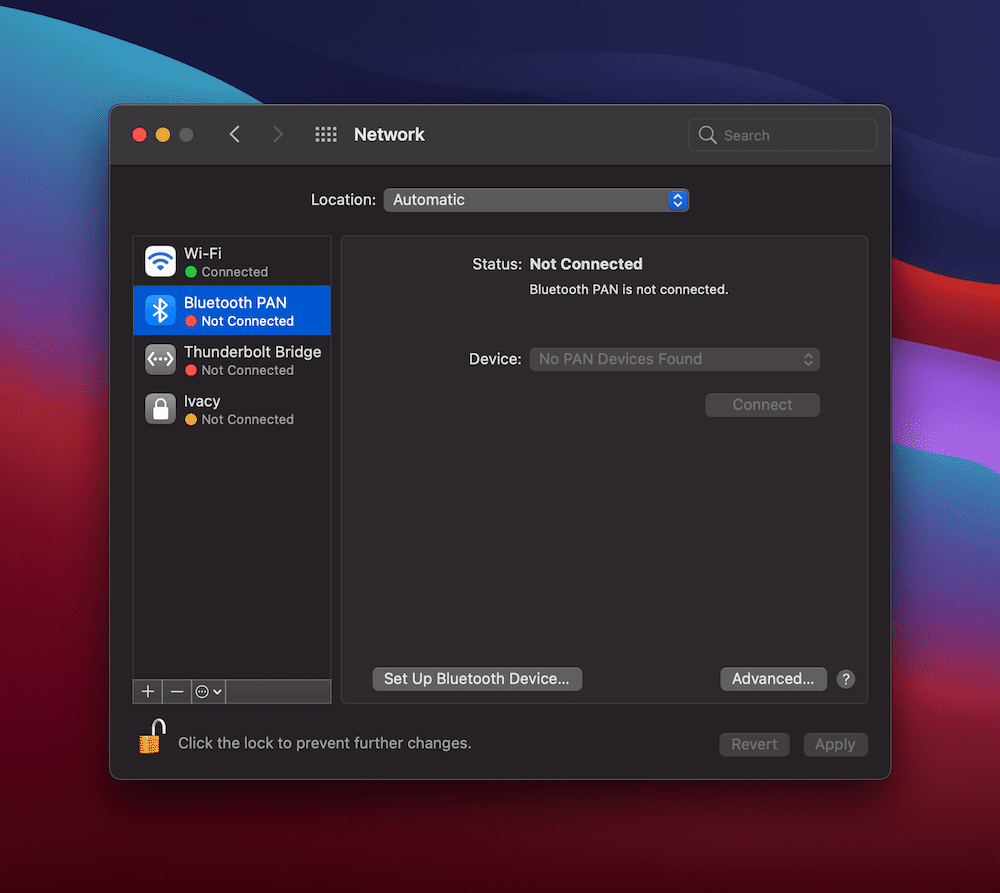
For example, within the macOS Network screen, select one of the other connections on the left-hand side, and click the Minus icon to remove it from the list:
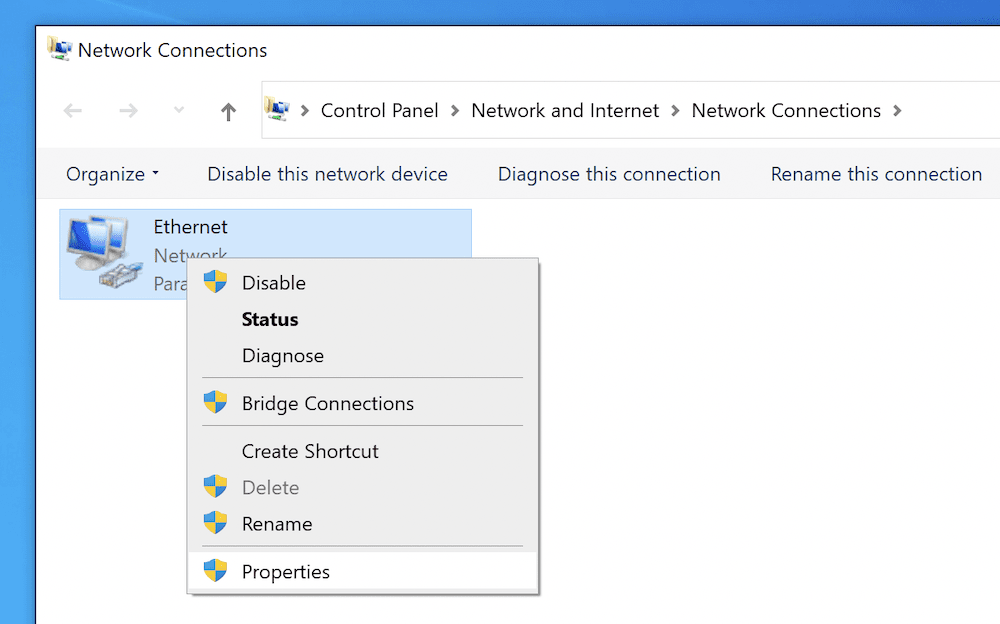
For Windows, find the Network Connections screen (you can use the search bar again here):
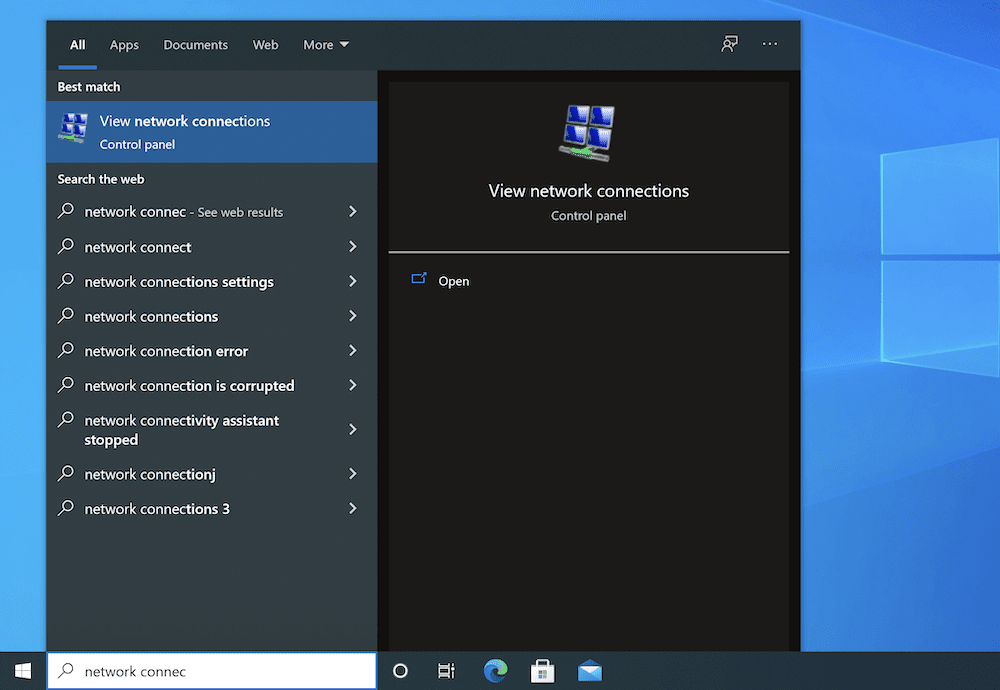
In the resultant screen, right-click any connections with a red ‘X’ and choose Disable from the context menu:
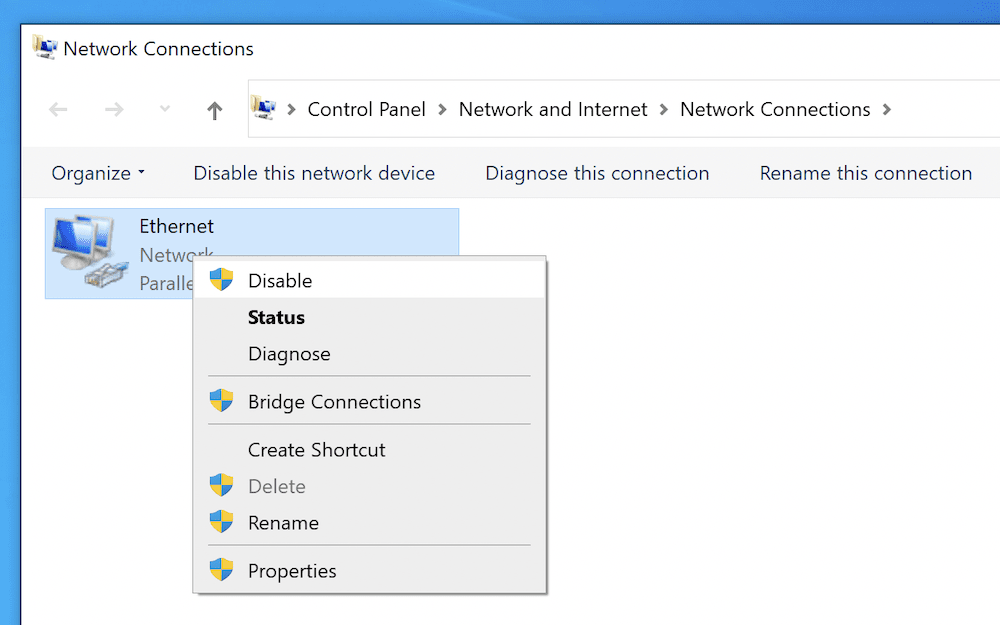
You’ll want to do this for every relevant connection here, at which point, you’ll also want to test your website again for the DNS Server Not Responding error.
5. Disable Peer-to-Peer Connections (For Windows 10 Users Only)
This next method won’t apply to macOS users, but Windows has a Peer-to-Peer (P2P) connection that you might want to look at to fix the DNS Server Not Responding error. It’s a way to spread out and balance the load of Windows updates across a network, and it can affect your regular connection in some cases.
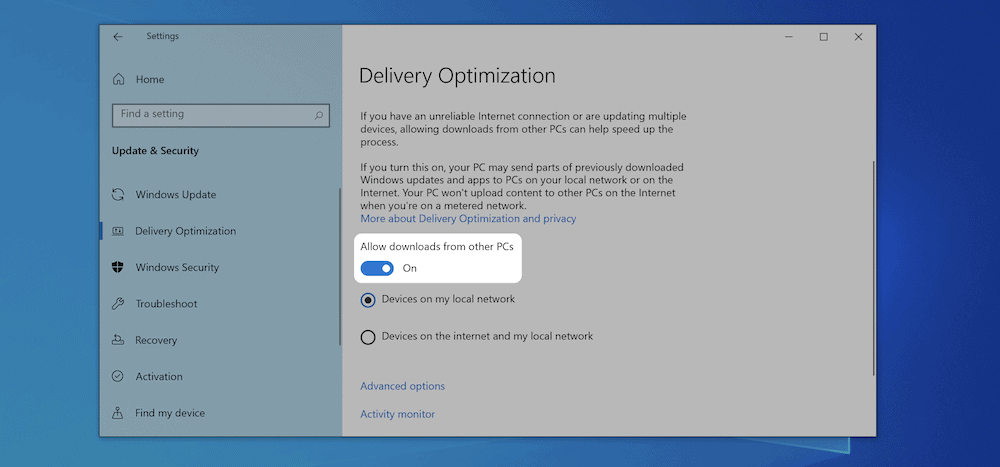
To find the right page, nagivate to the Settings > Network & Security screen:
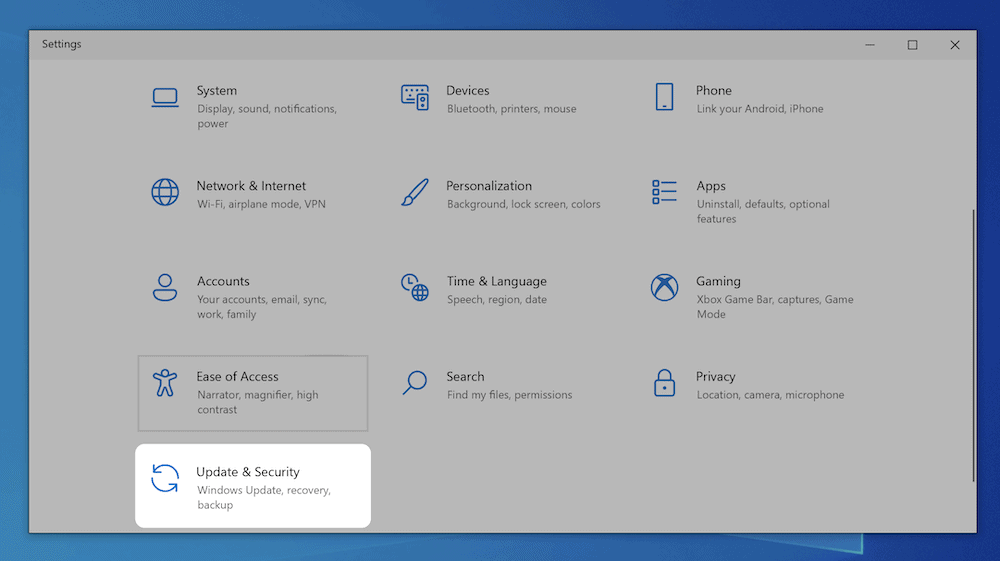
On the left-hand side, choose Delivery Optimization, then toggle the Allow downloads from other PCs switch:
From here, restart your computer and check for any errors within the browser.
6. Disable IPv6 Connections
Your IP version dictates how you connect to the web, and also how it routes traffic between the various networks. IPv4 is the standard, and has been for a while. However, there’s a newer version – IPv6 – that in most cases is a worthwhile upgrade, although it can cause issues such as the DNS Server Not Responding error.
Because of this, you can disable IPv6. However, the approach is different for Windows and macOS machines.
Windows
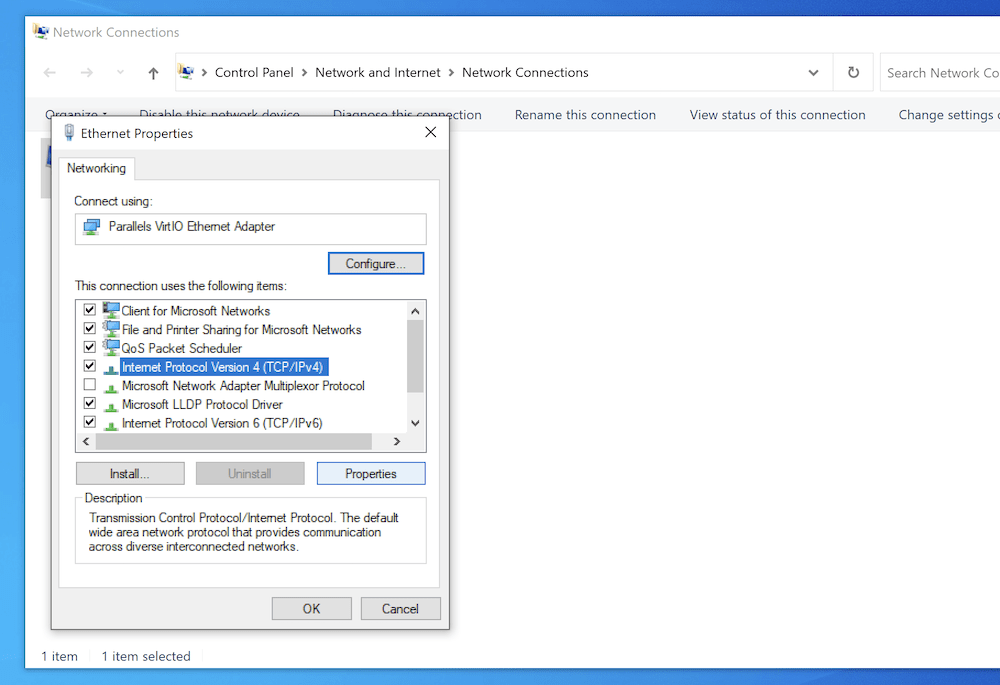
You’ll want to return to the Network Connections panel from the previous method, and this time, right-click on your active connection to choose Properties:
You should see the Networking panel here. You’ll want to scroll down and find Internet Protocol Version 6 (TCP/IPv6), and untick it:
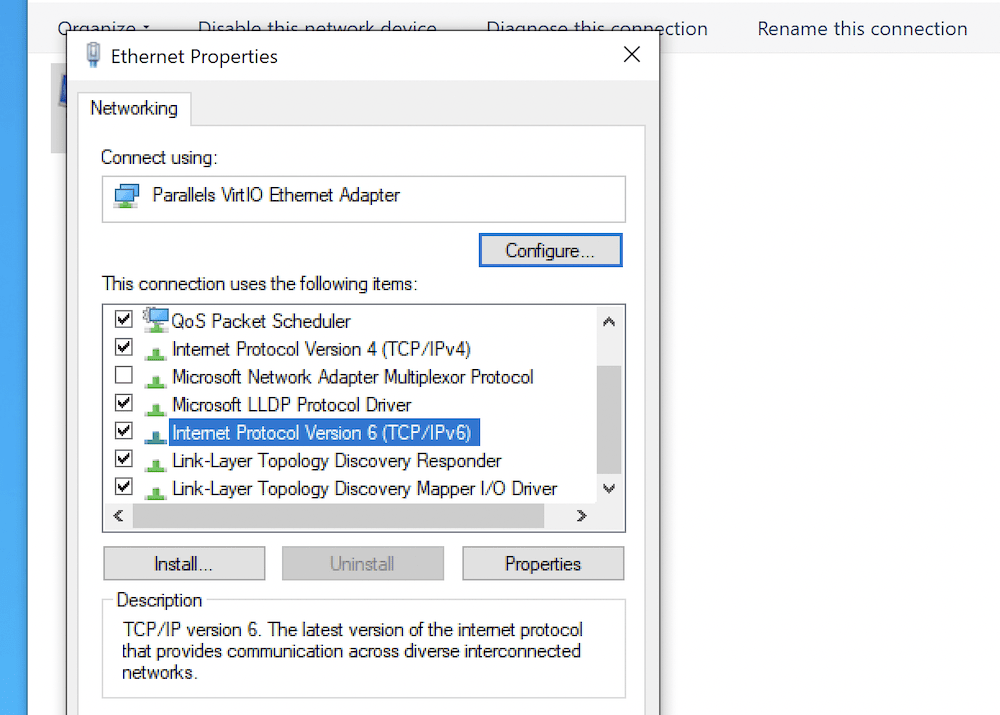
Once you click OK, restart your computer and check for errors.
macOS
Before you disable IPv6, you will want to find what network connection your Mac uses. You can achieve this through a Terminal window, using the following command:
networksetup -listallnetworkservices
This will show you every available service on your network:
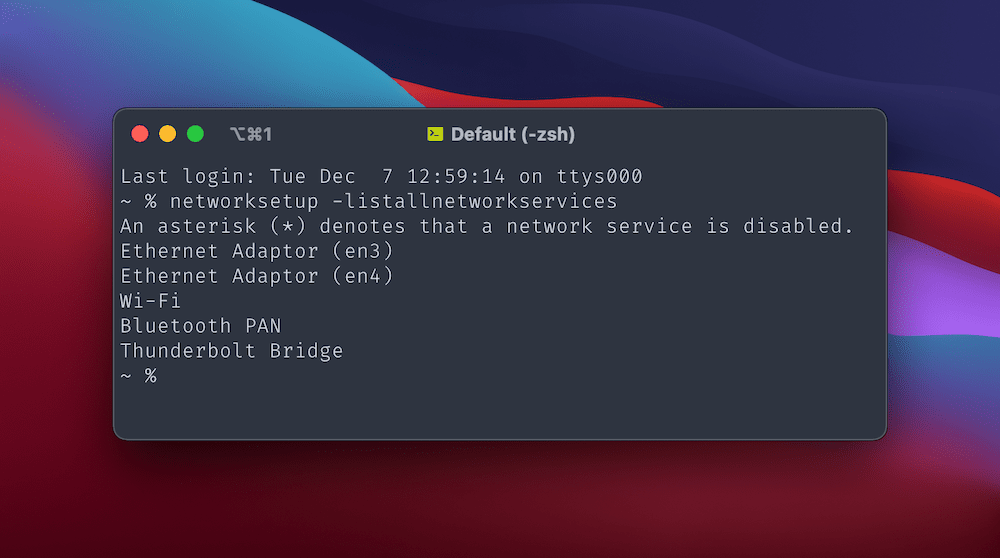
From here, you’ll be explict in which service to disable IPv6 on. For example, your Wi-Fi will need you to run the networksetup -setv6off Wi-Fi command.
Once you do so, check your browser for the DNS Server Not Responding error (and potentially restart your computer to see the changes).
7. Change the Default DNS Server for Your Computer
Given the nature of the DNS Server Not Responding error, you can change the actual DNS server your use, which will solve a lot of issues if you have them. As with turning of IPv6, both Windows and Mac have different approaches.
Windows
You’ll once again want to navigate to the Network Connections screen. For your primary internet adapter (for example, your Wi-Fi), right-click and choose Properties.
From the list of protocols on the Networking tab, select Internet Protocol Version 4 (TCP/IPv4), then choose the Properties button:
In the General tab, there will be a few radio buttons. The one you want here is Use the following DNS server addresses, and once you click the option, you can enter a new DNS server address into the appropriate field:
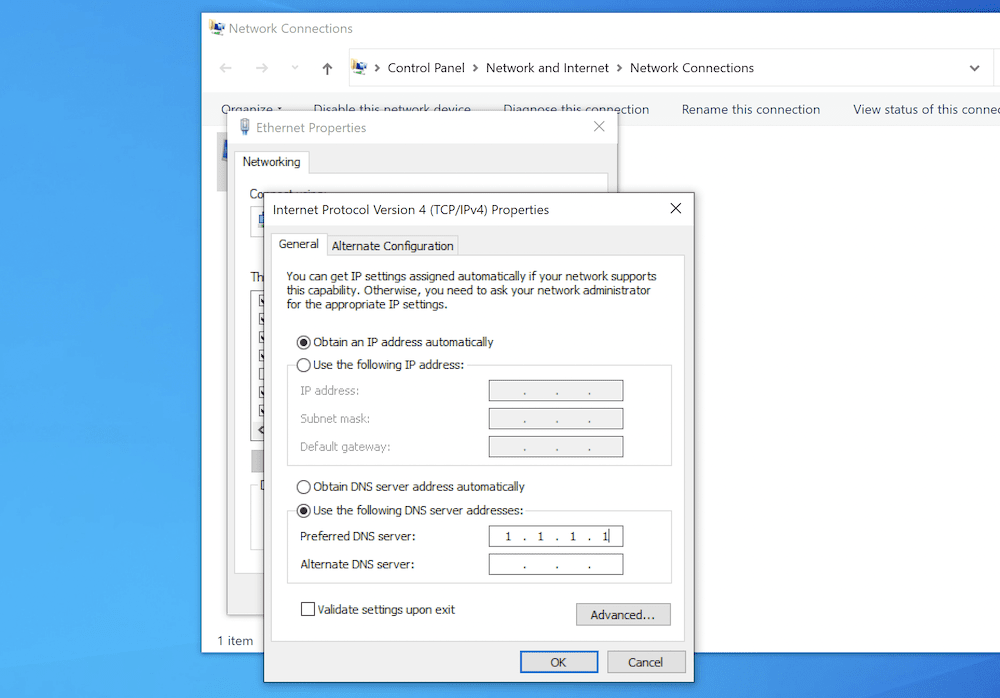
Once you confirm your changes, refresh your browser or restart your computer and check for the DNS Server Not Responding error.
Mac
For macOS, head to the Network pane again, and click the Advanced button. This time, choose the DNS tab. On the left-hand side is a list of system DNS servers. To add a new one, choose the Plus icon, then add your DNS server address:
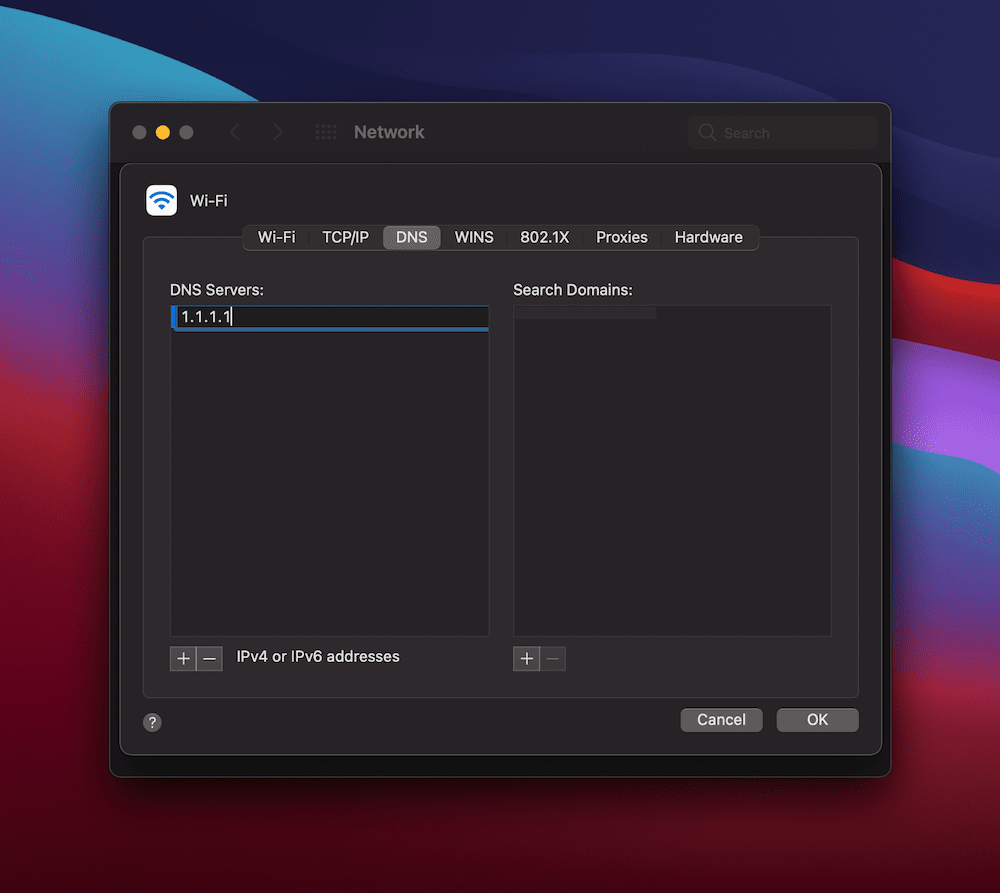
Once you click Okay, then Apply, refresh your browser and look out for the DNS Server Not Responding error.
In Conclusion
Your browser’s connection to the internet is mostly stable and solid. However, in some cases, you can find an error that seems confusing at first glance. The DNS Server Not Responding error is one of them, although it’s simple to rectify.
There are a few methods you can carry out, and the process differs depending on your OS. Even so, each approach often involves disabling elements such as IPv6 or your secondary internet connections. In rare cases, you’ll need to flush the DNS cache for your system, through the command line.
Is the DNS Server Not Responding error something you encounter, and if so, which of these methods work for you? Let us know in the comments section below!
Leave a Reply