How to Do a Double Exposure in Photoshop
Double exposure hit the art scene as one of the hottest trends ever to exist, but then never went away. However, it’s easy to see why the love for double exposure effects stood the test of time while other Photoshop trends fell away.
Double exposure creates captivating portraits using only a few tools and images in less than 15 minutes!
Let’s take a look at how to do a double exposure in Photoshop.
What Is Double Exposure
Double exposure is a technique that combines two or more images by layering one on top of another. Initially, double exposure was created using multiple exposures to create a single image.
However, the effect can now be easily recreated using basic Photoshop techniques. Two photos are layered over one another, then connected by adjusting the topmost layer’s layer mode, generally changing it to either Screen and Lighten.
While it eventually started to trend big among photographers and Photoshop users, double exposure has existed for years and in various mediums. Alfred Hitchcock often used double exposure in his films to convey all kinds of emotions or even introduce a hint of surrealism to a scene.
Double exposure effects still exist in modern cinema and, of course, modern-day photography, which we will learn the ins and outs of in today’s double exposure Photoshop tutorial.
Actionable Tips to Create a Double Exposure
- Choose compelling images. When choosing stock, try and think about how one image will add to the other. Find exciting angles, play with symbolism, and focus on each image, bringing the best out of its counterpart. Merge the two photos in inventive ways, and try using more than one photo.
- Experiment with exposure. When learning how to do a double exposure in Photoshop, there are no magic exposure settings. Every image will need different adjustments to both brightness and contrast. Use Brightness/Contrast, Curves, and Levels to adjust the exposure of photos. The general rule of thumb is, if you want an area of a portrait to show, make it bright. If you want the underlying image to show, make that area dark.
- Experiment with layer modes. Double exposure Photoshop tutorials will often suggest using Screen. However, Lighten can also be used to great effect. It’s always worth playing with other layer modes to see how they react with each other, creating new and exciting results.
How to Do a Double Exposure in Photoshop
Step 1: Choose Two or More Stock Images
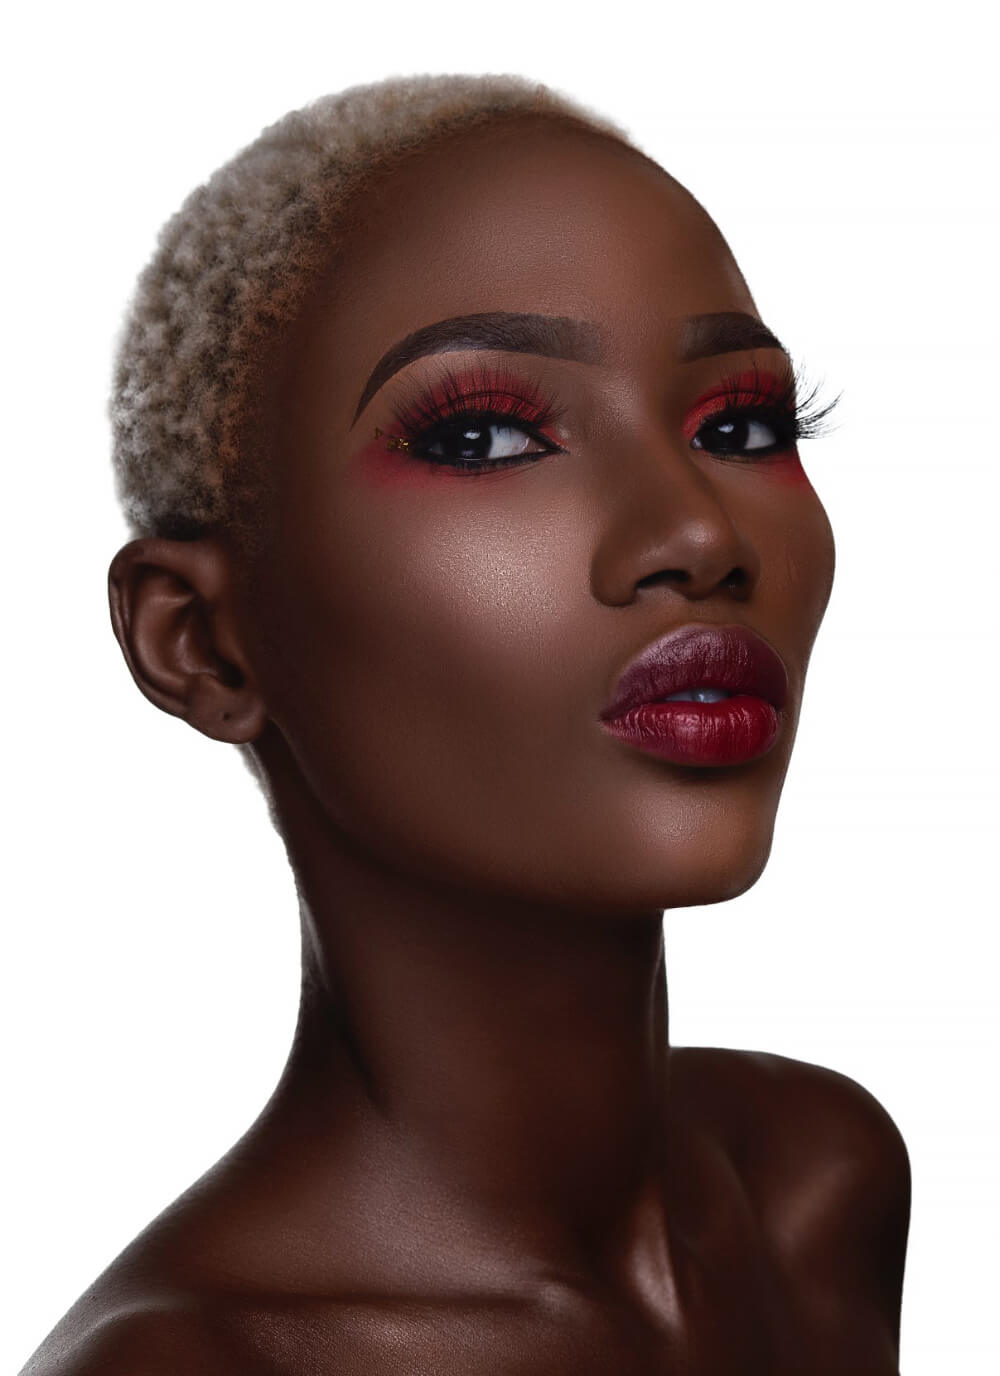
When starting our double exposure effect, you will need one portrait image and at least one other image that will merge with the portrait. Often, this is an environmental or cityscape image.
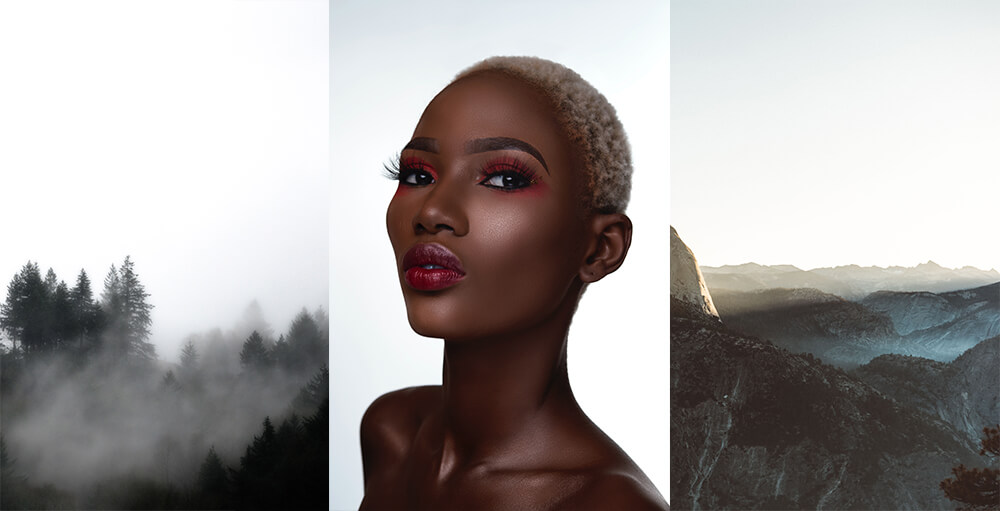
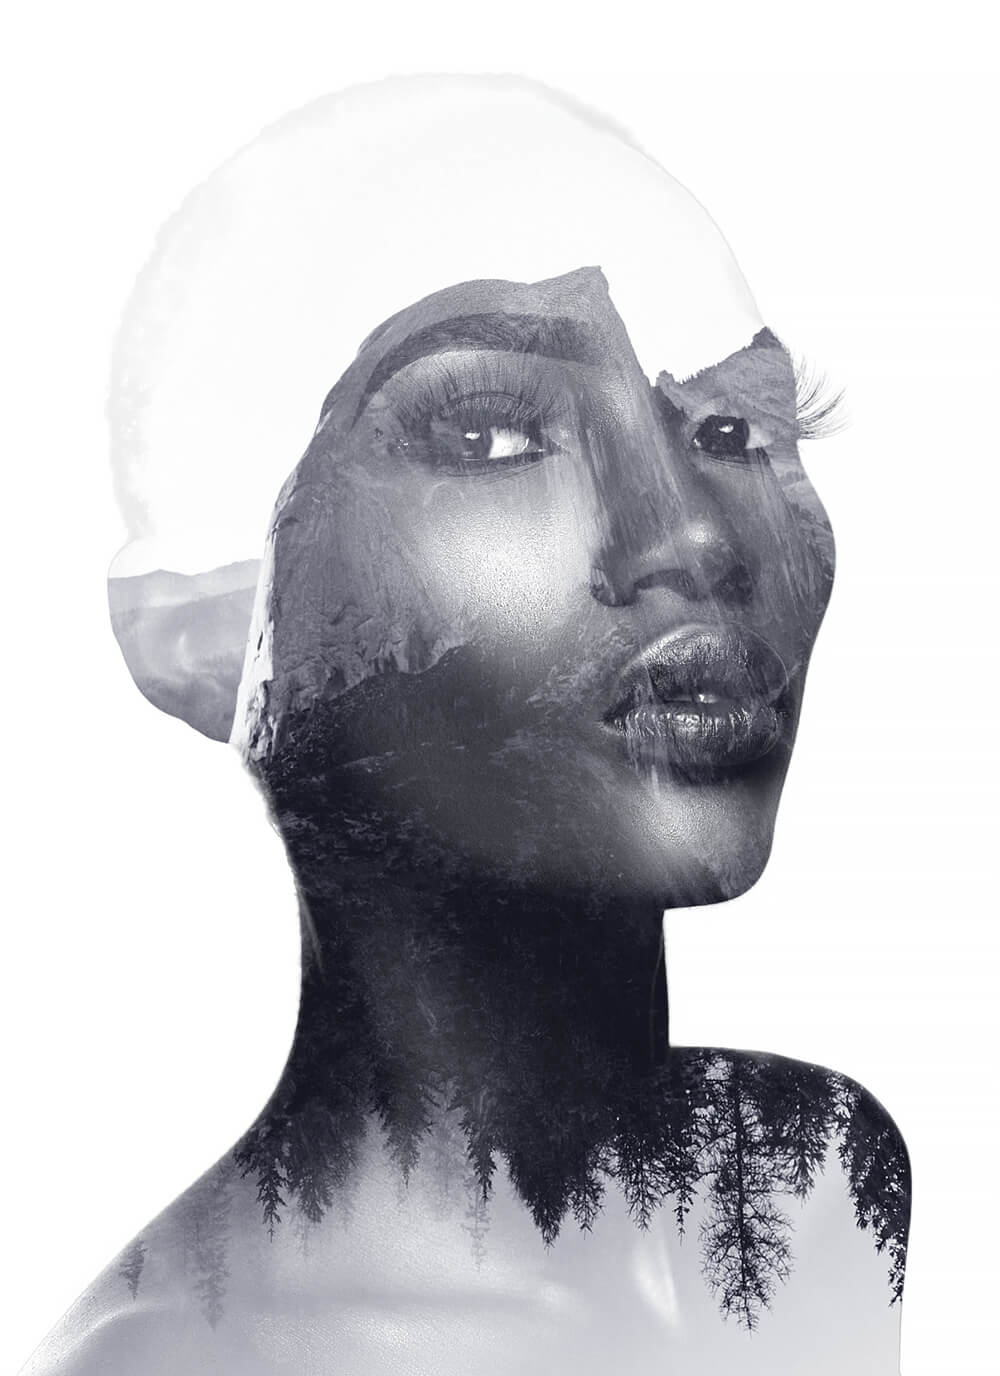
Today, we will be using a total of three images—one of a close-up portrait, one of some mountains, and one of a foggy forest. Images with large areas of white tend to work best.
Step 2: Extract the Main Image
Next, let’s extract our portrait image using Select Subject, or whatever your preferred method may be.
When extracting your image, no matter what method you choose, make sure to use Layer Masks, as we will be using the subject’s mask in future steps.
Once you are done extracting, create a white Color Fill layer below your subject.
If your portrait is already on a pure white background, then you can skip this step.
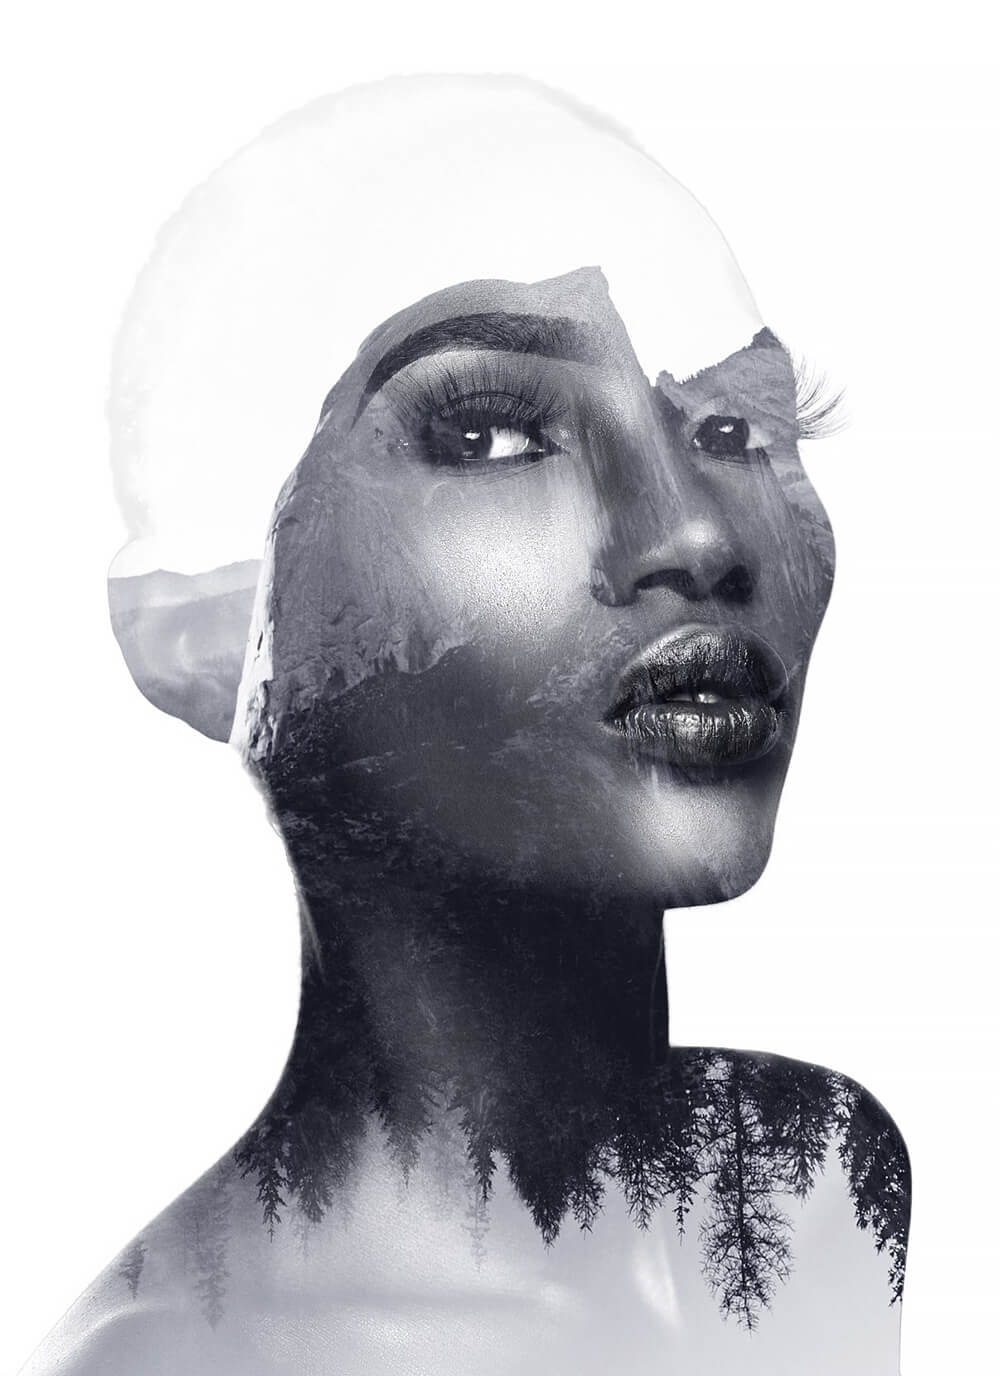
Step 3: Adjust Base Portrait
With the subject’s background masked out, we can do some basic layer adjusting to prepare for the double exposure effect.
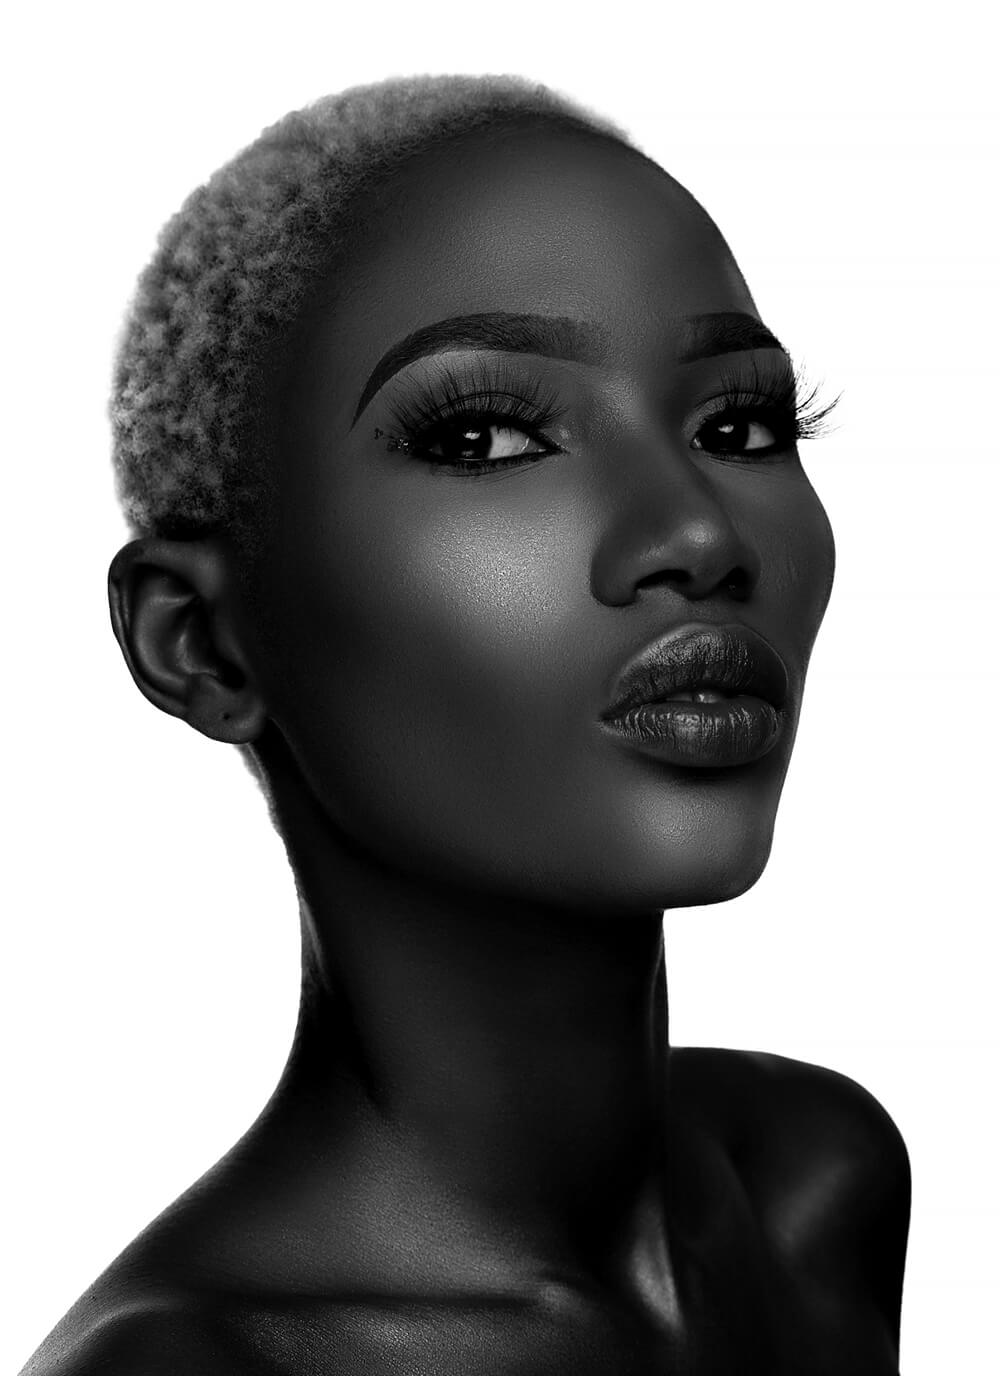
First, we will go to Image > Adjustment > Hue Saturation and bring the Saturation down to -100. This will turn the image black and white.
Next, we will go to Image > Adjustments > Levels and bring in the left and right toggles. This will make the image darker, as well as add contrast.
My exact input levels were 20, 1.00, and 236. However, every image is different. I suggest using Smart either Objects or adjustment layers, so that you can readjust your image’s exposure if necessary.
Step 4: Align the Secondary Images
Create a new Group over your subject layer. Copy the layer mask from the subject onto the new Group by holding Alt, dragging, and dropping the layer mask.
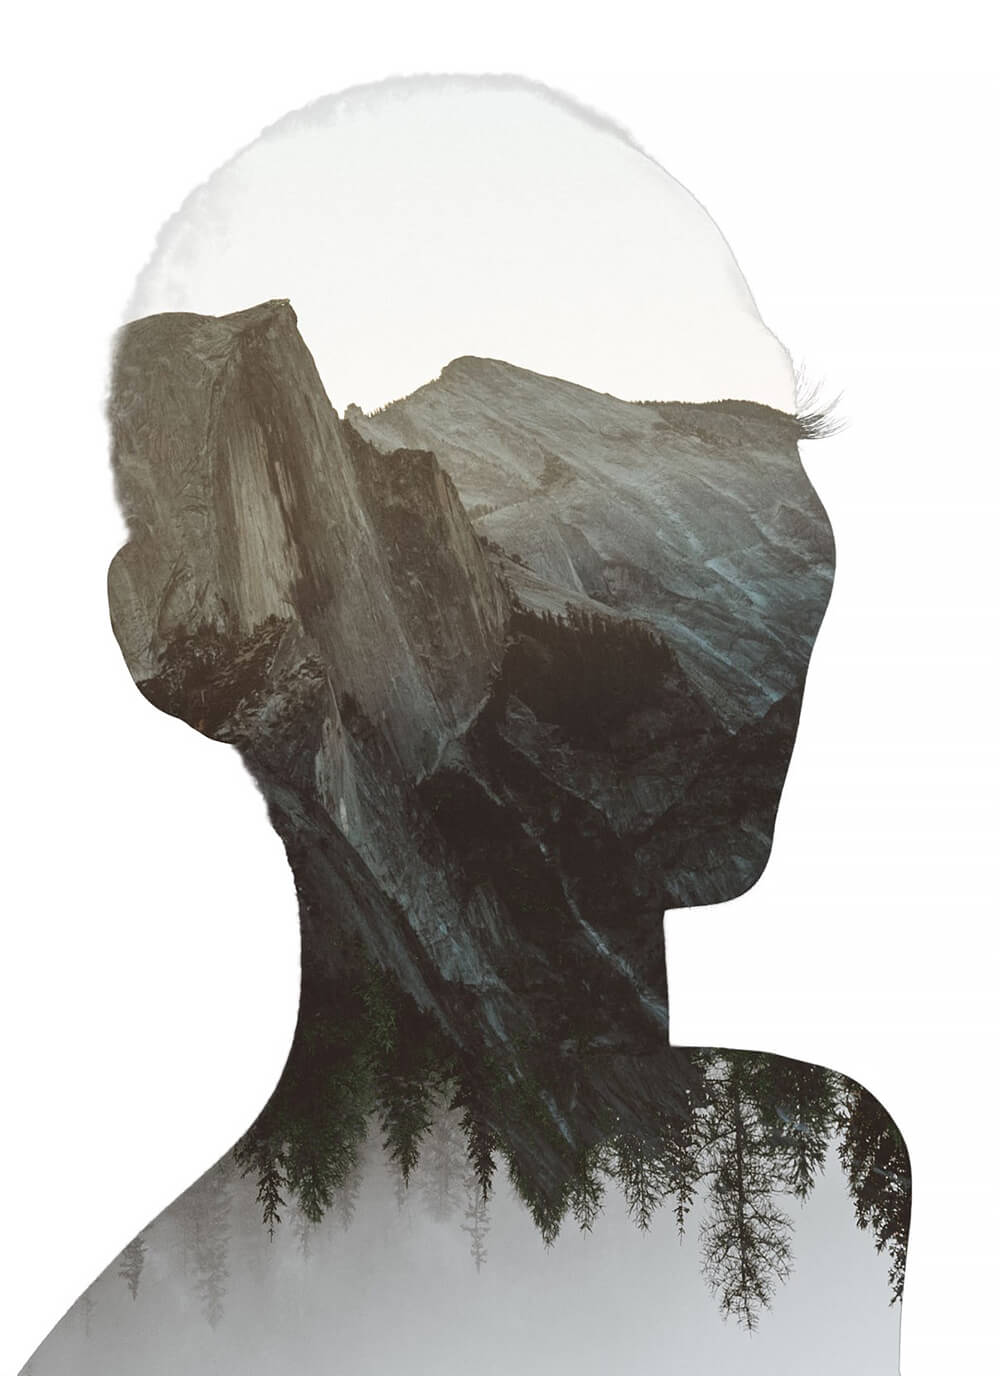
We are going to place two environmental images into the group, firstly, a set of mountains. Don’t worry about placement for now.
Secondly, we are going to place a foggy forest. I flipped the forest upside down and set the layer mode to Lighten, so that it blends in with the mountains.
Step 5: Adjust Secondary Images
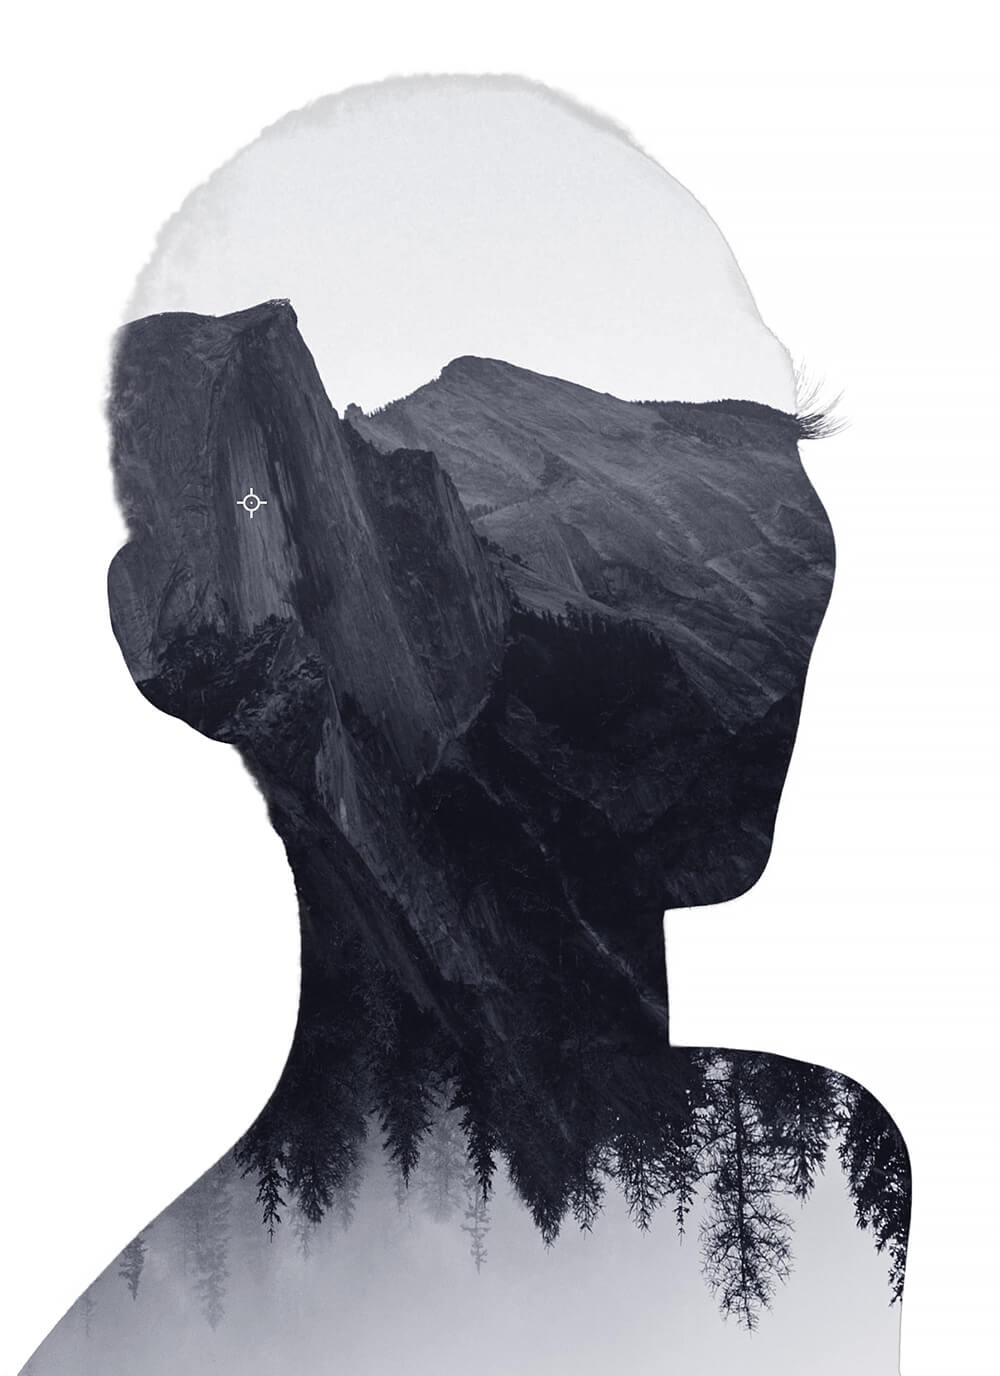
Now, we can make some basic adjustments to our secondary images, starting with creating a Black and White Gradient Map adjustment layer. Place the Gradient Map above both the mountains and forest layers, keeping it inside of the group.
Secondly, above the gradient Map layer, let’s create a Color Balance adjustment layer. Set the settings to Red -11, Green -8, and Blue +14 to add a slight tint of blue to our image.
Finally, if needed, you can adjust the contrast of your secondary images using Brightness/Contrast. I adjusted the mountain range by Brightness -41 and Contrast -12.
Step 6: Duplicate the Main Image
Let’s duplicate the main subject image and bring it above the group holding out environmental layers. Set the duplicate to Screen.
Step 7: Adjust the Duplicated Main Image’s Exposure
Now is where exposure comes into play. This is how to make a double exposure in Photoshop work.
Select the top subject layer, and adjust its Levels. My Levels ended up being 30, 0.89, and 155, resulting in very strong highlights and dark shadows.
Again the settings will change from image to image, with skin tone playing a significant part. Lighter skin tones will likely have to be darkened, while the highlights in darker skin tones will be brightened. We want the facial features to be distinct.
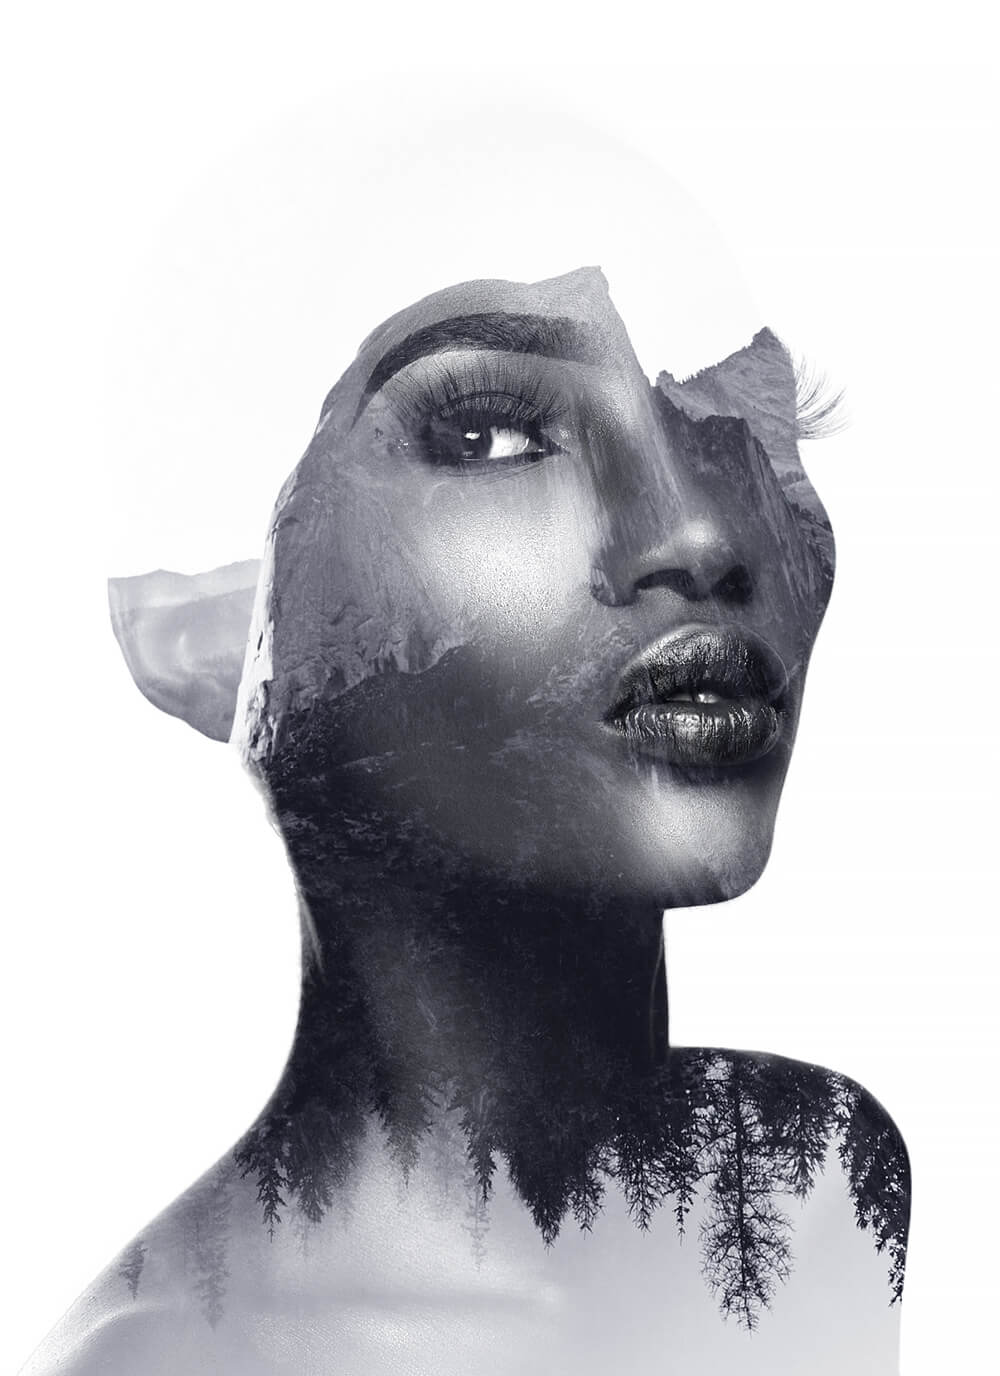
Step 8: Adjust the Final Composition
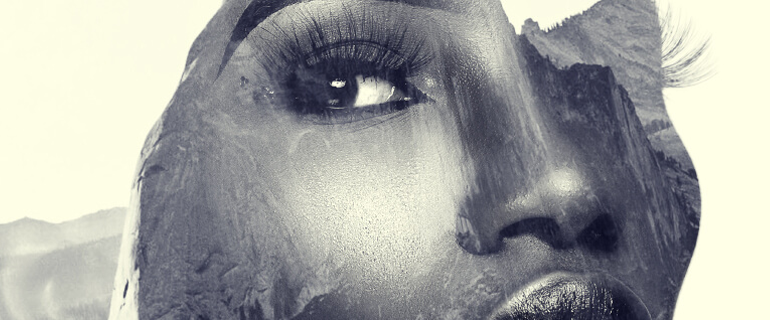
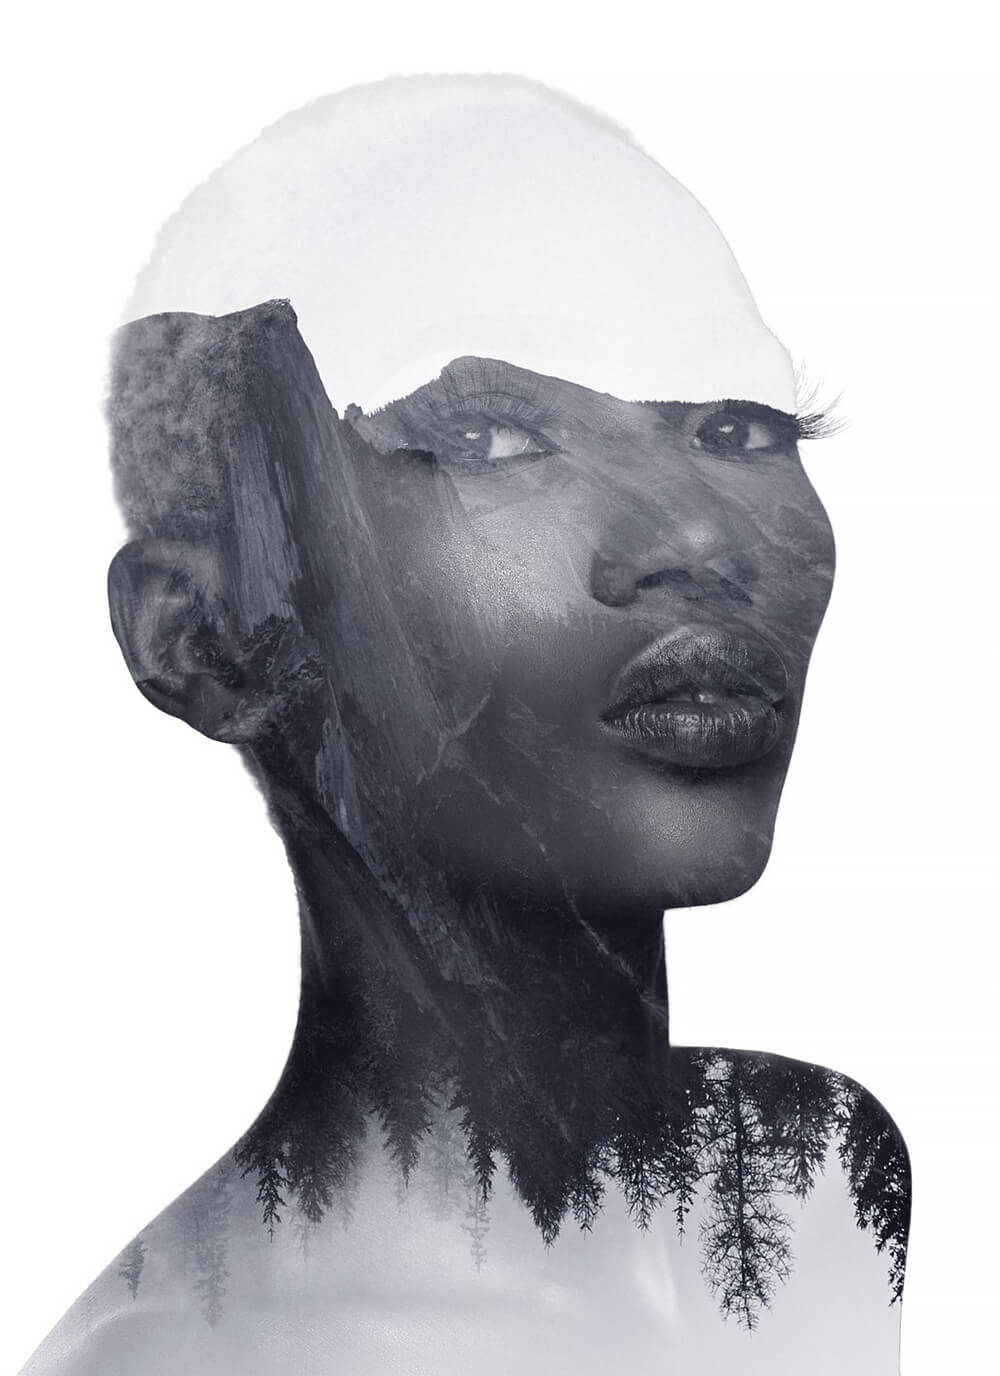
With our facial features set, we can go back and refine our final composition by moving around the environmental images to match our subject’s facial features better.
Try and line things up logically. Here, I like how the curve of the mountain matched the angle of the subject’s brow. I also made sure the highlights of the mountain matched the highlights of the face.
Step 9: Enhance Facial Features
After finalizing the composition, we can enhance our facial features, making sure they appear solid.
Let’s create two new layers. Set the first layer to Overlay and clip it into the upper subject layer. Use this layer to enhance the subject’s highlights. Paint whites on the area you want to make more prominent.
Secondly, there’s a layer set to Soft Light placed below the upper subject layer, but above the environmental group. Use this layer to paint black on areas of the face you want to appear more solid such as the eyes, nose, and lips. I also enhanced the eyebrows.
You can also use the black layer to hide any distracting details in the environmental layers.
Step 10: Final Masking
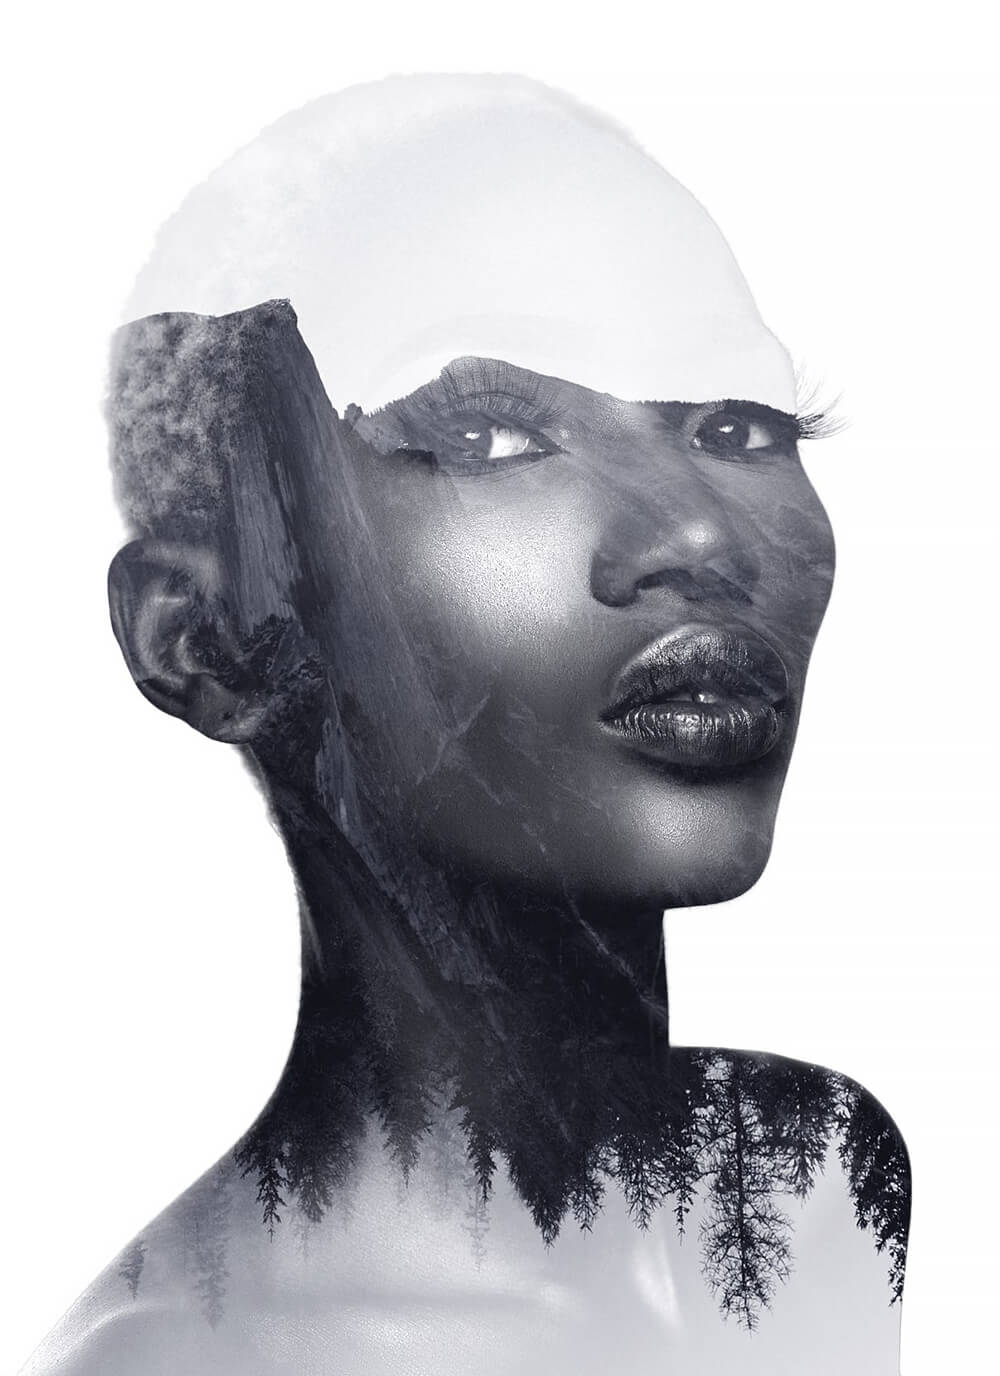
Then, we will finish our subject by masking out any details on them that may be distracting. In this example, I choose to remove the right eye, masking it out using a soft round brush.
I also masked out some of the chest highlights. In this example, turning off the original base subject layer resulted in a cleaner effect.
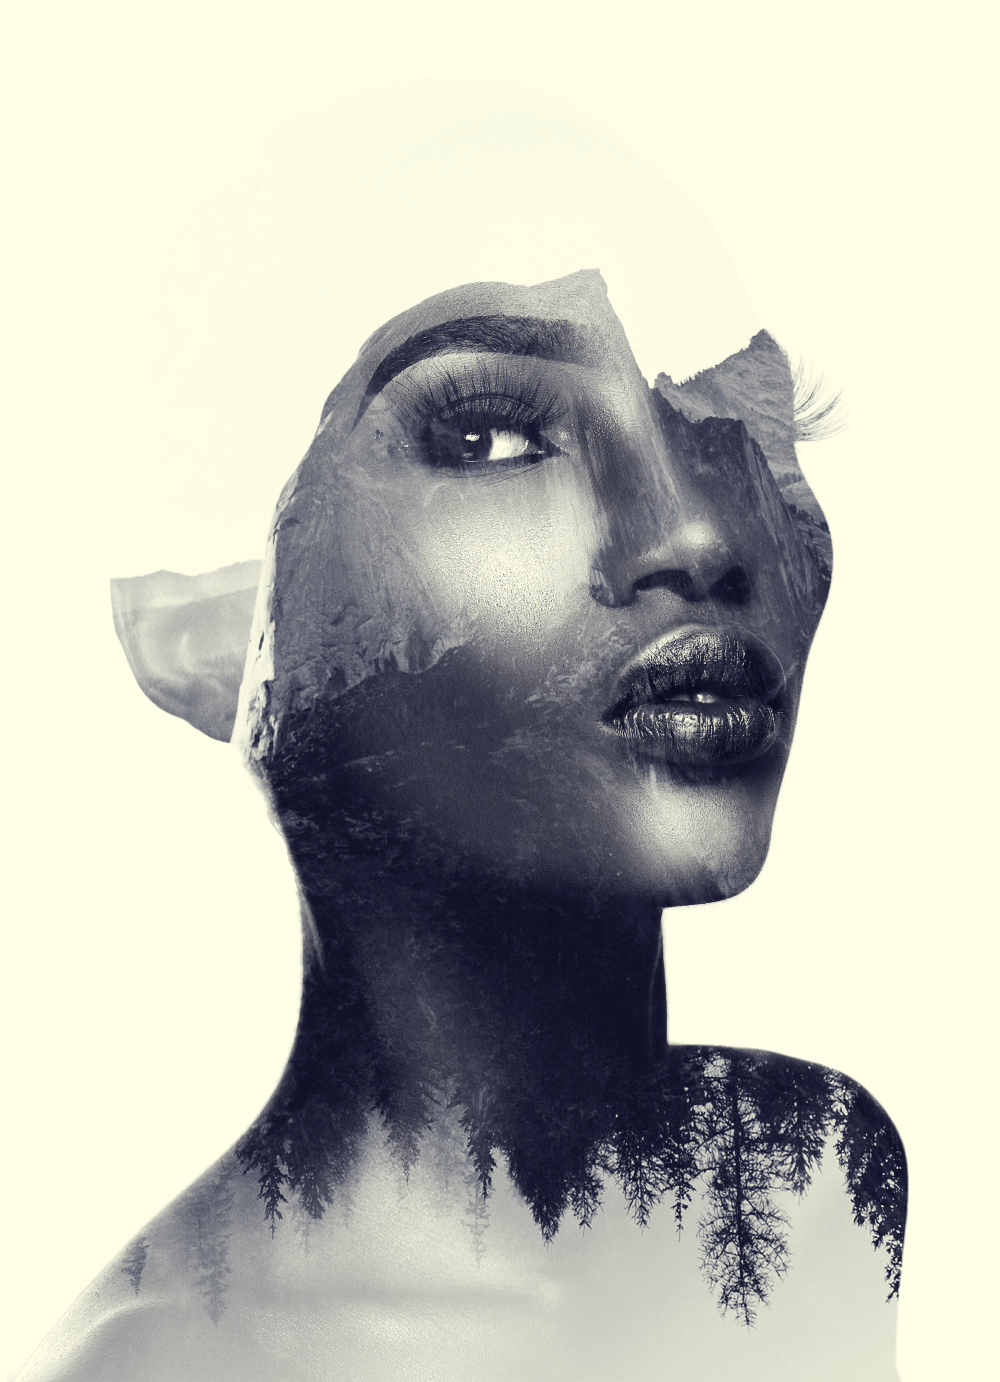
Step 11: Final Color Grade
Finally, we can bring the image together with a quick color grade with a single Curves adjustment layer. I increased the contrast using what is often called an “S” curve. Then I brought up the blues in the shadows while lowering the blues in the highlights, creating a blue and yellow duo-tone effect.
All color adjustments are optional, however, and can be easily changed from image to image.
Conclusion
That is how to do a double exposure in Photoshop! Double exposure is an incredibly versatile and inventive technique, giving you the ability to create an endless amount of compelling results. Once you have the basics down, try and switch things up. Play with exposures, layer modes, and layering multiple images over one another. There is more than one way to create a double exposure effect, and the more innovative you get, the better your results!
Leave a Reply