Bootstrapping WordPress projects with Composer and WP-CLI
Composer is a PHP-dependency manager, a tool to import and manage our PHP project dependencies (both our own and from 3rd-party providers). It works with PHP packages (where a package is essentially a directory containing PHP code), which are retrieved from package repositories, either public or private.
Composer enables to bootstrap a new PHP-based application very easily: we define the list of dependencies our project depends on and, by executing a single command, Composer will have them installed and updated to their latest versions (or to whichever version we require).
In this article we will learn how to automate the creation of WordPress sites through Composer and WP-CLI (which allows to interact with WordPress by executing commands on the command-line), as to save time when testing, developing and deploying our websites.
Adding Composer to a project
To start using Composer, all we need is a composer.json file, a JSON file located at the root of our project, defining the package’s name and its dependencies:
{
    "name": "packageVendor/projectName",
    "require": {
        "packageName": "versionContraint",
        "packageName": "versionContraint",
        "...": "..."
    }
}
The package name is composed of a package vendor and project name, in format "packageVendor/packageName". This format enables to upload our package to the repository and not collide with packages from other vendors. In this case, my vendor name is “leoloso”, and the name I chose for my project is “wp-install”:
{
    "name": "leoloso/wp-install"
}
Our project dependencies are defined under the require entry. Each dependency declares the package name as its key and, as its value, the package’s version constraint, which indicates which version of the package we want to install. We can define any package hosted in Composer’s default package repository, Packagist.
For instance, we can install the latest version of logging library Monolog like this:
{
    "require": {
        "monolog/monolog": "2.0.*"
    }
}
Once we have composer.json configured, we can install all the project dependencies by running composer install in the terminal (at the root folder of our project), and update them to their latest versions by running composer update.
Installing WordPress through Composer
In order to install WordPress through Composer, we must treat WordPress as yet another dependency. In this sense, even though WordPress is the underlying CMS for our application, installing it is no different than installing a simple PHP library. Since there is no “official” WordPress composer package, we can use the one created by John P. Bloch, like this:
{
    "require": {
        "johnpbloch/wordpress": ">=5.3"
    }
}
WordPress themes and plugins, as available under the WordPress plugin and theme directories, are hosted through a dedicated package repository, WPackagist. We will need to define it in our composer.json file, like this:
{
    "repositories": [
        {
            "type": "composer",
            "url": "https://wpackagist.org"
        }
    ]
}
When declaring themes and plugins as dependencies, their vendor names are "wpackagist-theme" and "wpackagist-plugin" respectively. For instance, installing the Gutenberg plugin is done like this:
{
    "require": {
        "wpackagist-plugin/gutenberg": ">=7.2"
    }
}
Creating a Composer project
We saw how to define all our dependencies in our project and have Composer install them by running a command in the terminal. Next step is to convert our project into a “template” project, from which we can easily bootstrap any new WordPress site.
For this, we first define our project being of type "project" (as opposed to the default type "library") in the composer.json file:
{
    "type": "project"
}
It is recommended to also define the project’s homepage, description, license and author information. In this case, the project’s source code is in GitHub, so I just define its repo URL:
{
    "homepage": "https://github.com/leoloso/wp-install",
    "description": "Bootstrap a WordPress site through Composer and WP-CLI",
    "license": "MIT",
    "authors": [
        {
            "name": "Leonardo Losoviz",
            "email": "...",
            "homepage": "..."
        }
    ]
}
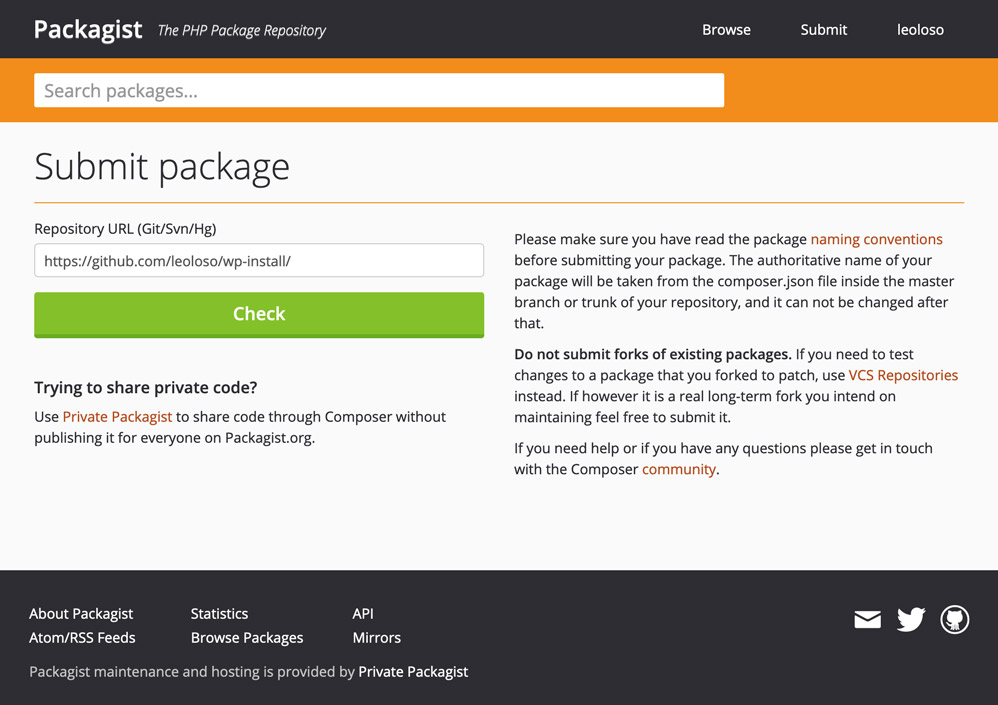
If we haven’t done so yet, we must upload our project as a package in some repository. The easiest option is to submit it to Packagist, for which we must just add the repo URL in the Packagist submission page:

Once our package is available, we can bootstrap a new WordPress site by executing Composer’s "create-project" command, which creates a new project from the indicated package.
For instance, to spin up a new WordPress site using project leoloso/wp-install, and create it under folder new_wp_site, we execute this command in the terminal:
composer create-project leoloso/wp-install new_wp_site
This commands means: git clone the project from https://github.com/leoloso/wp-install into folder "new_wp_site", step into the folder, and execute composer install to download and install all of its dependencies.
Installing WordPress
So far so good: after executing the create-project command we will have WordPress, its theme and plugins downloaded into the project folder. Next step is to run a script to configure and install WordPress.
If dealing with a single website, we may be tempted to upload file wp-config.php (where the WordPress configuration entries, such as the database name, user and password, are defined) to the repo. Even though this is wrong (since uploading credentials to the repo is a security risk, and it doesn’t allow to easily scale up deploying the software, as recommended by the 12-Factor App), it would work. However, for using a project to spin up multiple websites it will not work, because each website will need its own configuration.
The solution is to have file wp-config.php empty, and to fill it up through environment variables, which, in addition, enables to automate the creation of different websites from the same source repo, or the same website for different environments (DEV, STAGING, PROD).
We will have WP-CLI achieve this strategy: retrieve the required configuration items from environment variables and define them on the configuration file. After setting up the configuration file, WP-CLI can proceed to install WordPress, which involves creating all the tables in the database, and configuring the application with the website name, URL, admin person’s email, username and password. This process will be triggered through Composer events, invoked right after the creation of a new project.
Let’s proceed to do it. All the environment variables that will be required are the following:
# For wp-config.php
$DB_NAME: The name of the database for WordPress
$DB_USER: MySQL database username
$DB_PASSWORD: MySQL database password
$DB_HOST: MySQL hostname

# For installing WordPress
$SITE_URL_WITHOUT_HTTP: Such as www.mywebsite.com
$SITE_URL_WITH_HTTP: Such as https://www.mywebsite.com
$SITE_NAME: Website name
$ADMIN_USER: Admin person\'s username
$ADMIN_PASSWORD: Admin person\'s password
$ADMIN_EMAIL: Admin person\'s email
Hence, before creating the new project, we will need to set-up its environment variables. For this, we can use the terminal to export their values, like this:
export DB_NAME=my_wp_site_db
export DB_USER=admin
export DB_PASSWORD=saranbadangananga
export DB_HOST=127.0.0.1
export SITE_URL_WITHOUT_HTTP=www.mywebsite.com
export SITE_URL_WITH_HTTP=https://www.mywebsite.com
export SITE_NAME="My super awesome super cool new WP site"
export ADMIN_USER=admin
export ADMIN_PASSWORD=ermenegildo
export ADMIN_EMAIL=admin@mywebsite.com
Composer enables to execute scripts during the lifecycle of the create-project command, for specific events. What scripts are executed for what events is configured in file composer.json under entry "scripts".
We must first validate that all required environment variables have been defined, which shall be done through a script file install/validate-env-variables.sh, executed upon event "post-root-package-install" (which occurs after the root package has been installed):
{
    "scripts": {
        "post-root-package-install": [
            "./install/validate-env-variables.sh"
        ]
    }
}
Script file validate-env-variables.sh will check if every one of the required environment variables has been set and, if not, show an error message and terminate the process. Its content is the following:
#!/bin/bash

# Flag to know if there are errors
ERROR_ENV_VARS=""

# Required for wp-config.php
if [ -z "$DB_NAME" ]
then
    ERROR_ENV_VARS="$ERROR_ENV_VARS\nDB_NAME"
fi
if [ -z "$DB_USER" ]
then
    ERROR_ENV_VARS="$ERROR_ENV_VARS\nDB_USER"
fi
if [ -z "$DB_PASSWORD" ]
then
    ERROR_ENV_VARS="$ERROR_ENV_VARS\nDB_PASSWORD"
fi
if [ -z "$DB_HOST" ]
then
    ERROR_ENV_VARS="$ERROR_ENV_VARS\nDB_HOST"
fi

# Required for installing WordPress through WP-CLI
if [ -z "$SITE_URL_WITHOUT_HTTP" ]
then
    ERROR_ENV_VARS="$ERROR_ENV_VARS\nSITE_URL_WITHOUT_HTTP"
fi
if [ -z "$SITE_URL_WITH_HTTP" ]
then
    ERROR_ENV_VARS="$ERROR_ENV_VARS\nSITE_URL_WITH_HTTP"
fi
if [ -z "$SITE_NAME" ]
then
    ERROR_ENV_VARS="$ERROR_ENV_VARS\nSITE_NAME"
fi
if [ -z "$ADMIN_USER" ]
then
    ERROR_ENV_VARS="$ERROR_ENV_VARS\nADMIN_USER"
fi
if [ -z "$ADMIN_PASSWORD" ]
then
    ERROR_ENV_VARS="$ERROR_ENV_VARS\nADMIN_PASSWORD"
fi
if [ -z "$ADMIN_EMAIL" ]
then
    ERROR_ENV_VARS="$ERROR_ENV_VARS\nADMIN_EMAIL"
fi

# If there are errors, return an error state
if [ -n "$ERROR_ENV_VARS" ]
then
    RED='\033[0;31m'
    GREEN='\033[0;32m'
    NC='\033[0m' # No Color

    echo -e "${RED}Fatal error:${NC} The following environment variable(s) cannot be empty: ${GREEN}$ERROR_ENV_VARS${NC}"
    echo "Terminating process."
    exit 1
fi
If all environment variables are set, we can then instruct WP-CLI to read them, set them up in file wp-config.php, and proceed to install WordPress. We do this through a script in file install/install.sh, executed upon event "post-create-project-cmd" (which occurs after the create-project command has been executed):
{
	"scripts": {
        "post-create-project-cmd": [
            "./install/install.sh"
        ]
    }
}
Script install.sh will interact with WP-CLI to first set up file wp-config.php, and then install WordPress (but only after checking that the WordPress database has not been initialized yet; for instance, when developing websites for clients, we may have a pre-populated database that we want to re-use). Its content is the following:
#!/bin/bash
RED='\033[0;31m'
GREEN='\033[0;32m'
ORANGE='\033[0;33m'
NC='\033[0m' # No Color

# 1. Fill wp-config.php
wp config set DB_NAME $DB_NAME
wp config set DB_USER $DB_USER
wp config set DB_PASSWORD $DB_PASSWORD
wp config set DB_HOST $DB_HOST
# Create random SALT keys
wp config shuffle-salts

# 2. Proceed to install WordPress (if not installed yet)
echo "Checking if WordPress is installed: "
if ! $(wp core is-installed); then

    echo "WordPress is not installed yet. Installing WordPress through WP-CLI..."
    wp core install --url=$SITE_URL_WITHOUT_HTTP --title="$SITE_NAME" --admin_user=$ADMIN_USER --admin_password=$ADMIN_PASSWORD --admin_email=$ADMIN_EMAIL
    wp option update home $SITE_URL_WITH_HTTP
    wp option update siteurl $SITE_URL_WITH_HTTP

    # Check if the installation was successful. If not, show an error message
    if ! $(wp core is-installed); then
        echo -e "❌ ${RED}Installation unsuccessful.${NC} Please check the error messages displayed in the console to solve the issue, and then try again."
        exit 1;
    fi

    echo -e "✅ ${GREEN}Installation successful!${NC}"
else
    echo -e "✅ ${ORANGE}WordPress is already installed${NC}"
fi
Checking the results
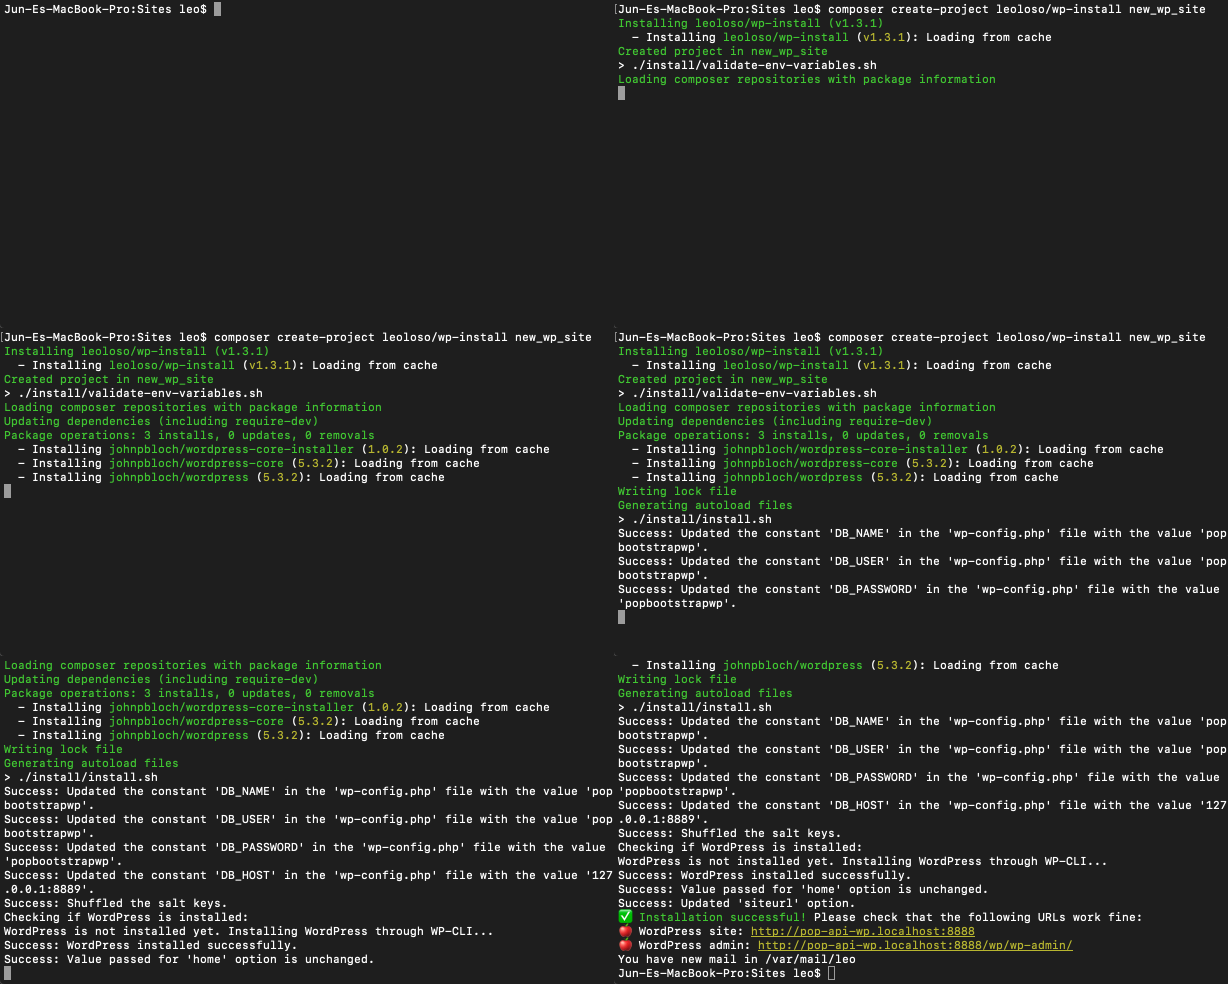
I have created a GitHub project containing (a slightly longer version of) this code. When we run the following command in the terminal…
composer create-project leoloso/wp-install new_wp_site
…it produces the following results:

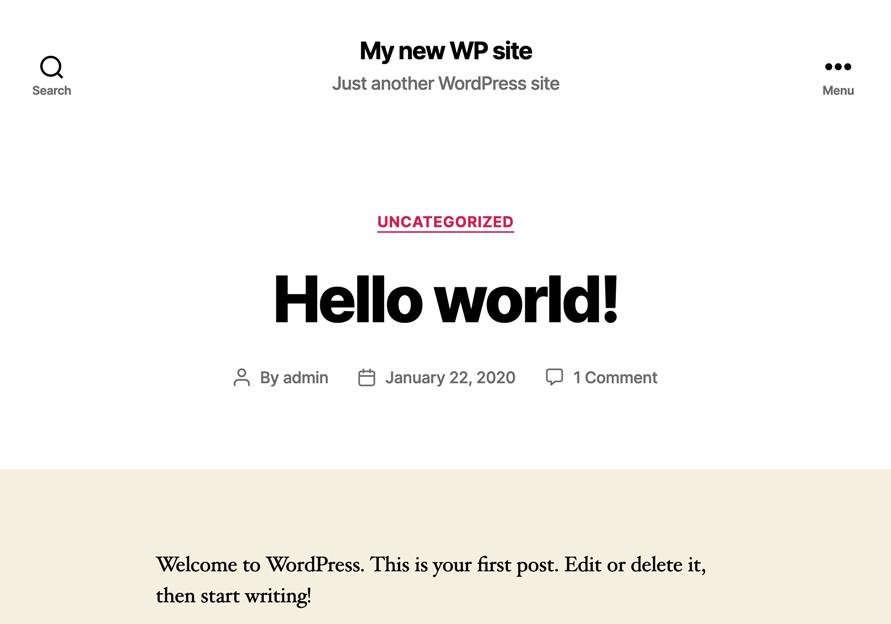
And our WordPress site will be duly created:

Conclusion
In this article, we learnt how Composer can help us automate the creation of WordPress sites.
The benefits of using this process are several: we can launch a new WordPress instance as part of our deployment process (for instance, through continuous integration), we can quickly instantiate our websites for the different environments (DEV, STAGING, QA) or different clients, and we can share configuration of themes and plugins with colleagues and open source project contributors, among other benefits.


Leave a Reply